THINK YOU CAN MAKE SPLASH PAGES?

You can! It just takes time, patience, work and consistency to learn.
The JOY of Making Capture Pages!

To begin, lets first talk about the tools you will need to make effective capture pages. I personally use Canva and the Power Lead System EVERY single week. Sure there are other tools besides these but I find these to be the most effective.
If you have not already taken a free seven day tour of PLS, you should check it out. I find this program absolutely essential to having success online. Yes, it is more expensive each month than most programs but its totally worth it. And yes, it is possibly too expensive for some, I totally understand. However, that is why we created the Mentors Program because it was much easier to afford monthly and still get the mentoring that you need. But you should at least give PLS a temporary explore for its amazing features. Let me explain to you why:
- It allows you to have UNLIMITED capture and squeeze pages with hosting each month. You can build FUNNELS and whatever you want. Its a bit different from having a blog that comes with pages already basically formatted. But these funnels you can create the formatting from scratch (with pre-made templates too if you need help).
- It allows you to connect your capture and squeeze pages to an autoresponder and also to a professional autoresponder such as Aweber and GetResponse.
- It has almost ANY tool you need, including HTML editor, tracking, email post cards, and basic to advanced online training for almost every online market.
- It has more than I can possibly explain and for this reason it can become a little daunting to explore (but fun if you are a patient person and willing to take your time to learn).
- You can join my Six Figure Mentors program that uses PLS. You just need for me to send you the web link and password. So don’t hesitate to ask me. My mentor changed my online business world and the same training that I received from him is available to you also!
Here is the link to join PLS for the seven day free trial, if you haven’t already tried it:
Basic PLS link:
My Mentors explanation of PLS if you want an in-depth explanation of what it can do for you beyond what I have mentioned:
So once you have joined, you can also join Canva for FREE and use it’s functions as explained below.
Here is the link to Canva:
https://www.canva.com/join/ford-hydrated-wine
OKAY, LET’S GET STARTED MAKING CAPTURE AND SQUEEZE PAGES WITH PLS AND CANVA!
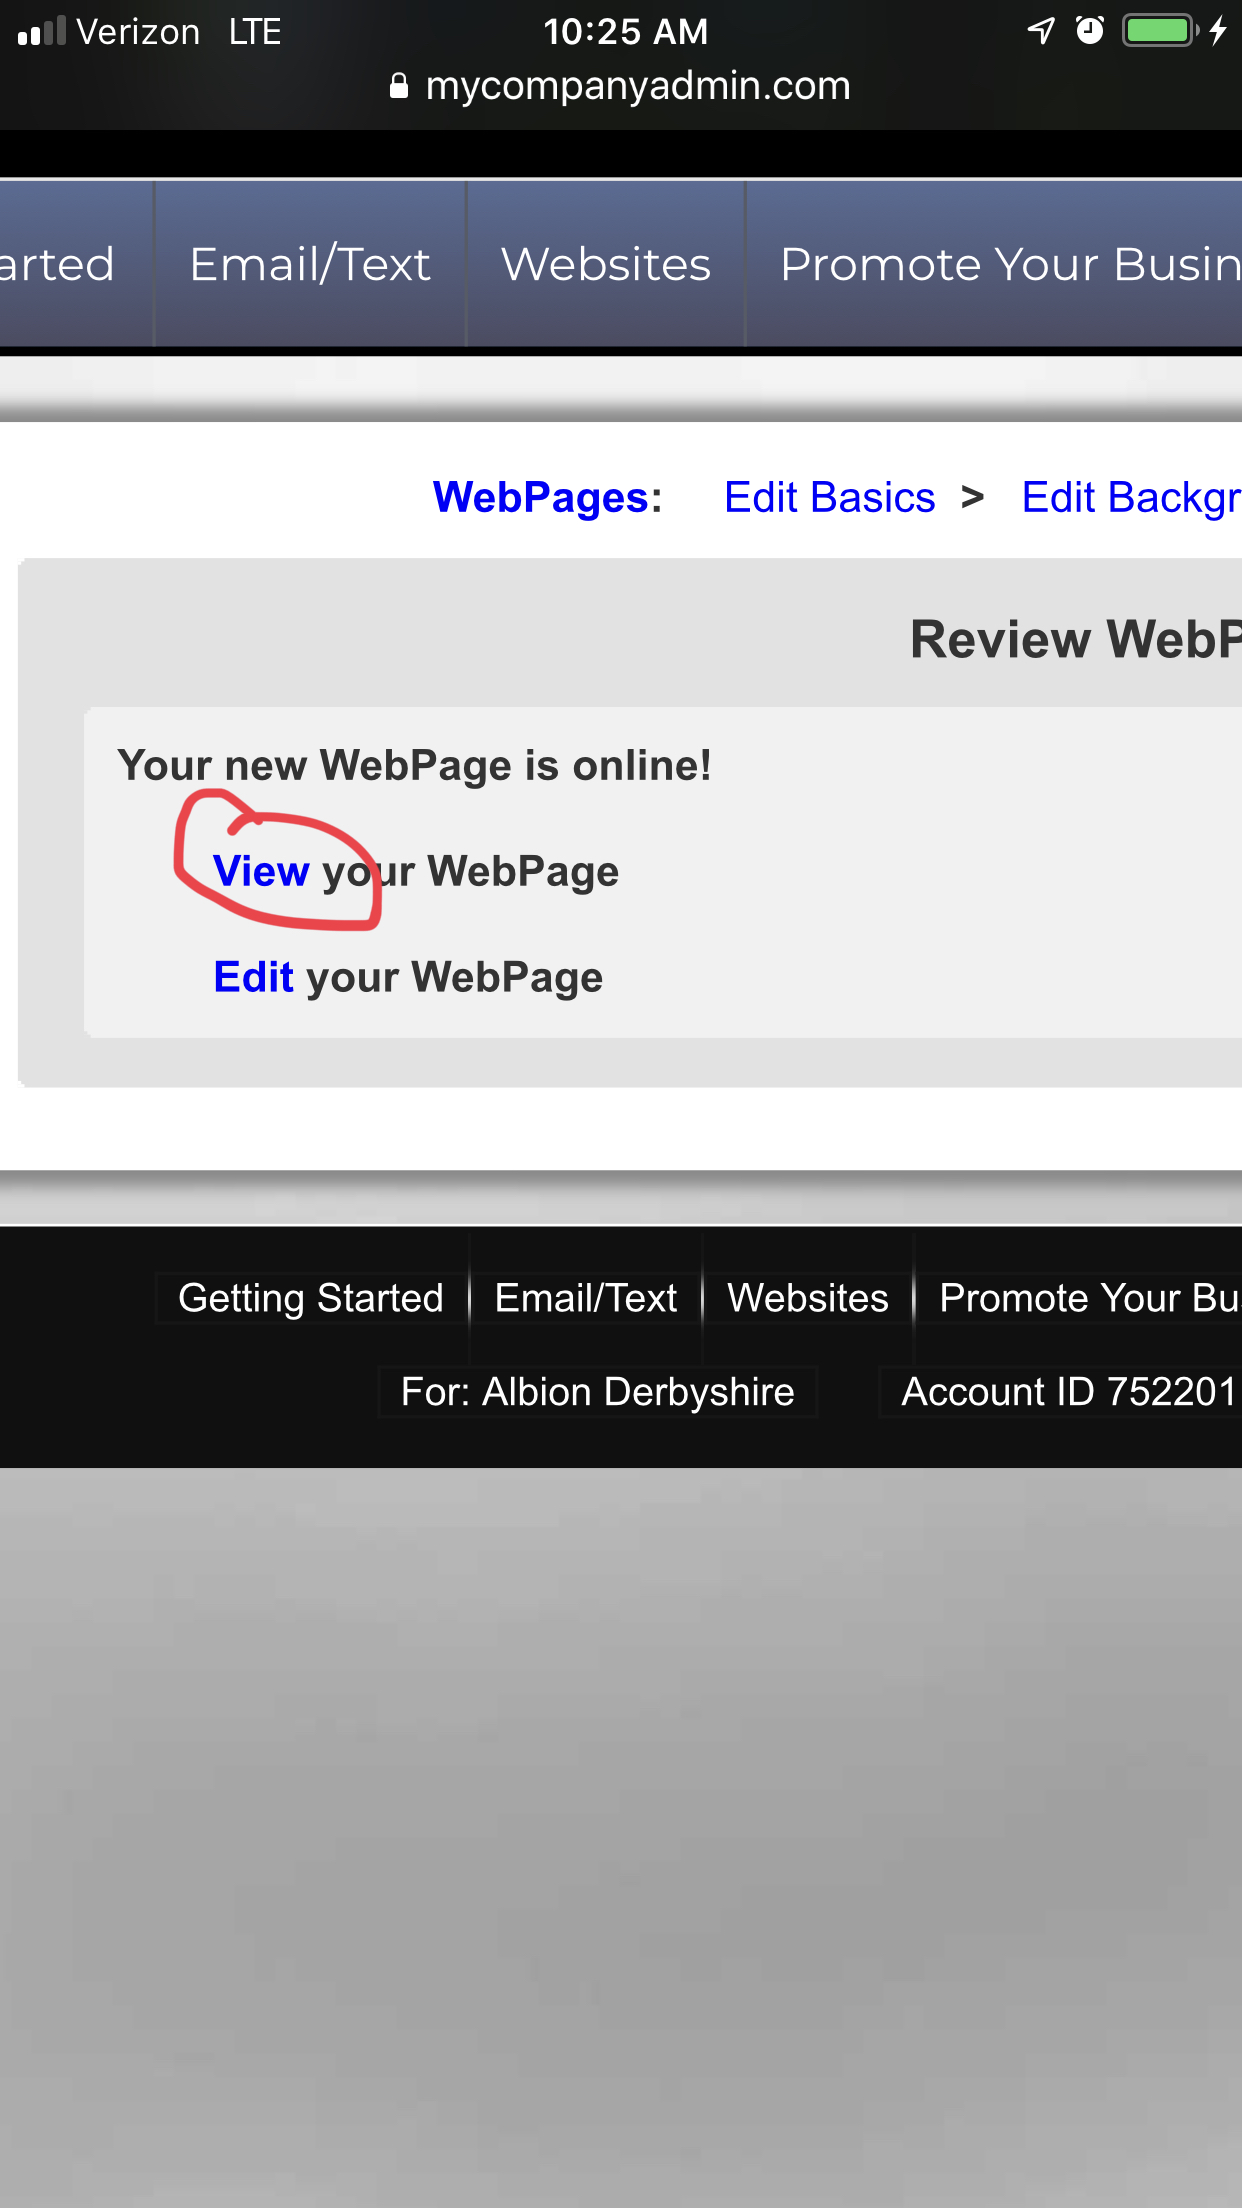
Ok so the first thing to do is to google “the power lead system backoffice” then click on the right link till you see one of the next three pics below:
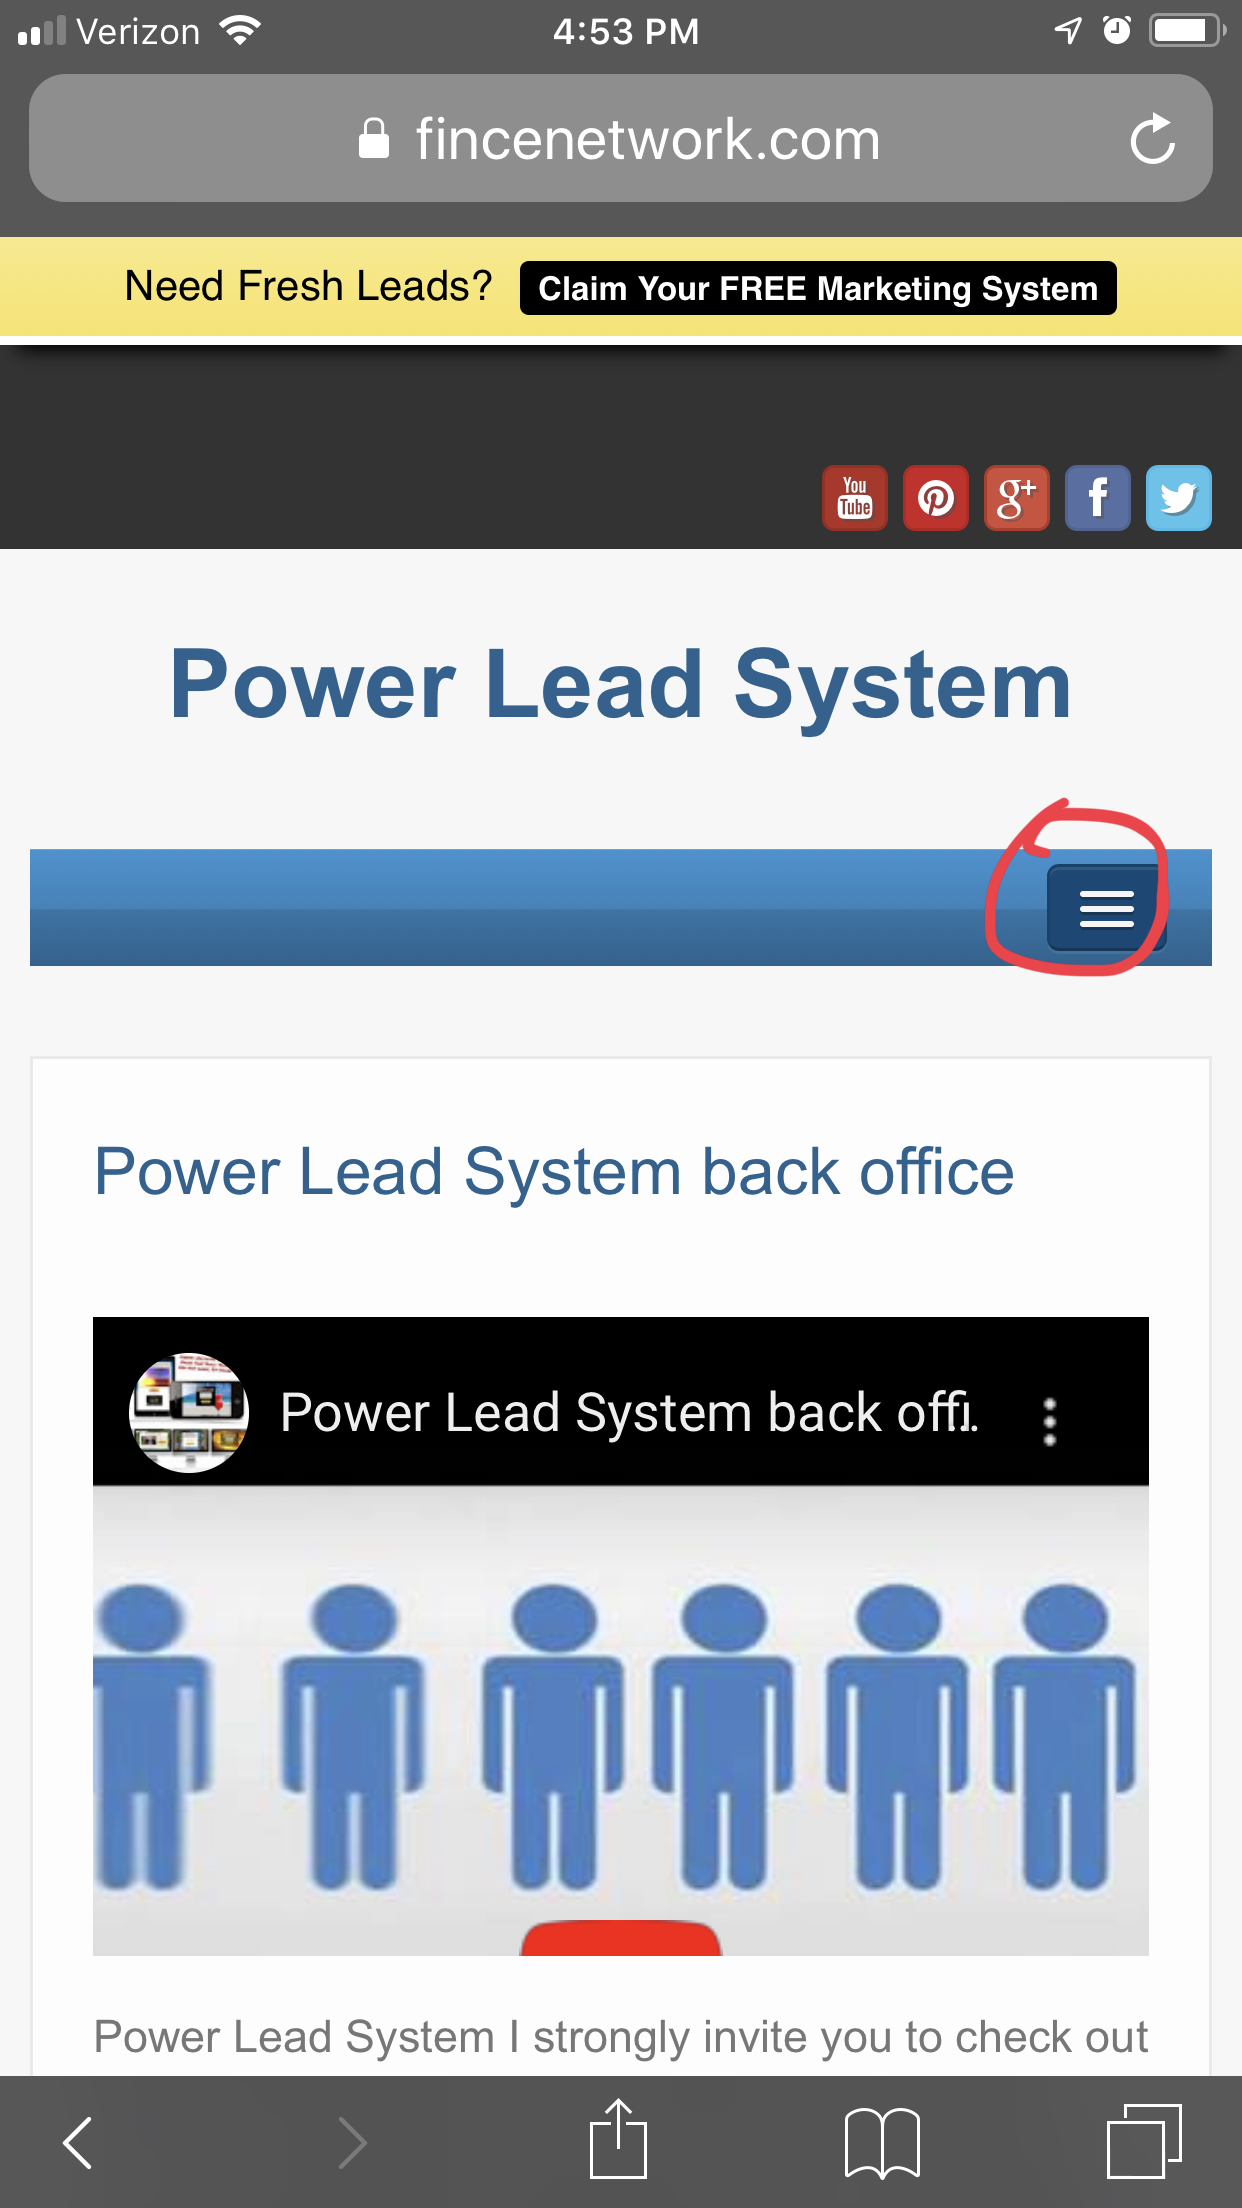
Go to Menu
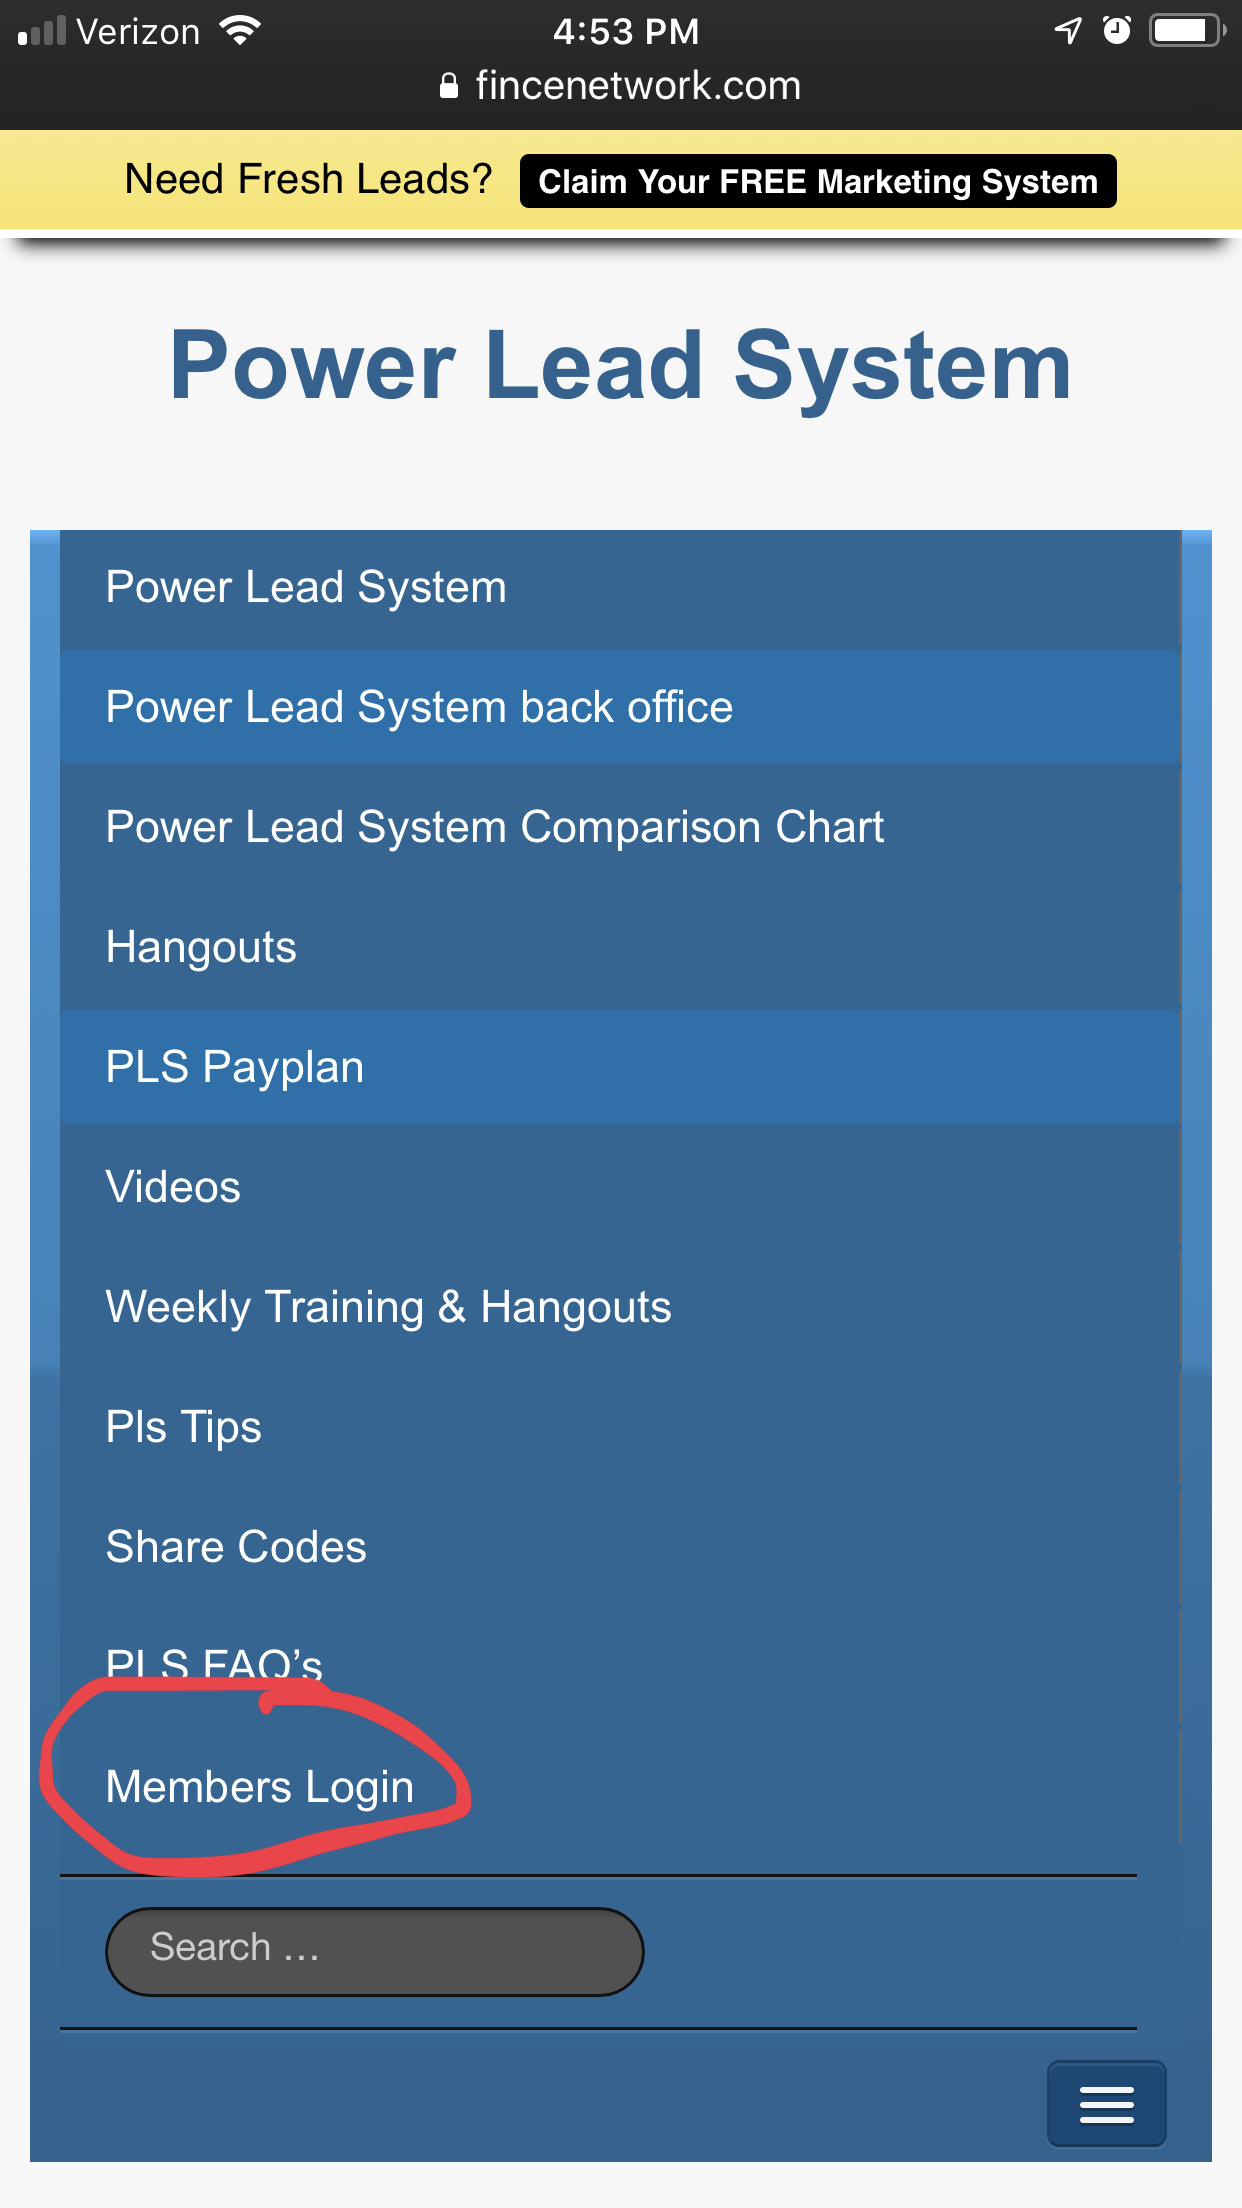
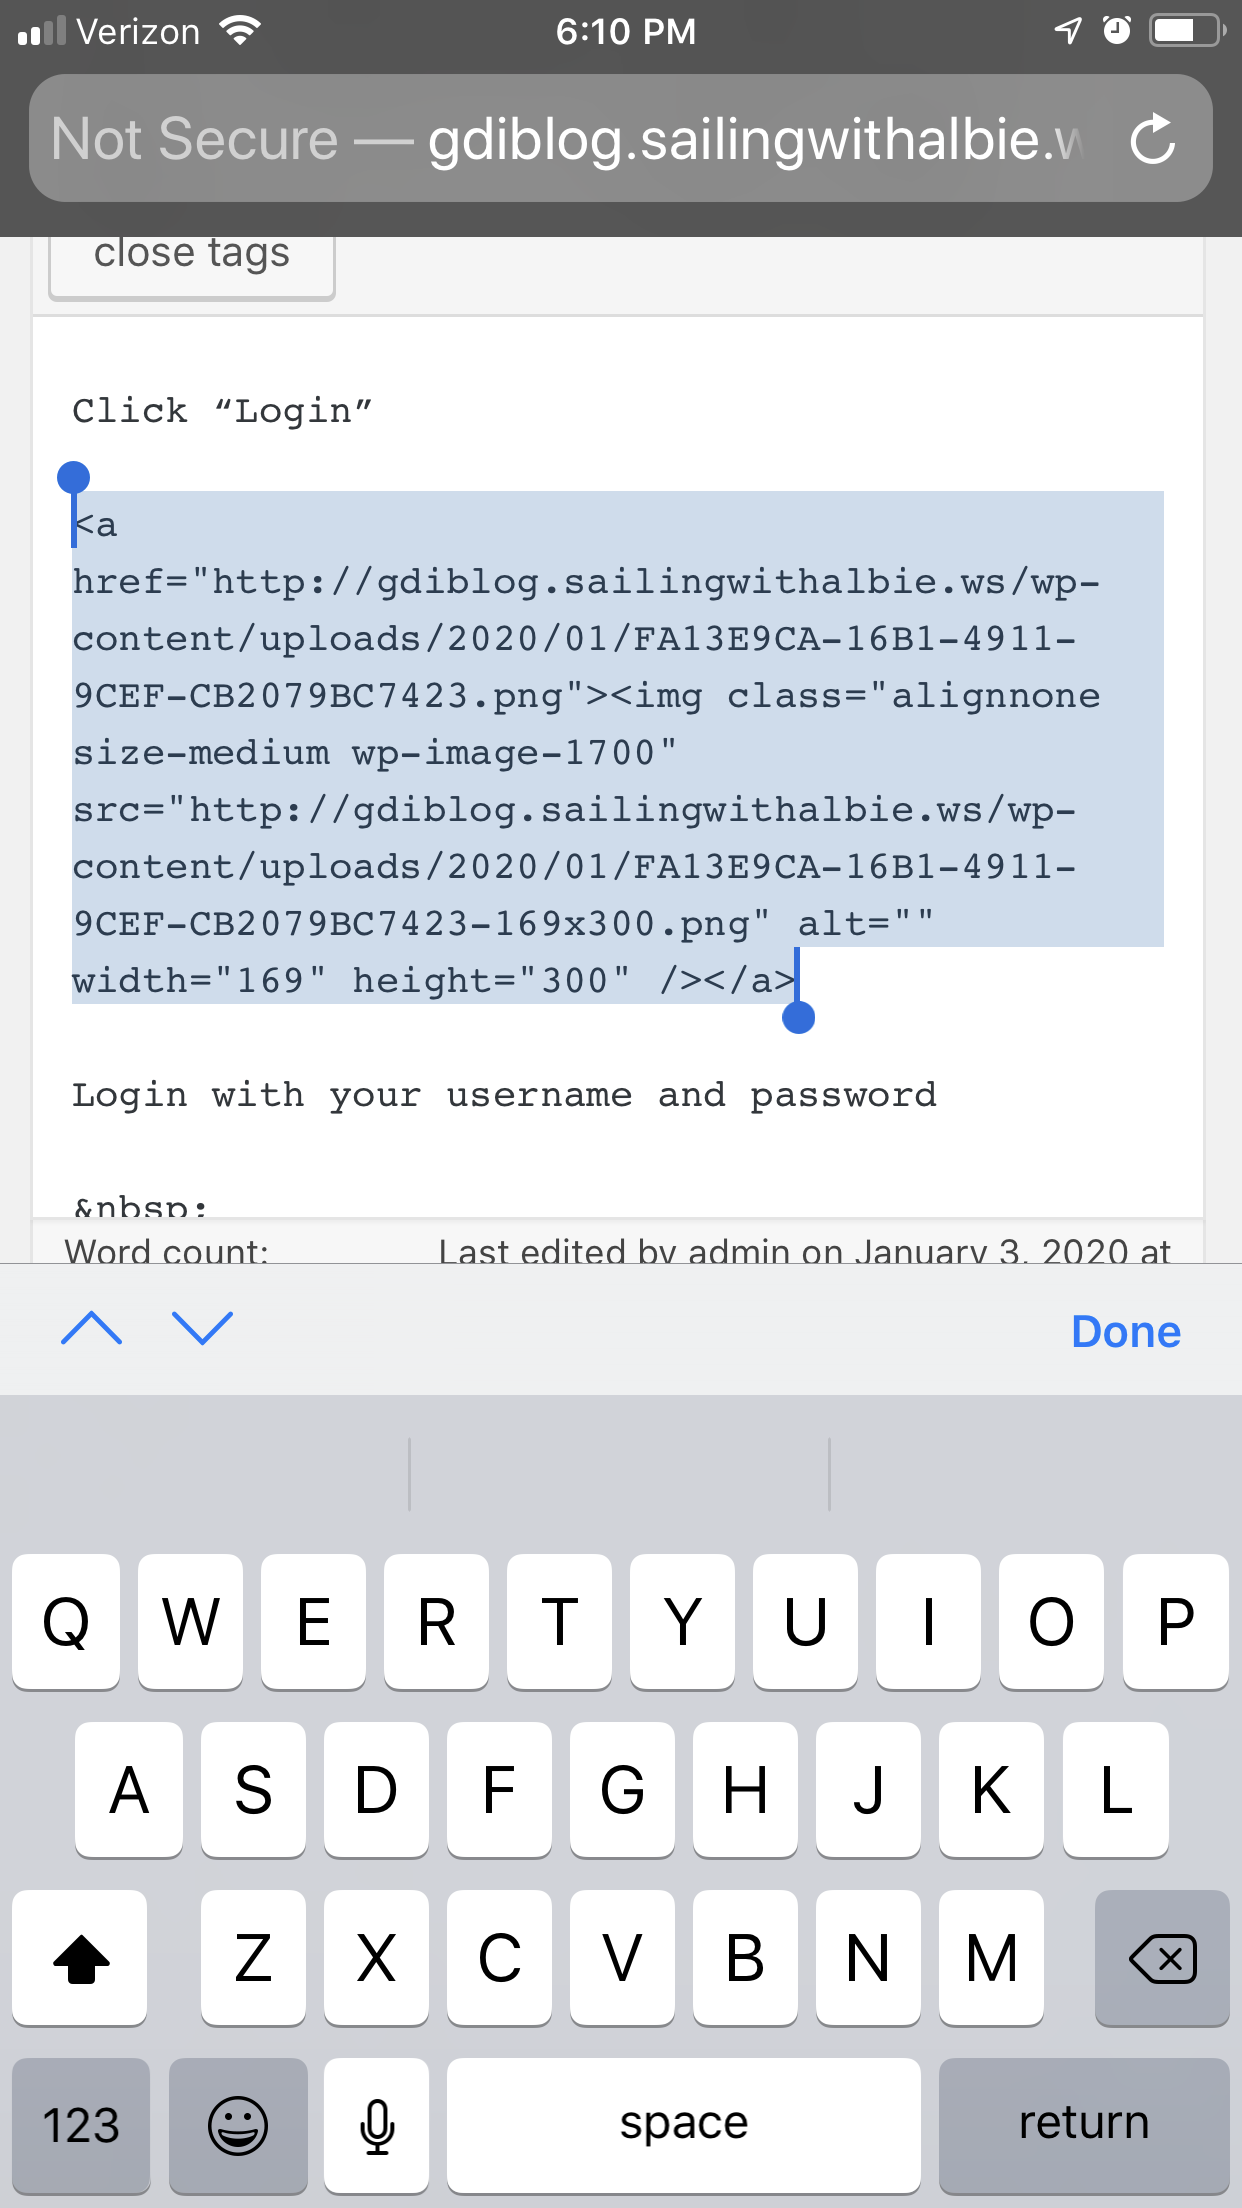
Click “Login”
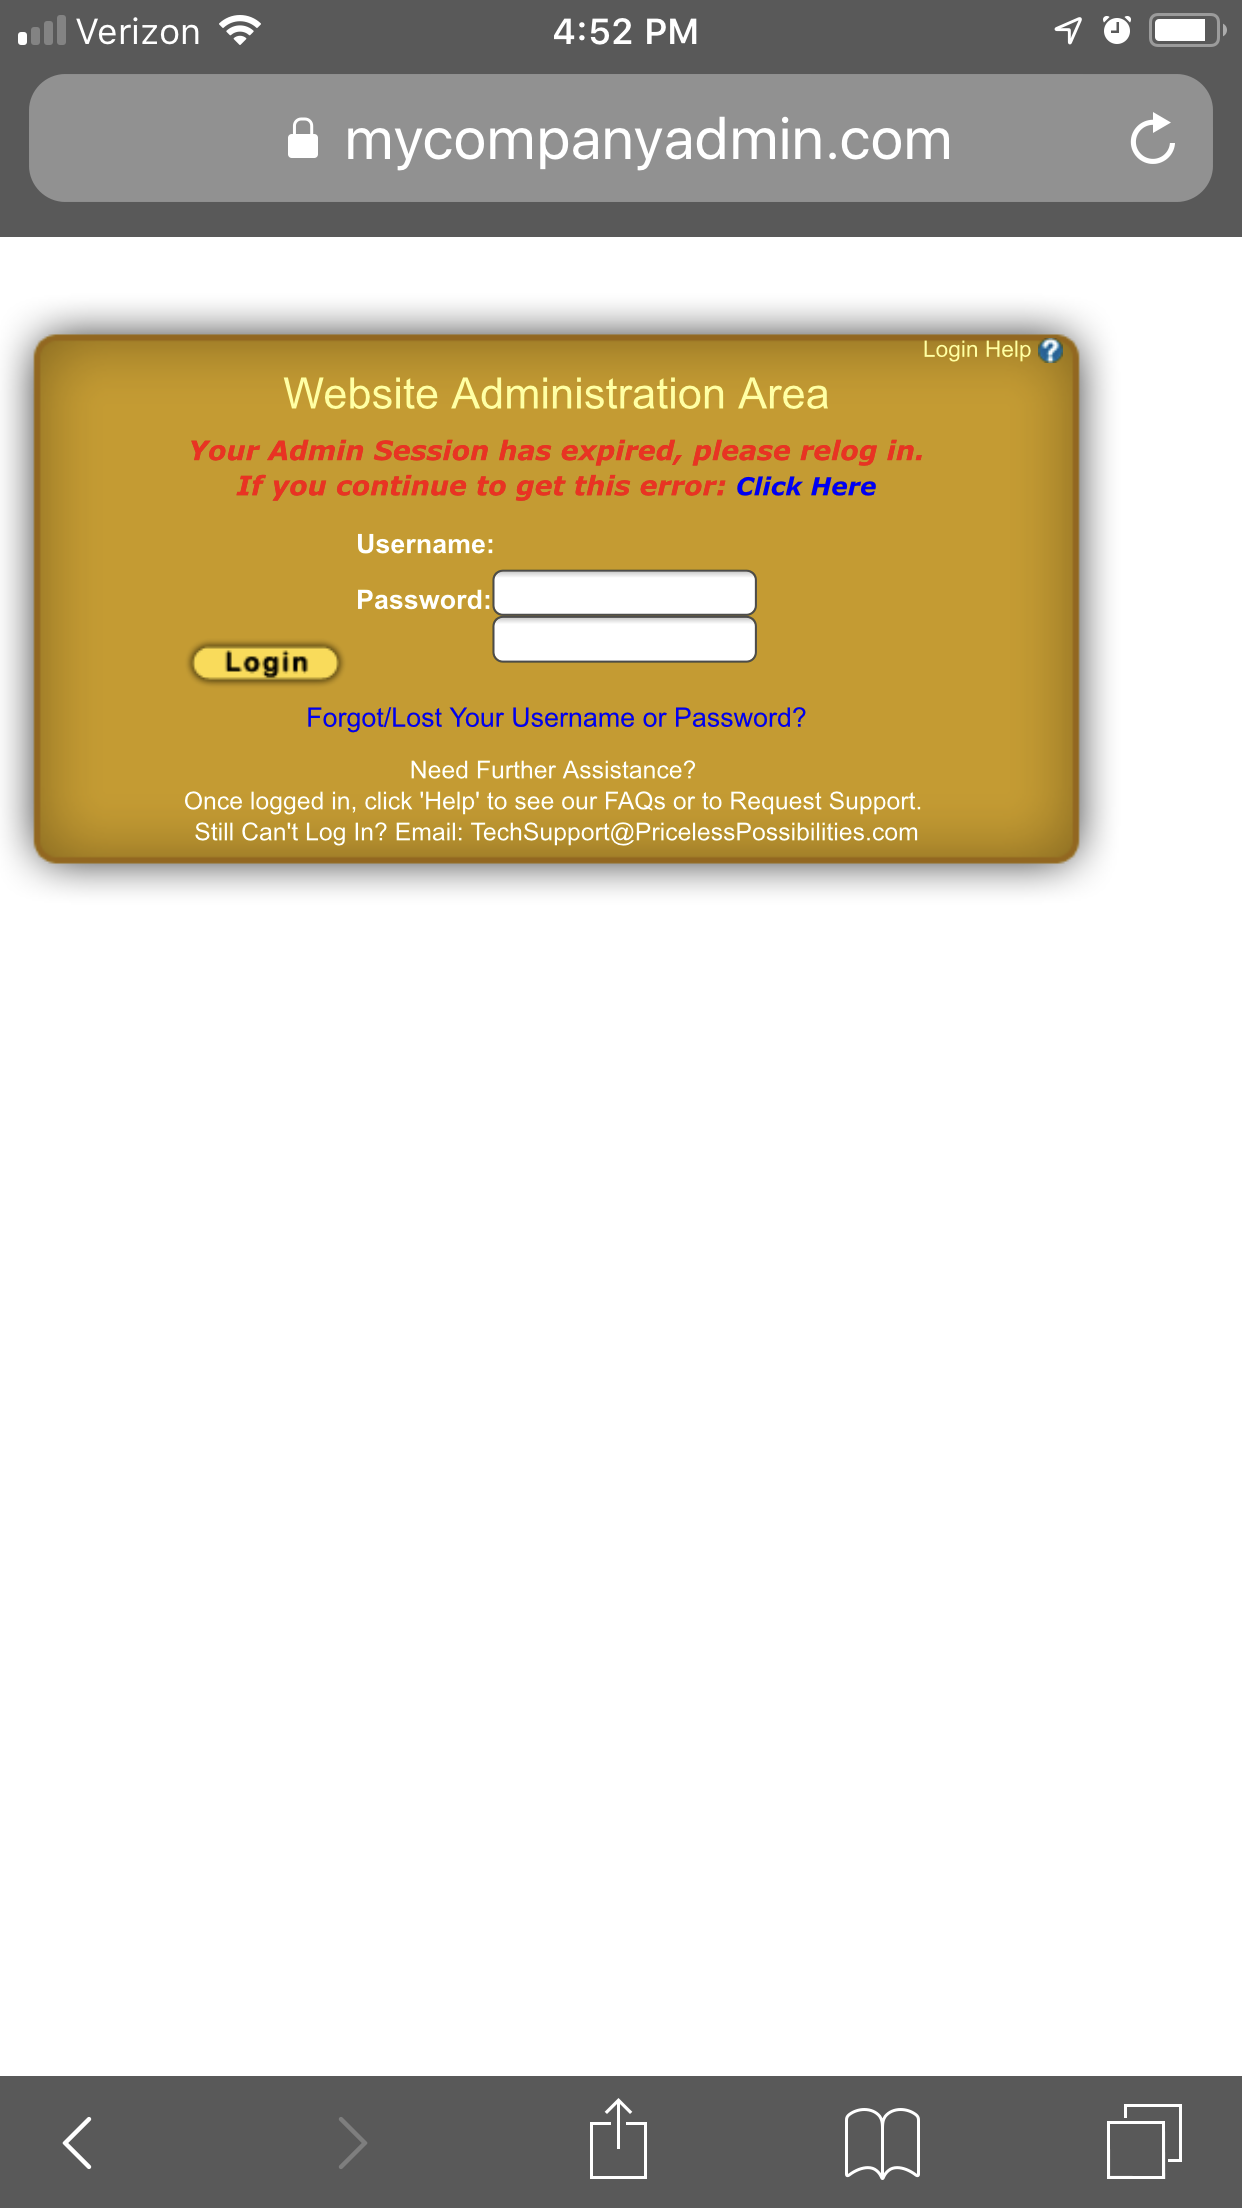
Login with your username and password
Click past the intro screen and come back and check it out later.
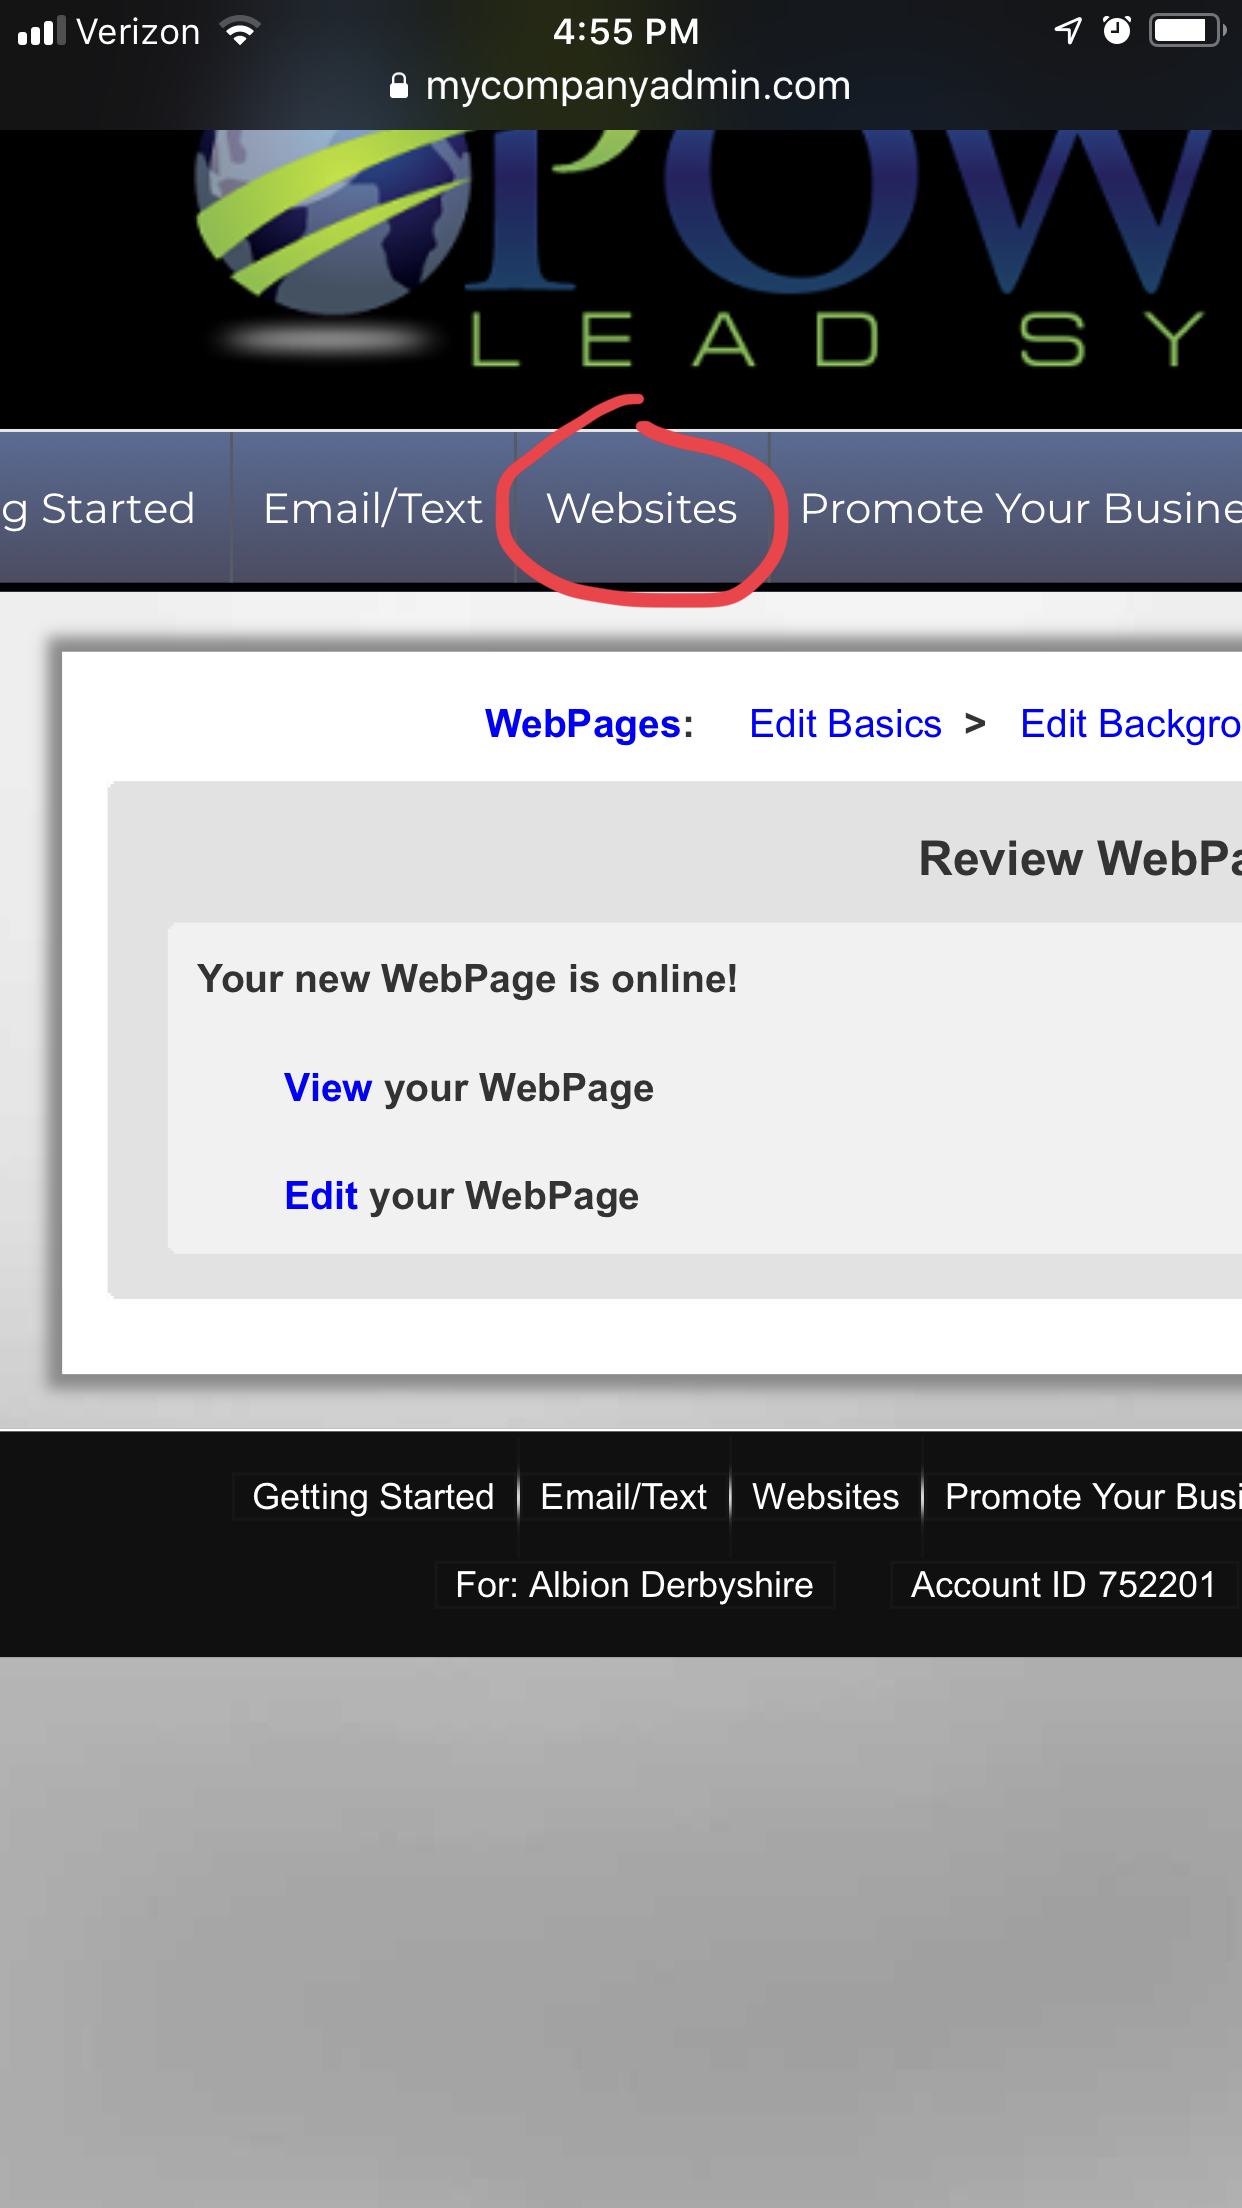
Go to “Websites”
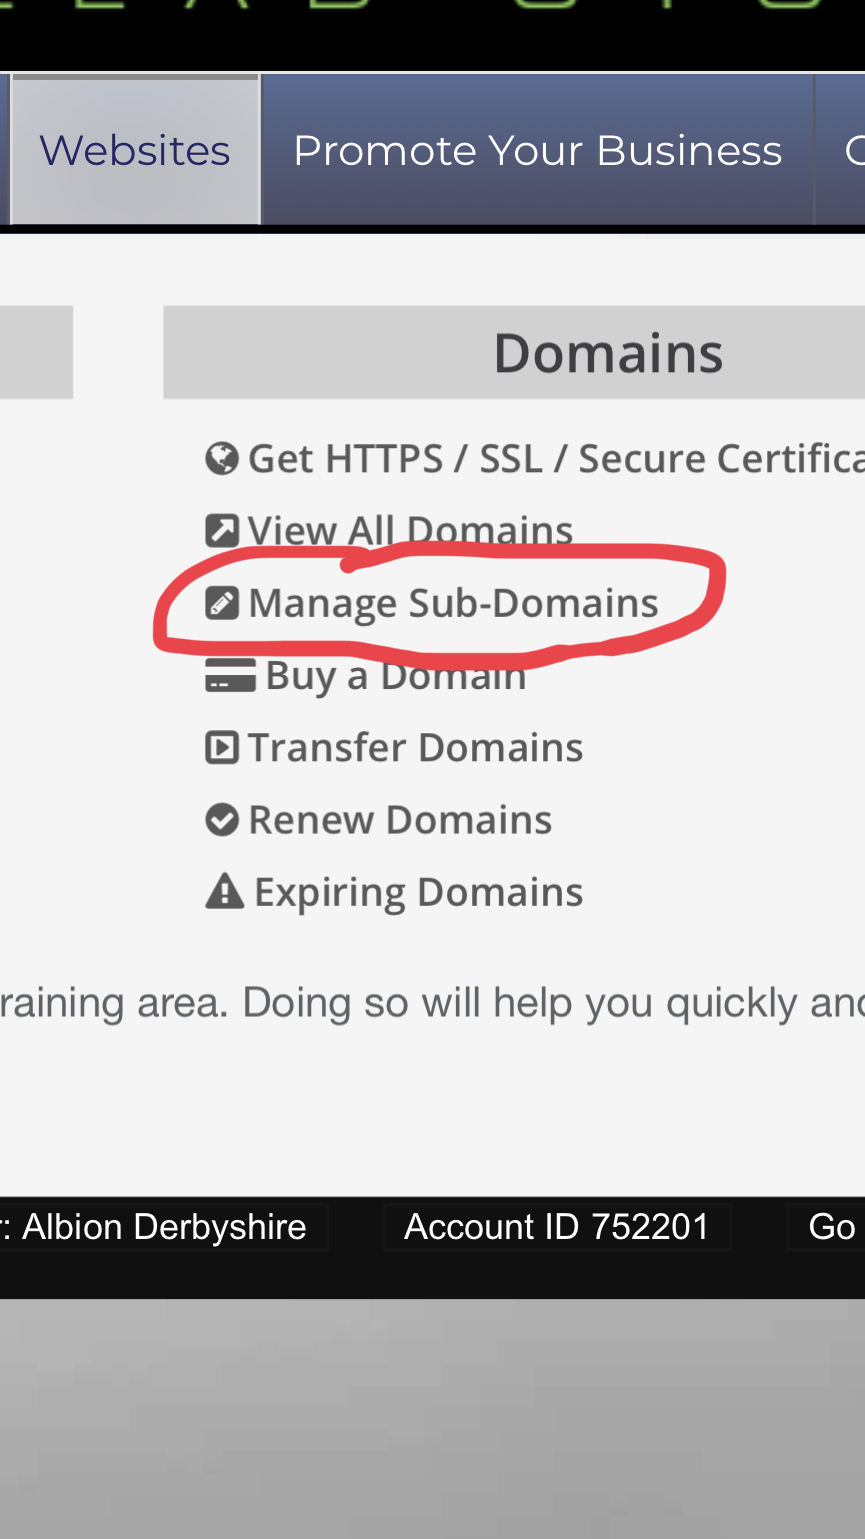
Then to “Manage Sub domains. IMPORTANT NOTE: If you have NOT set up your website already then go to “Buy website” instead. There is a “loaner” website you can use for free with PLS and it will work but I do not suggest it. Then when you are done getting your website, come back to this screen.
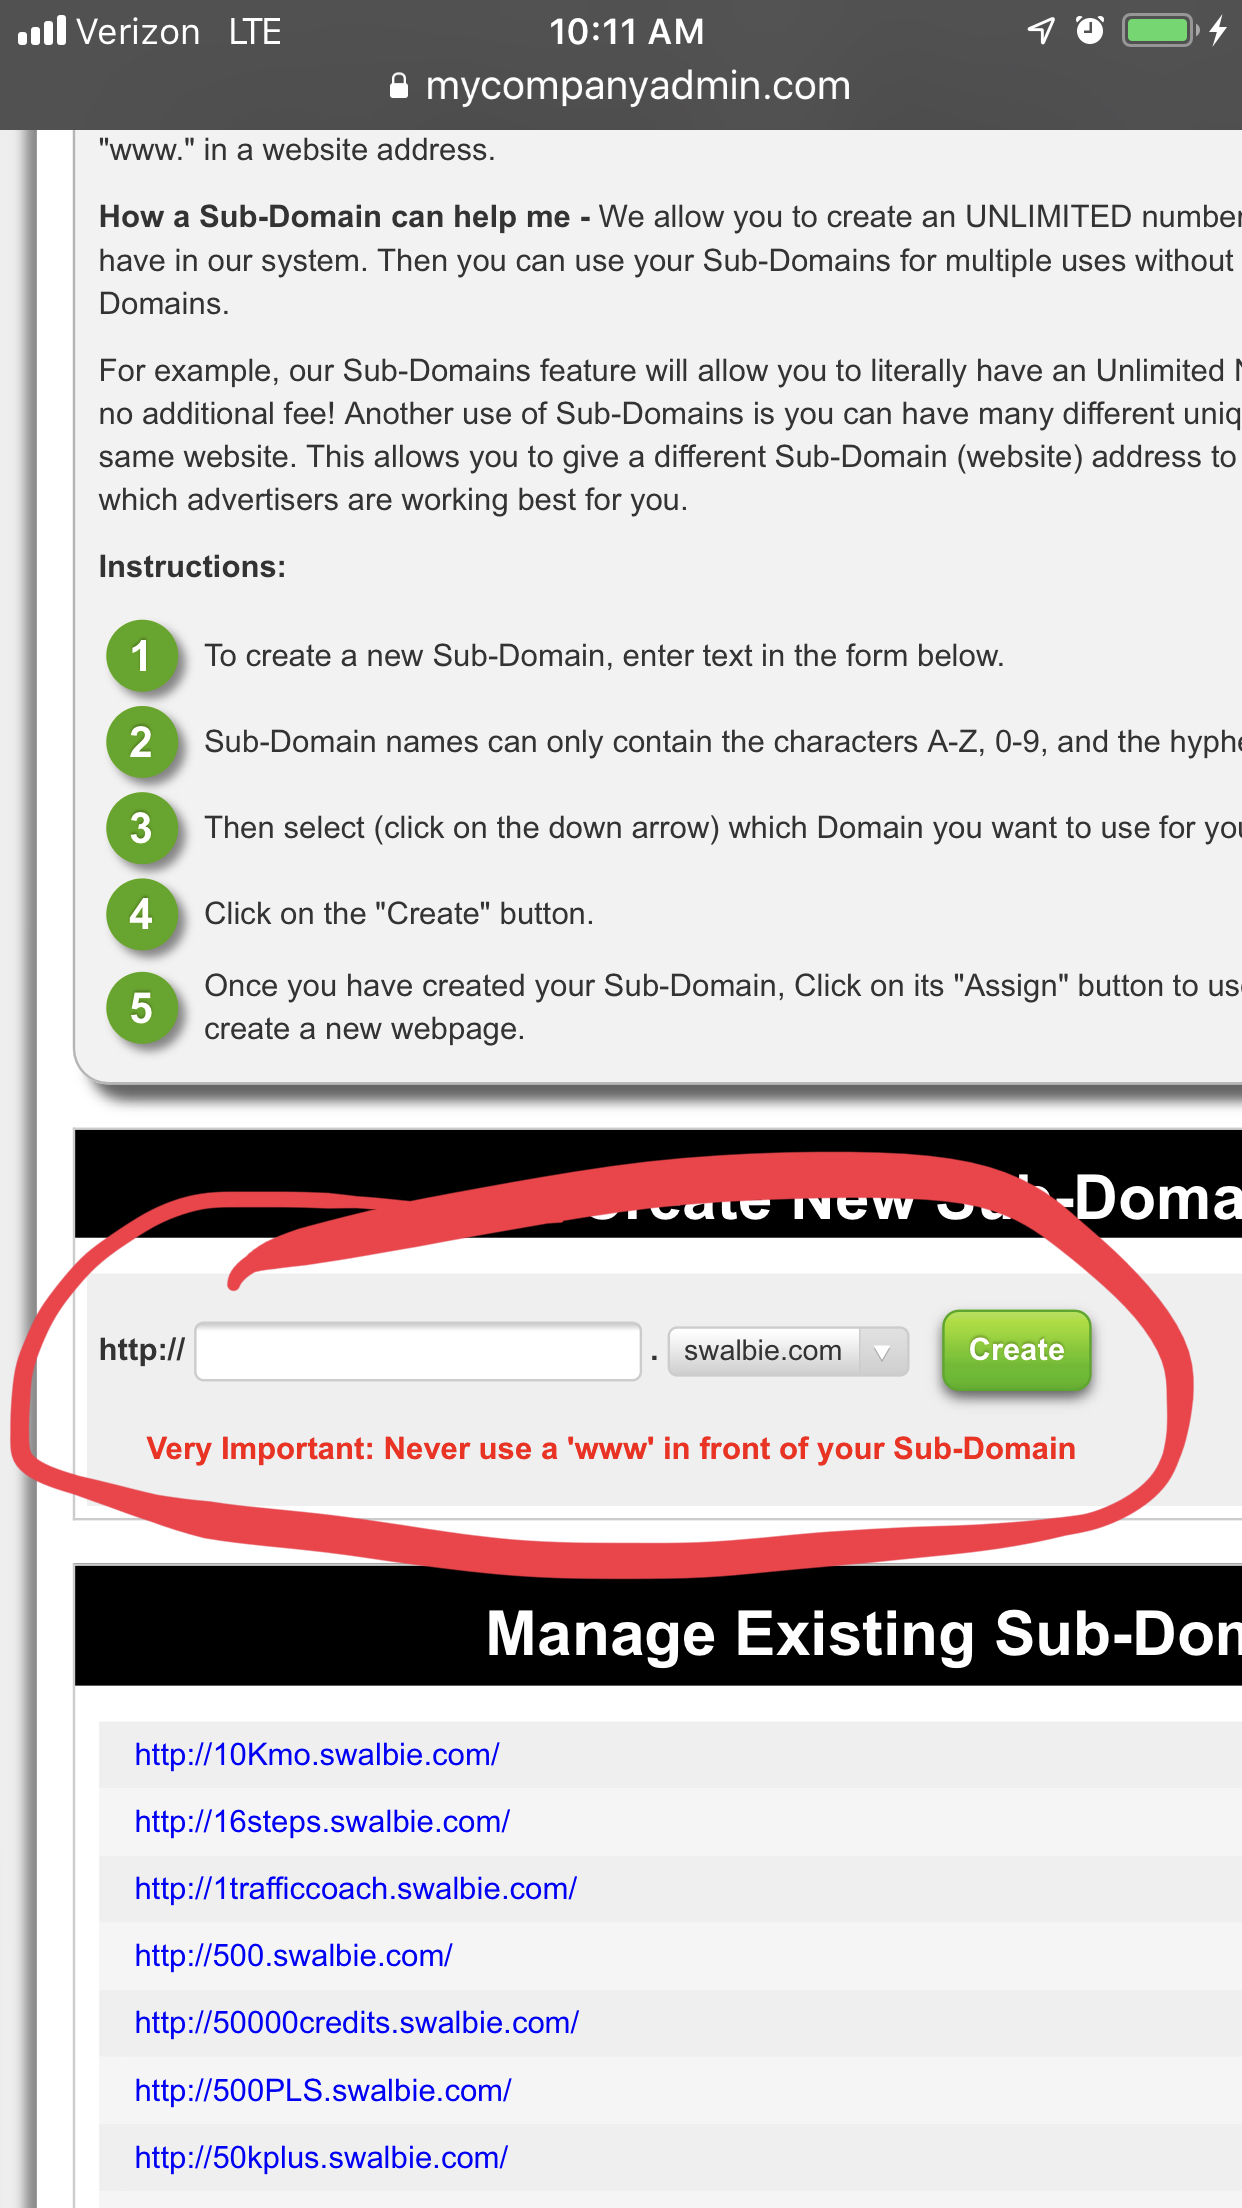
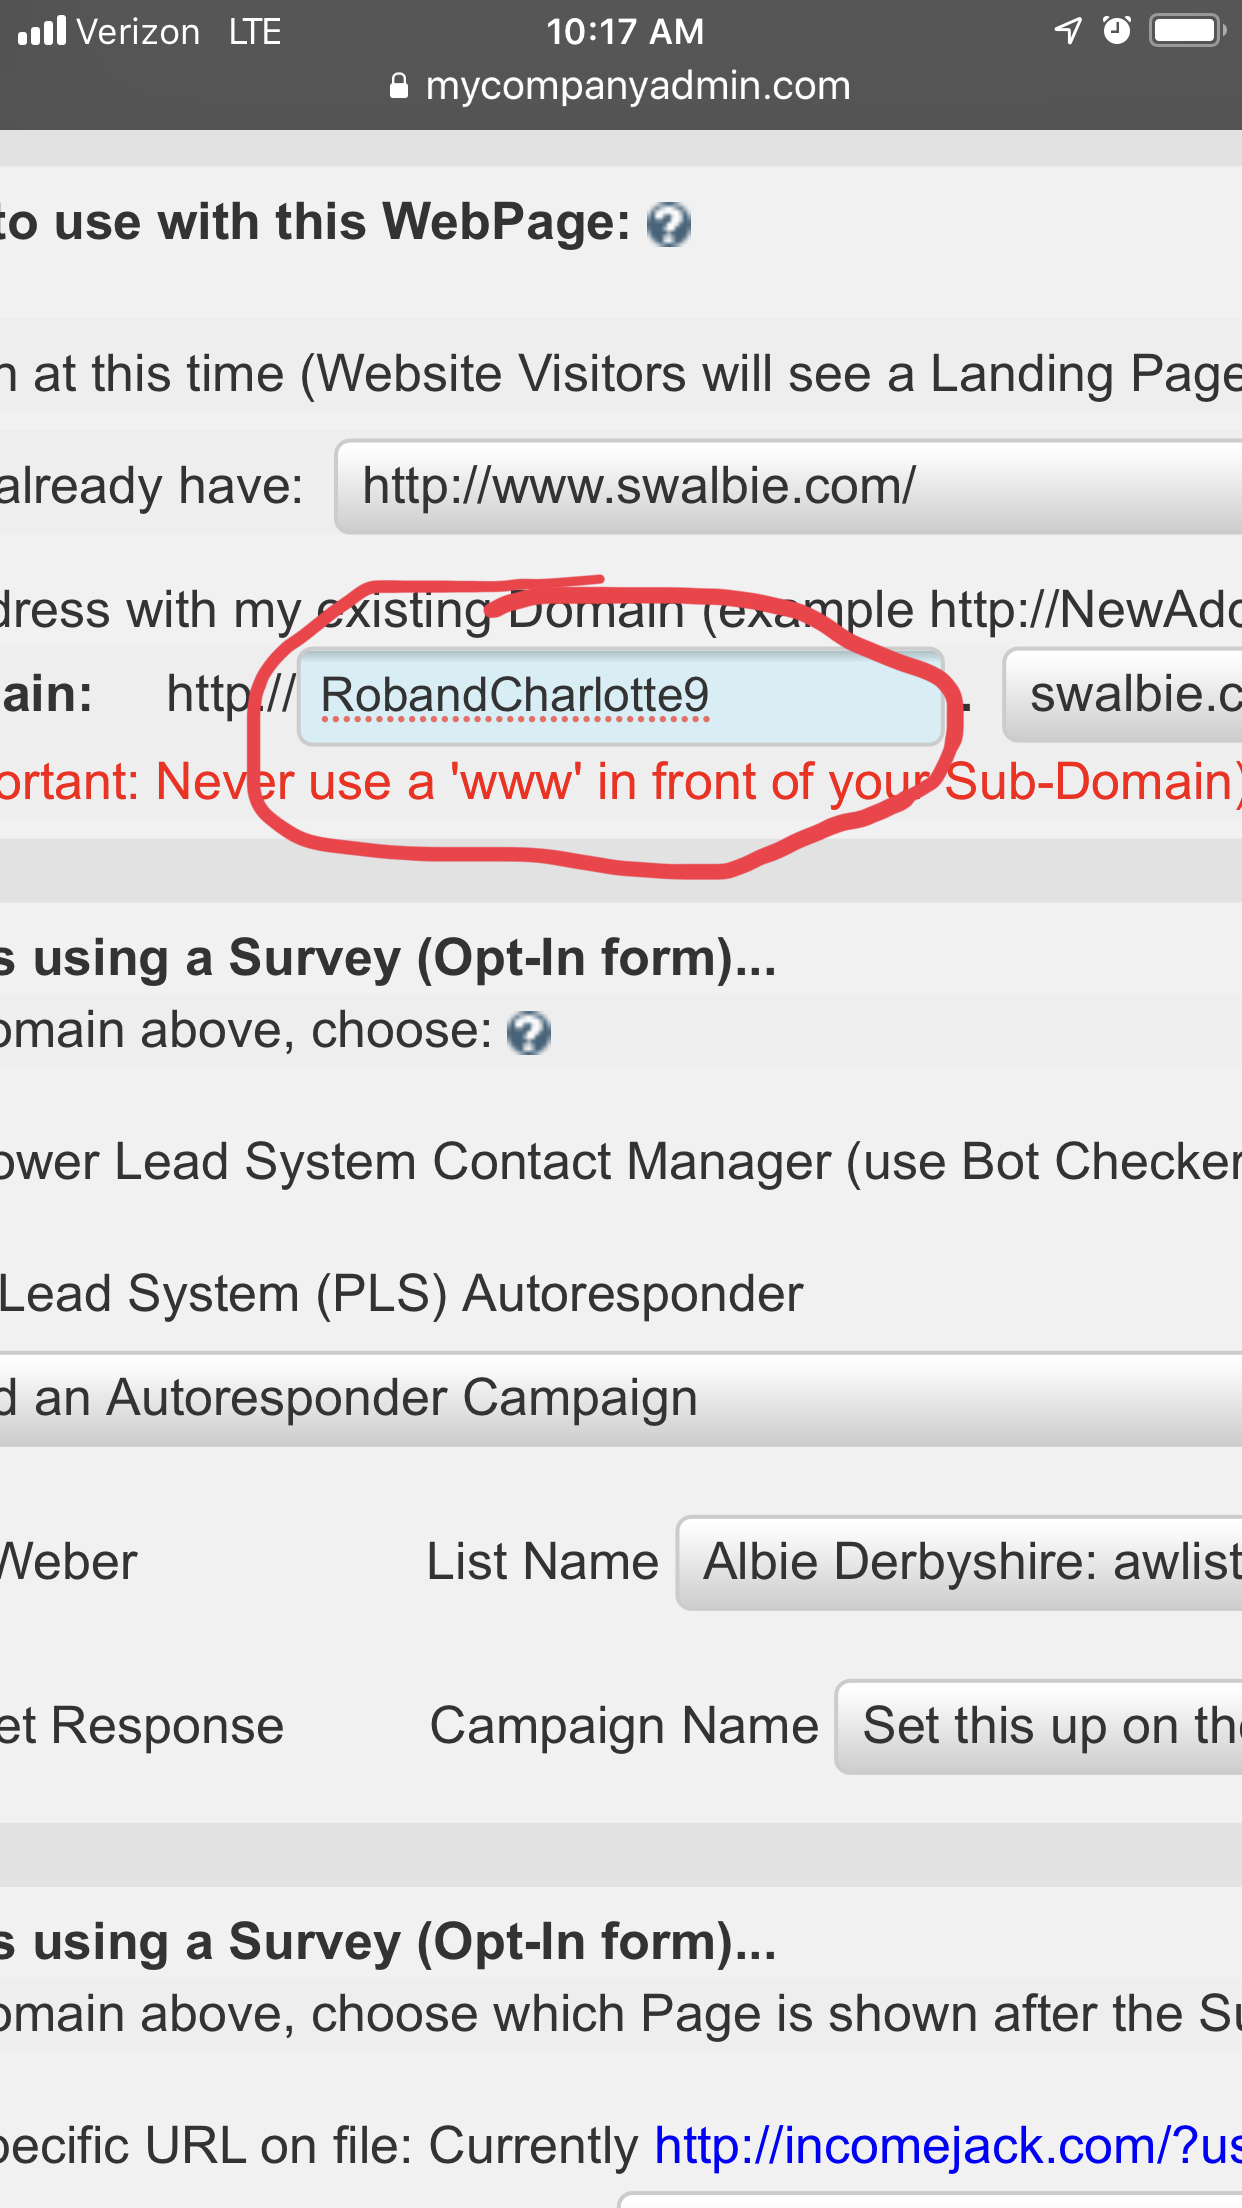
Create a sub domain name. My domain is named swalbie. But a subdomain could be anything. I will make mine to be “capturepage” just for example.
So my full site would be http://capture page.swalbie.com
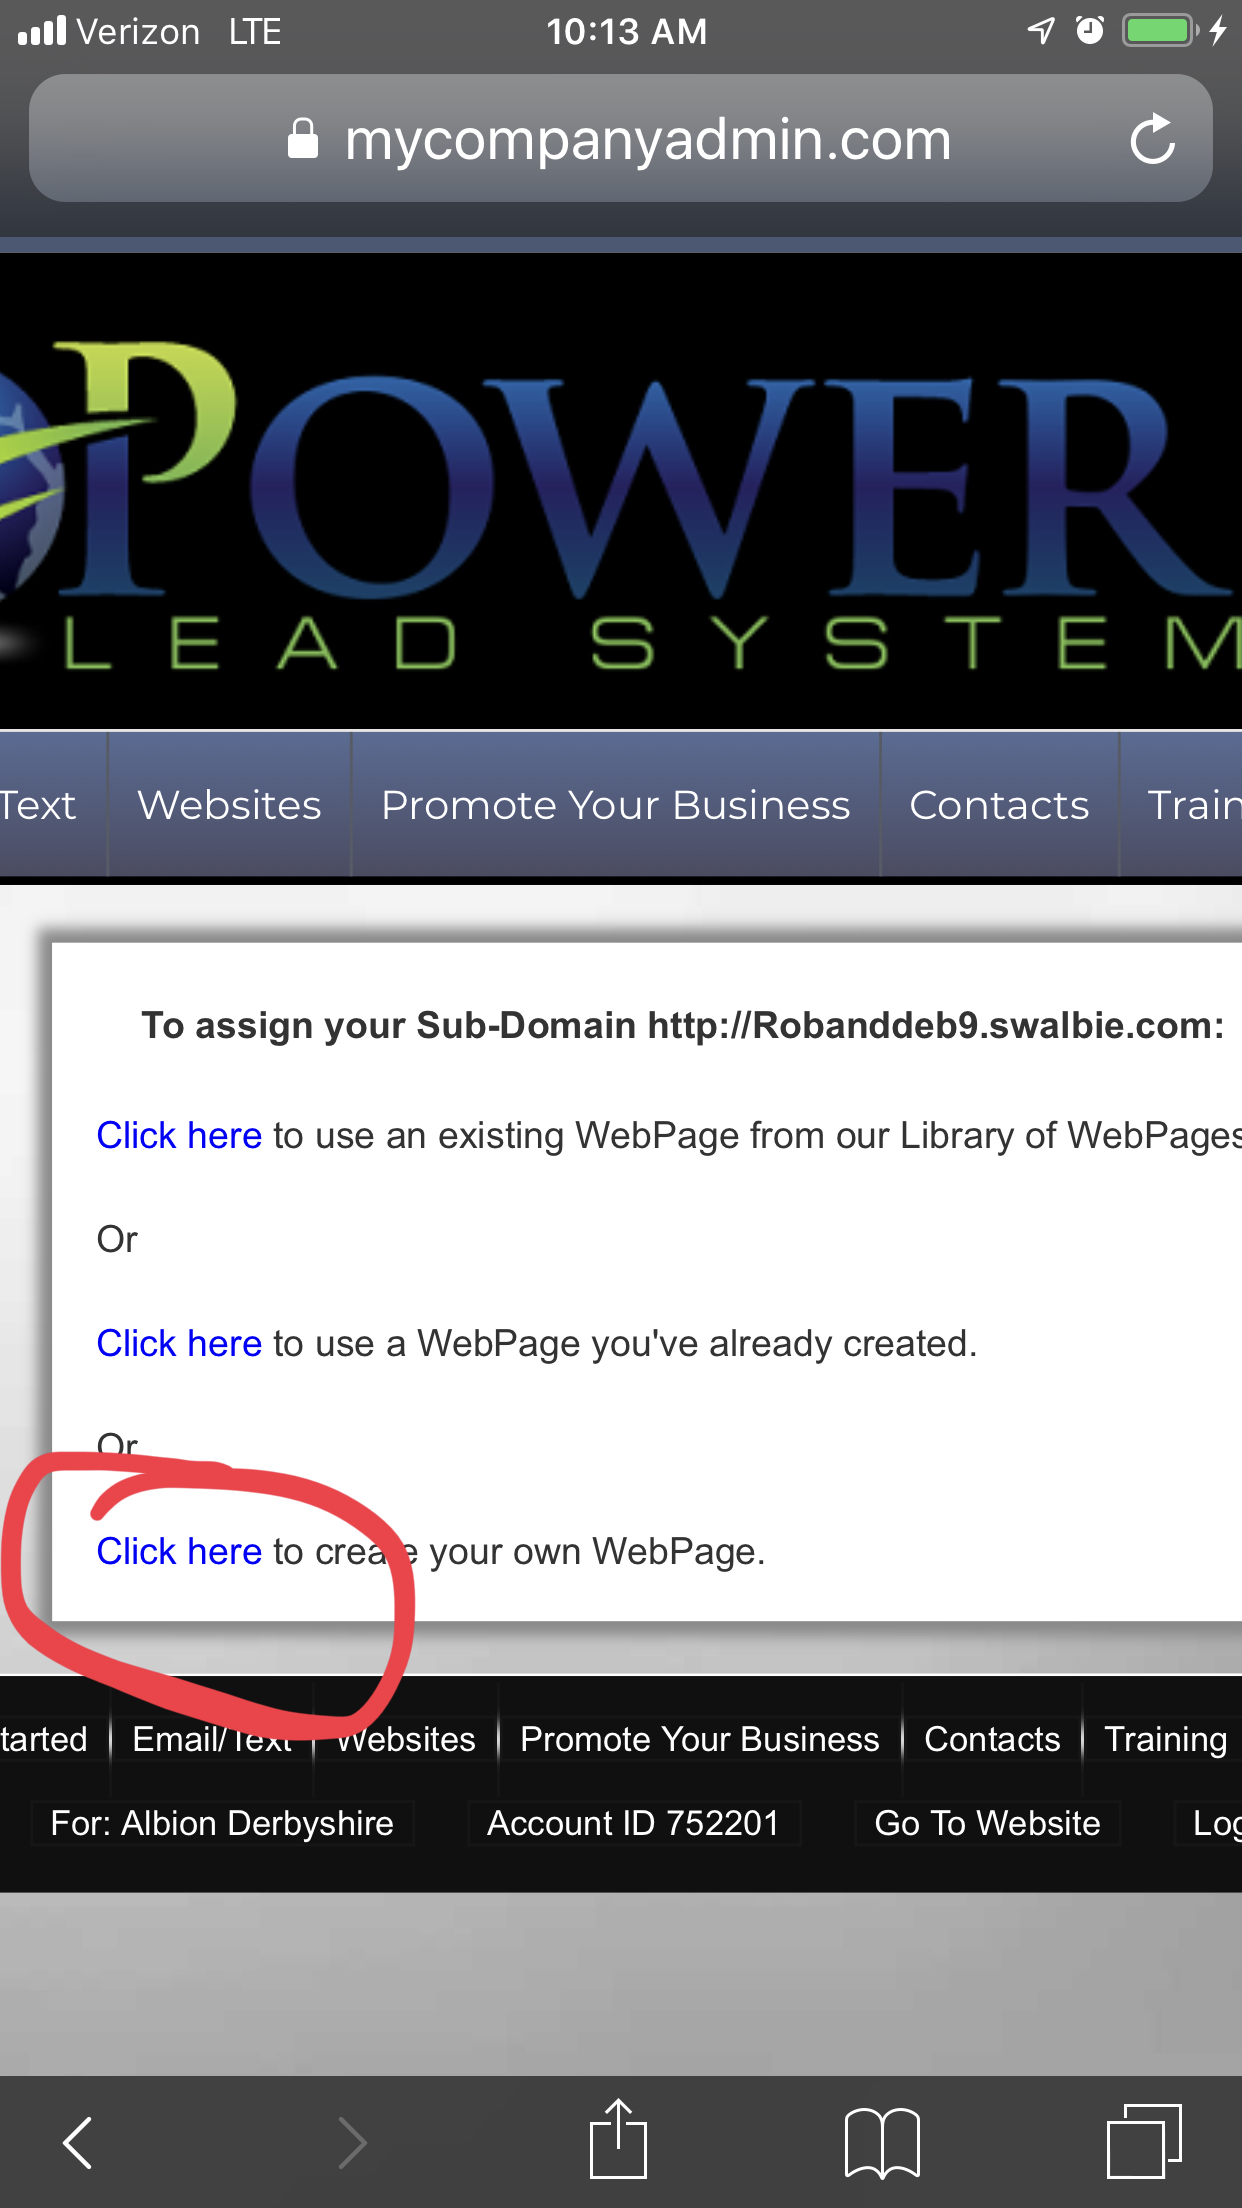
Now click on the bottom link to make your own page.
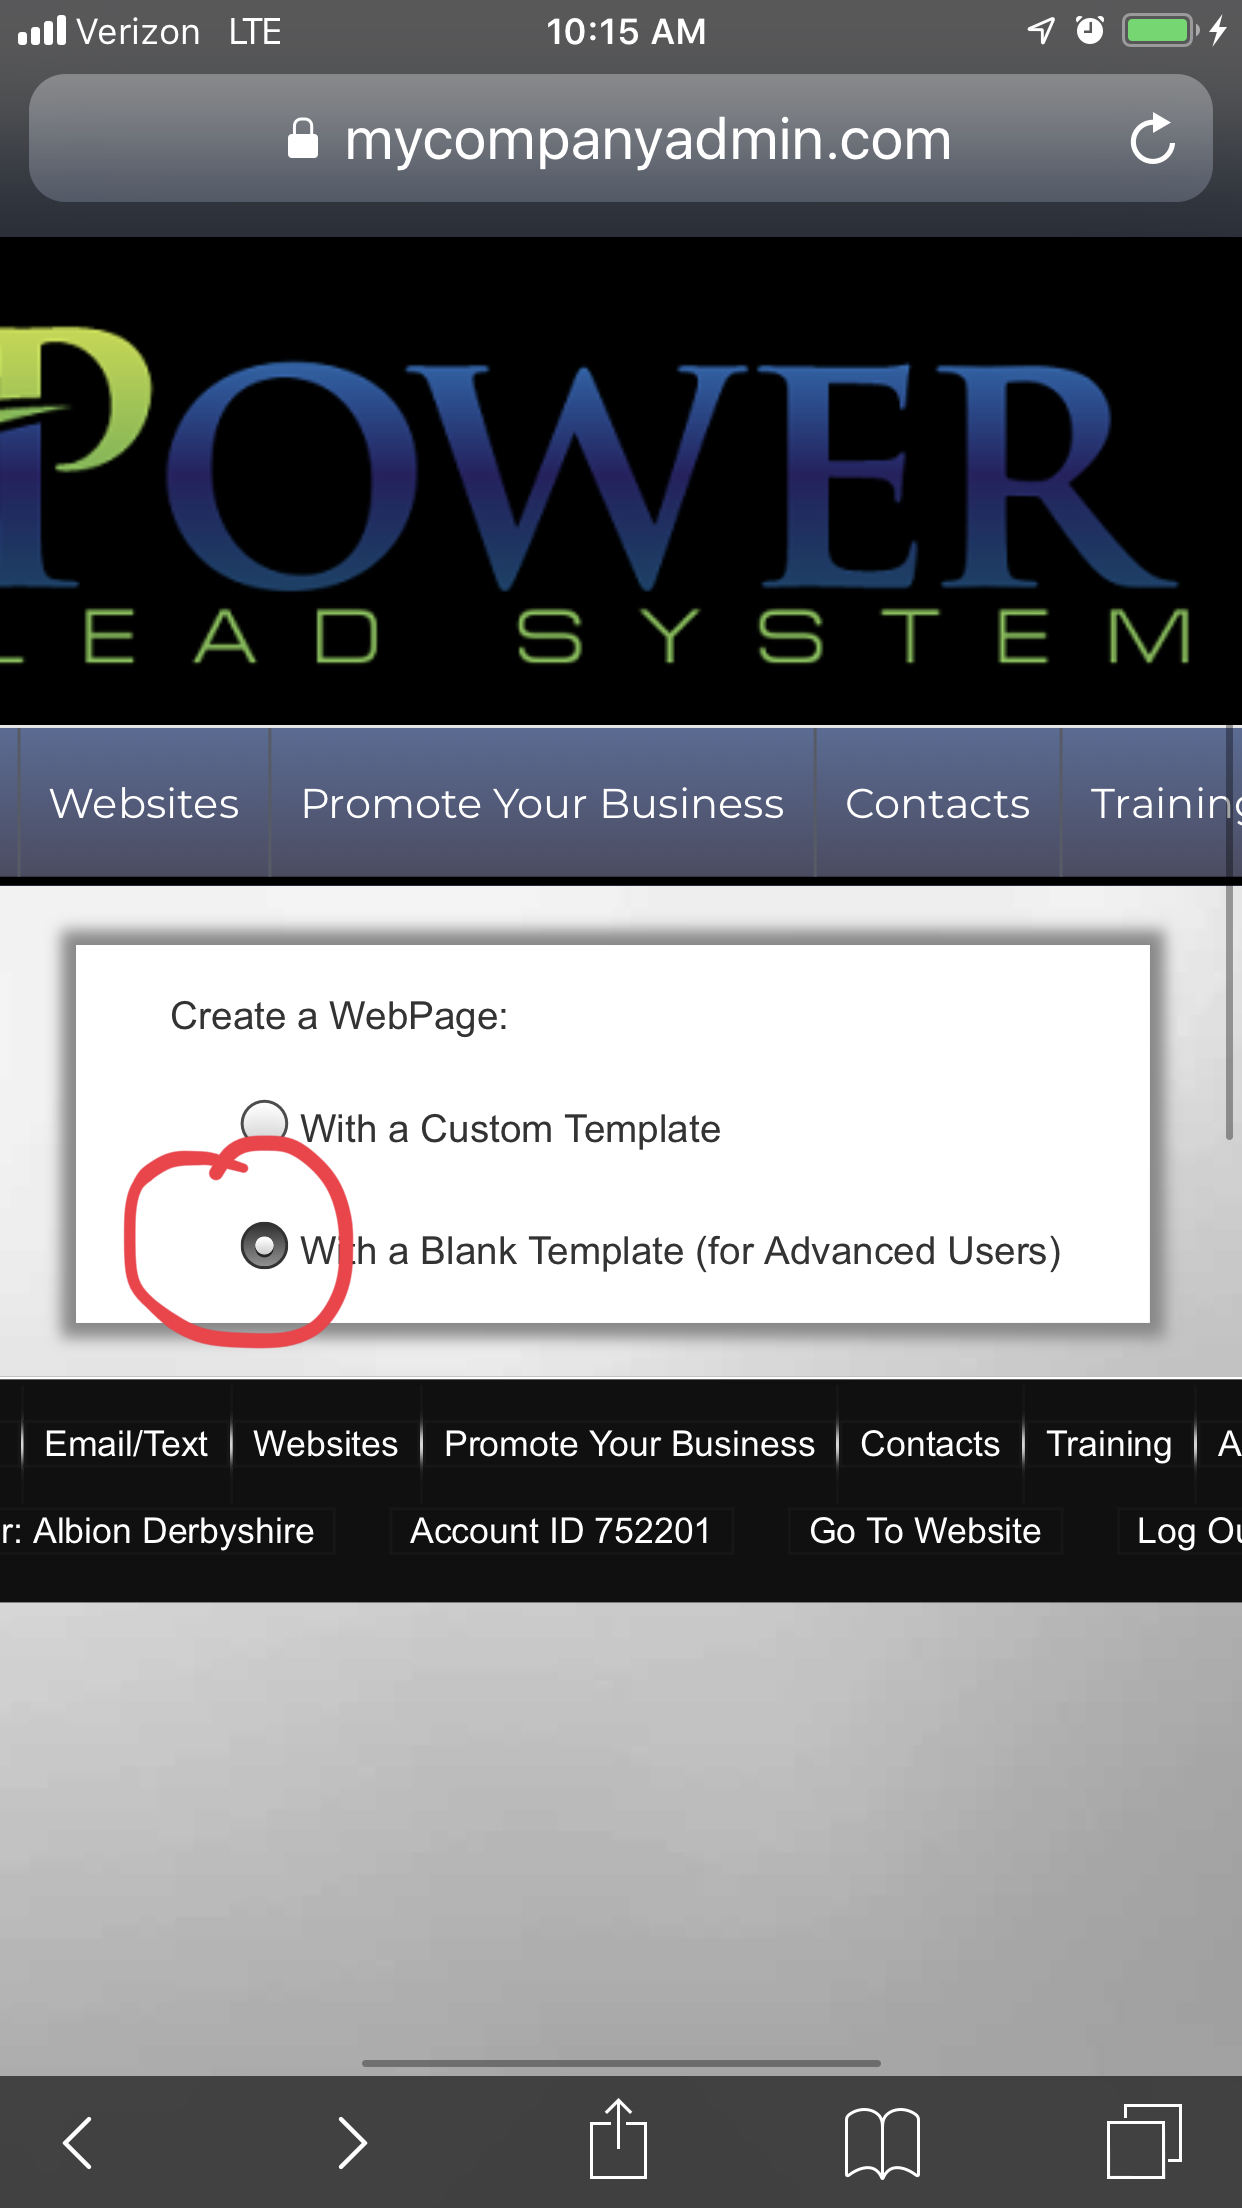
You will want your own Blank Template
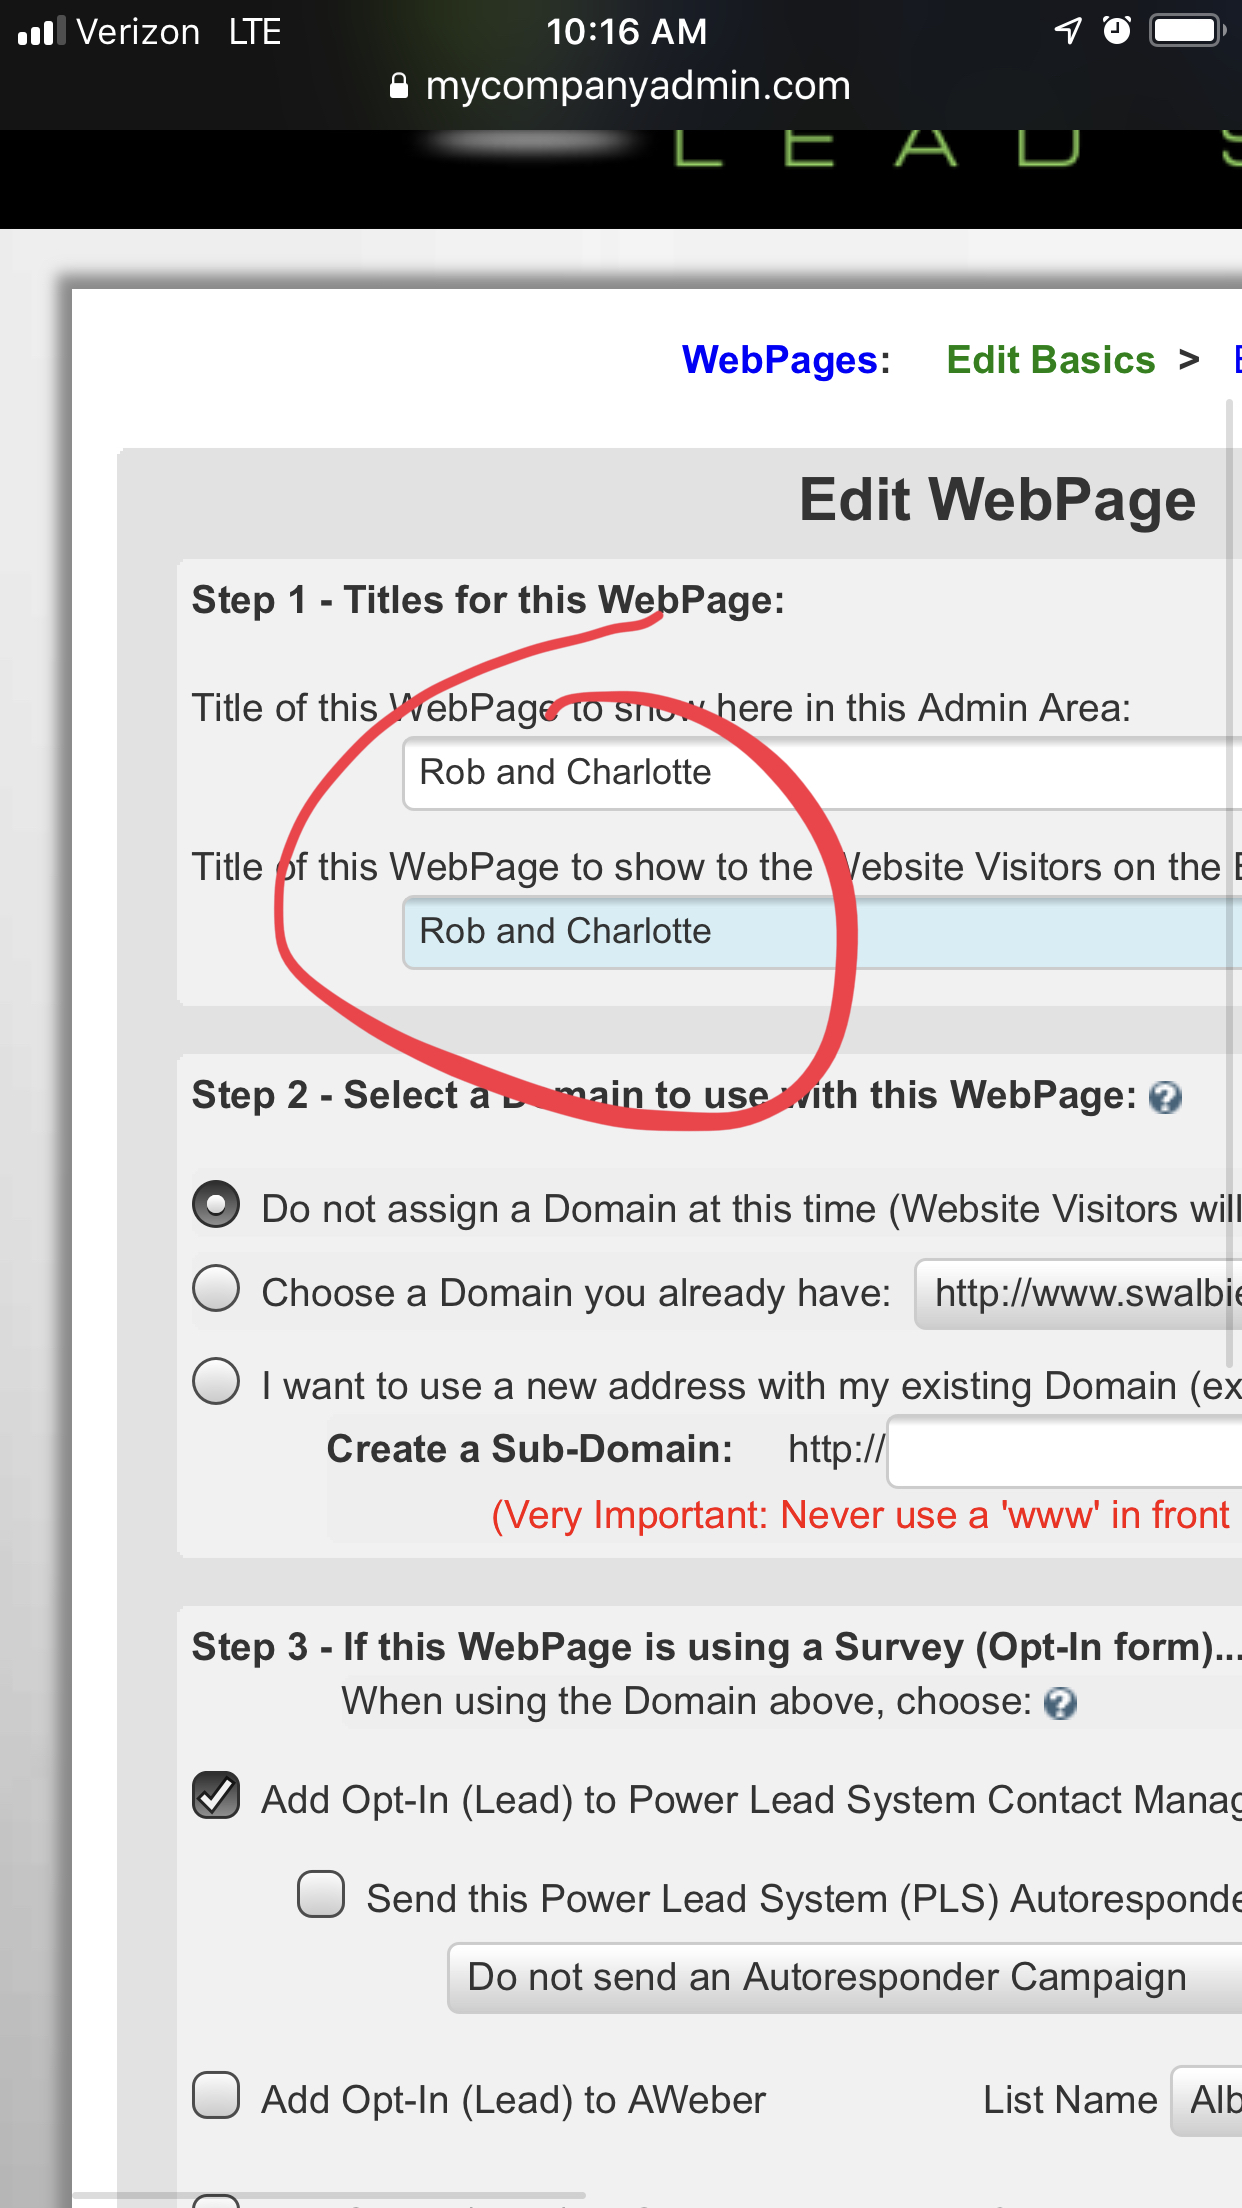
Change the title of your PLS page (this is so you can identify inside it PLS).
It may have you recreate the sub domain title again – just go along with it.
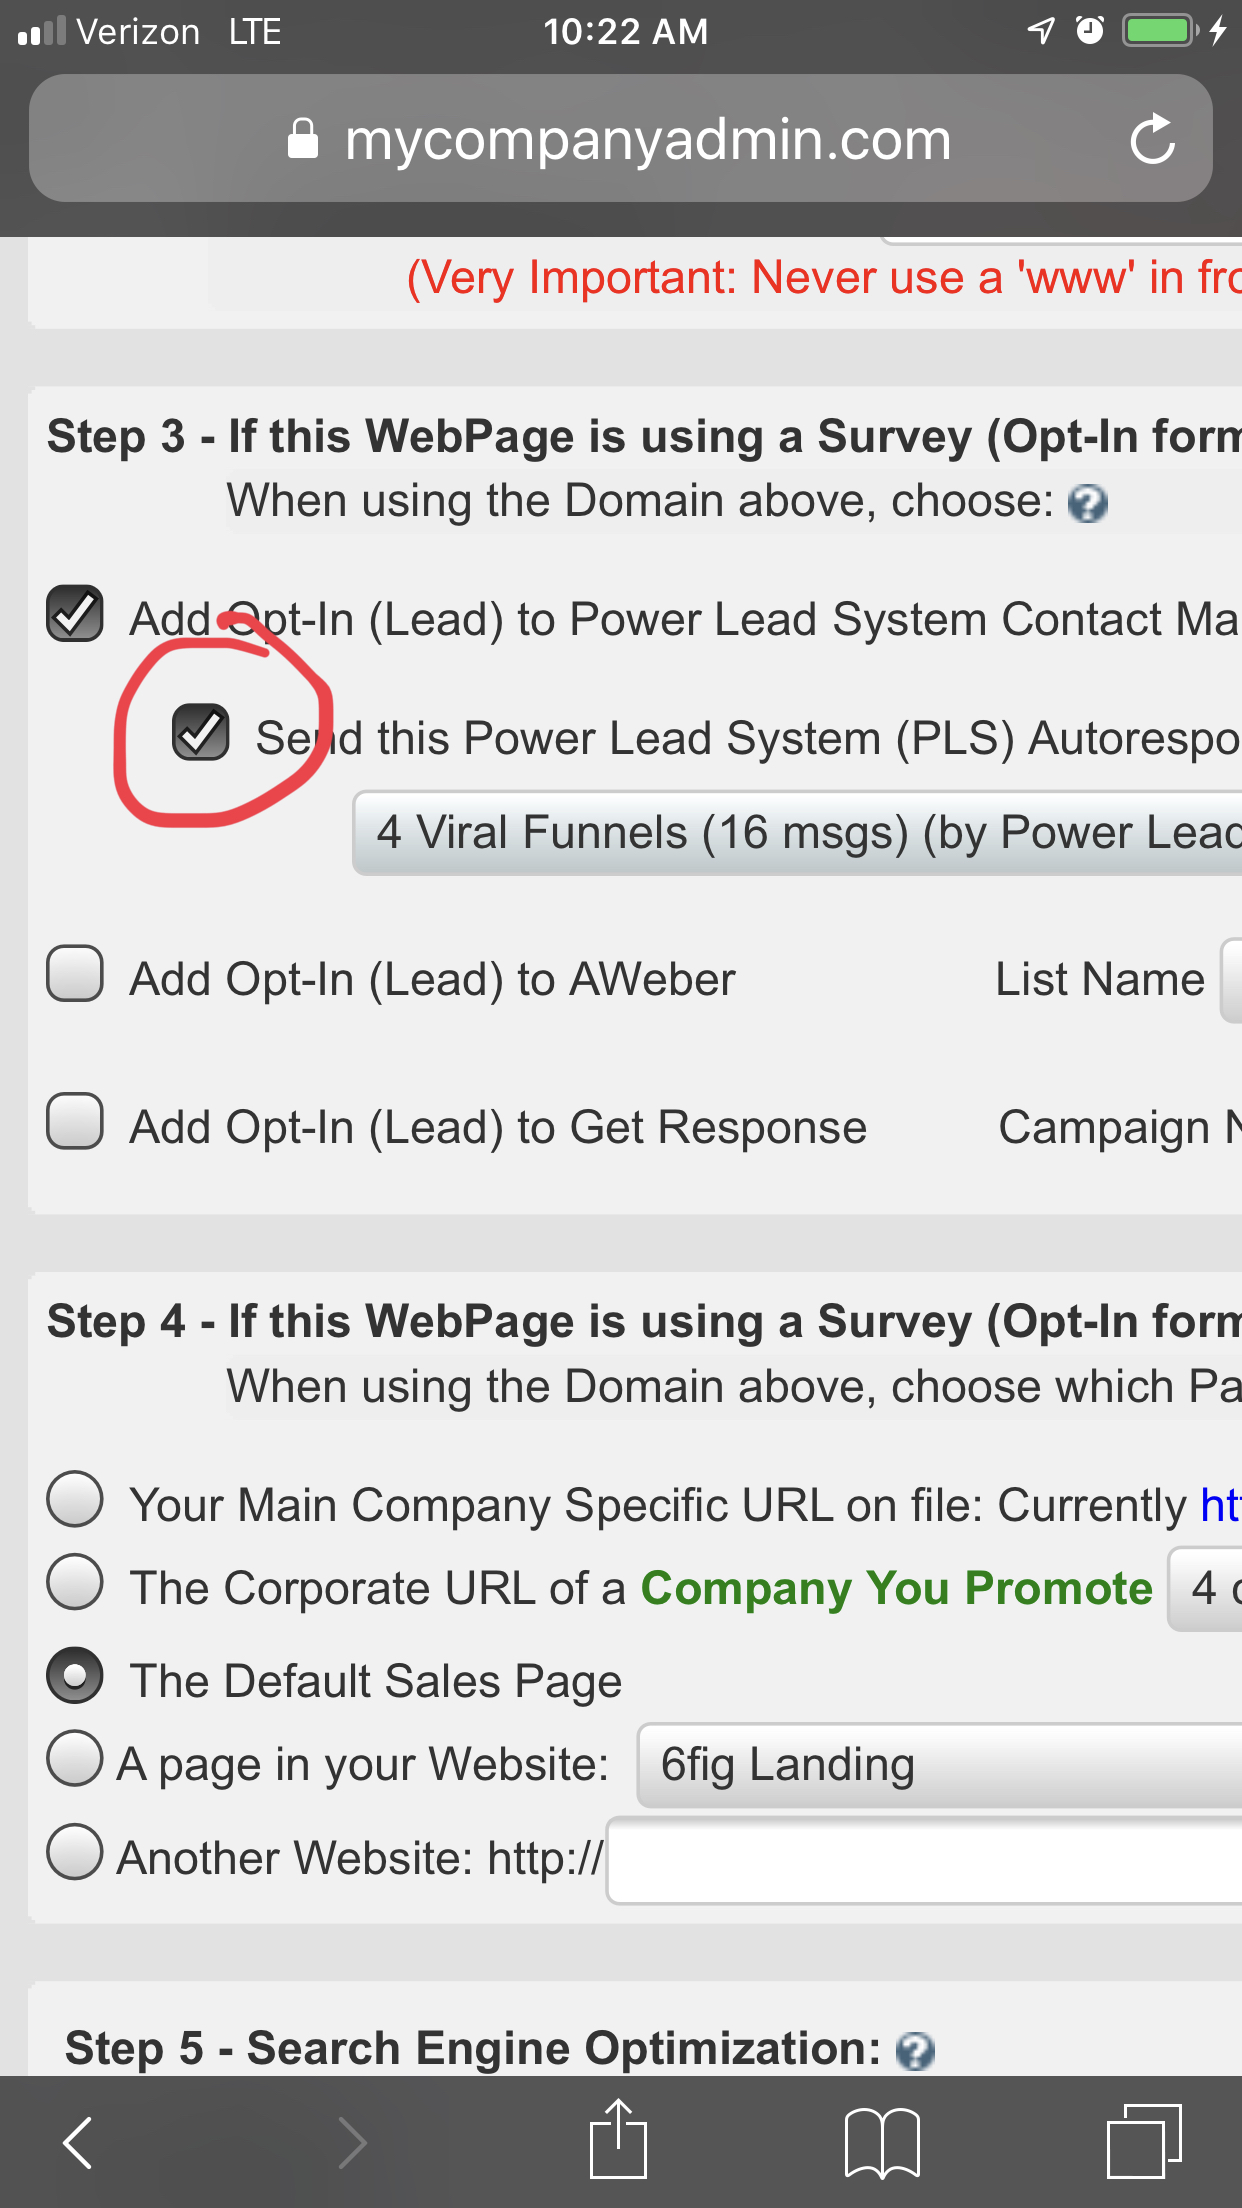
Set to use the Power Lead System Autoresponder
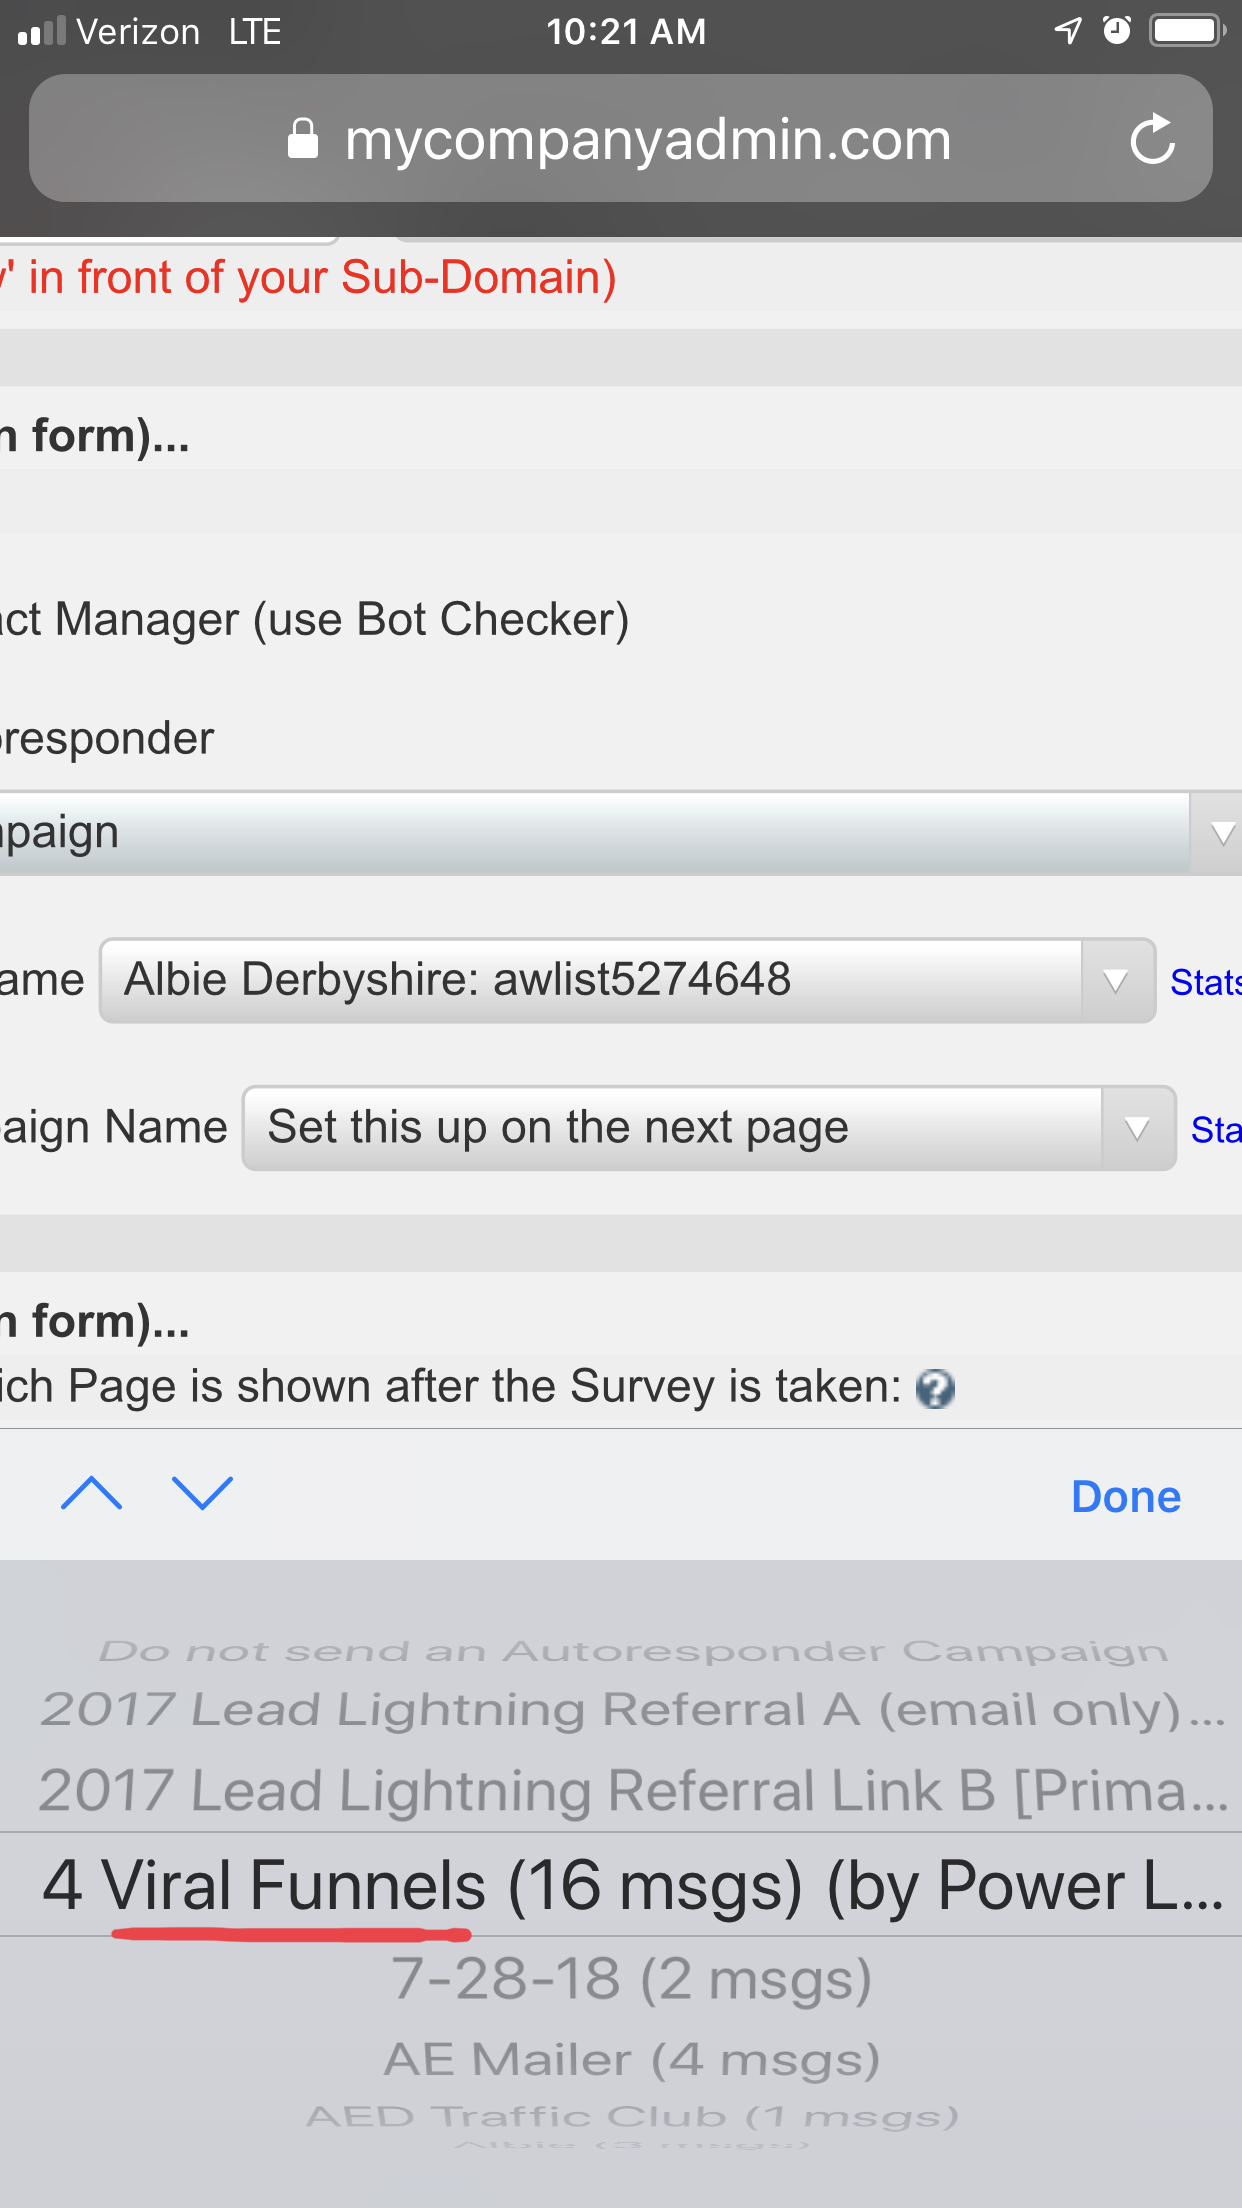
Set the autoresponder campaign for 4 Viral Funnels (16 messages by the Power Lead System). You can also use the Lead Lightning messages or you can set your autoresponder to Aweber or GetResponse too but you will need the specific code that comes with it to add it and this you may need the help of PLS Support and Aweber/ GetResponse Support and or my personal help to do this.
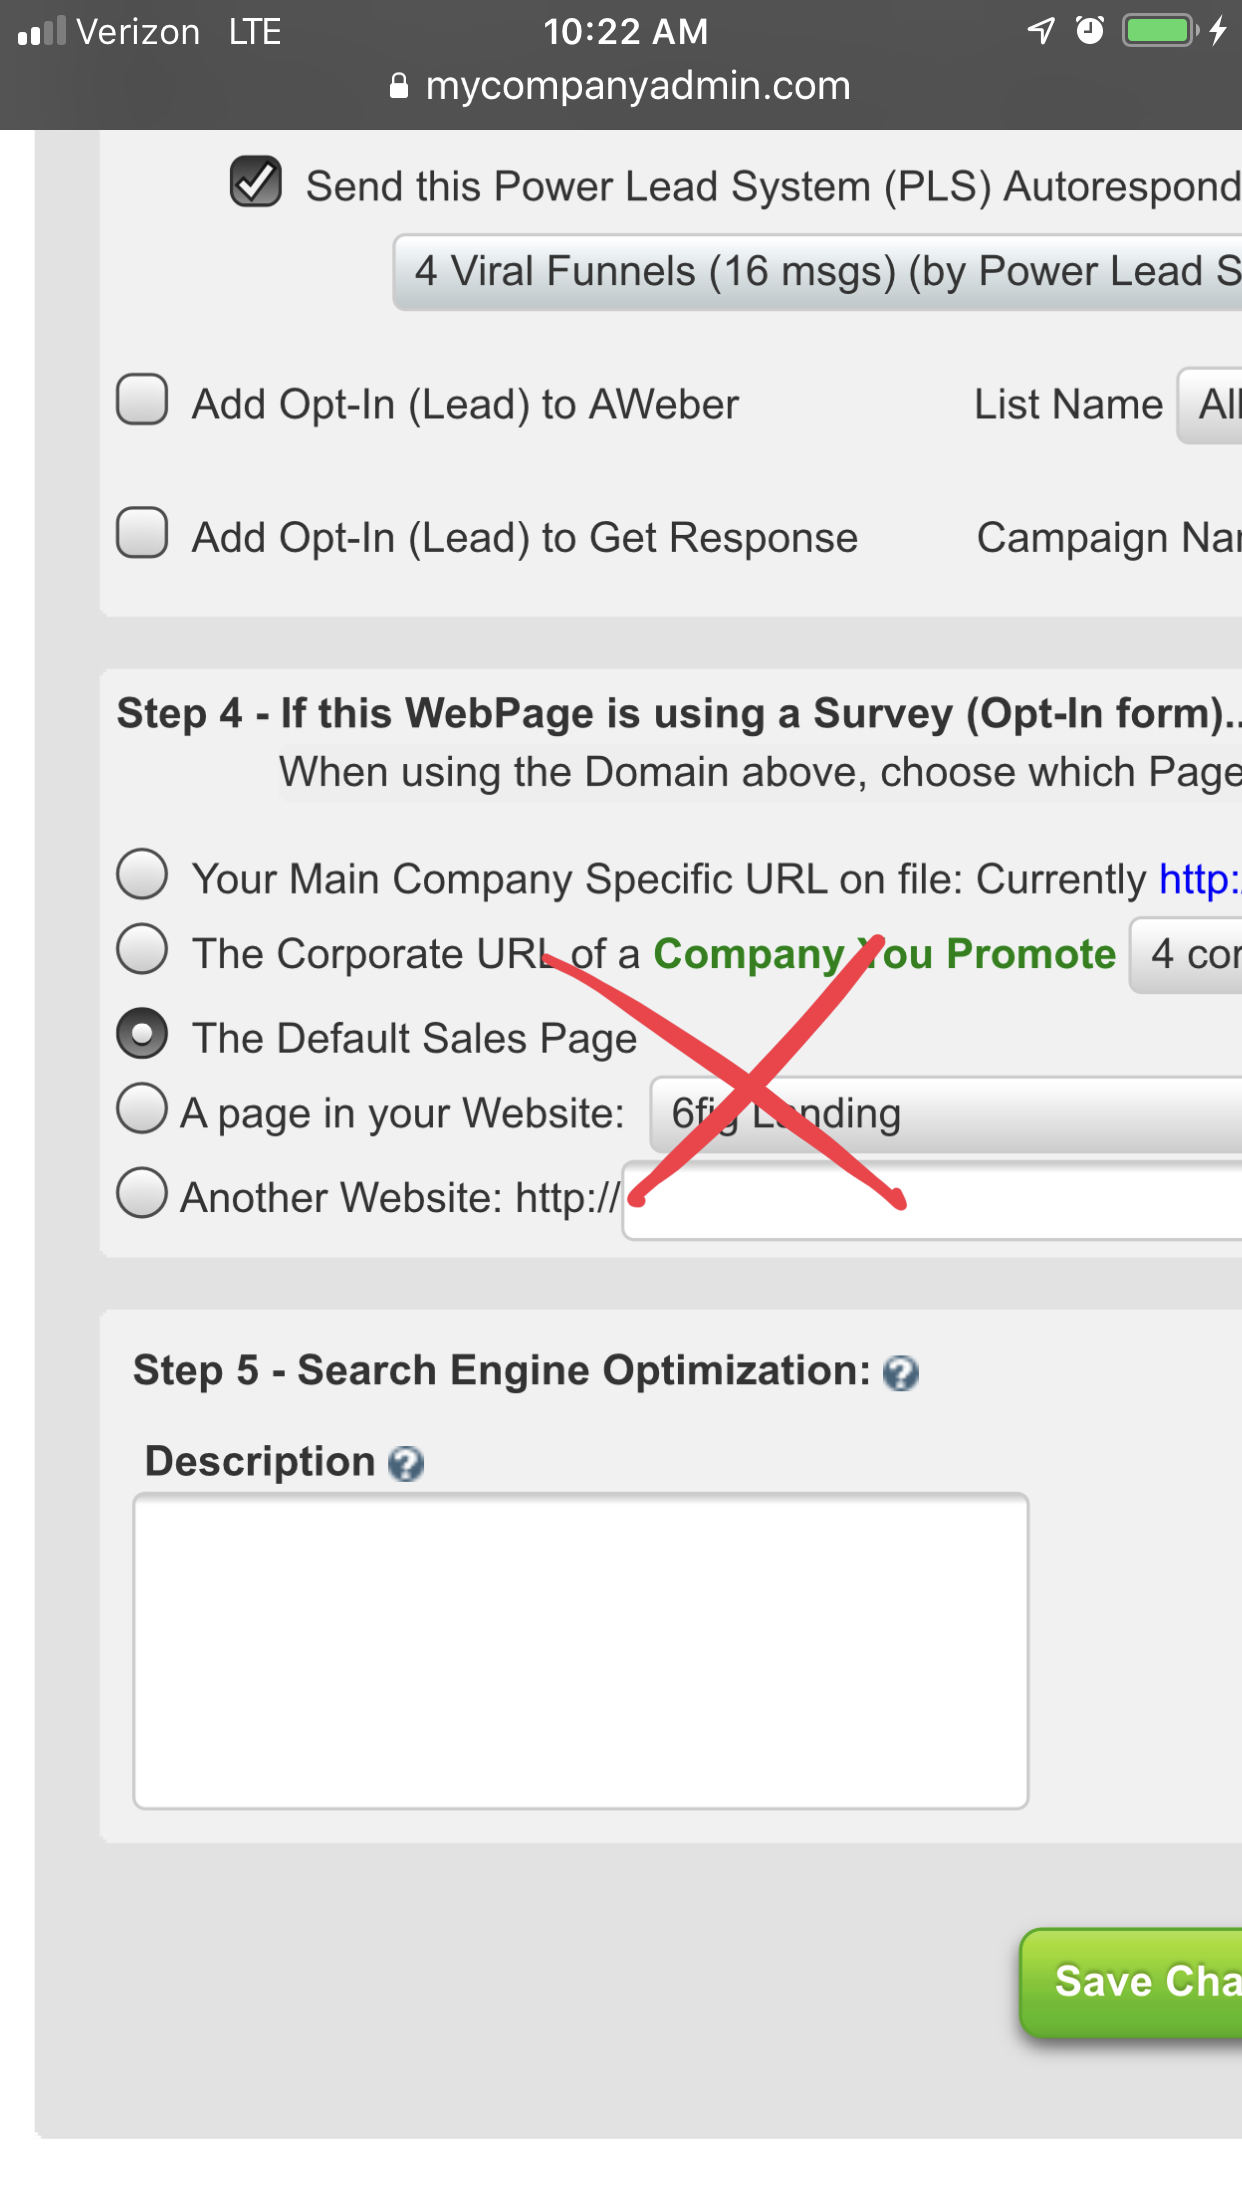
Do NOT Set the page to go to any link
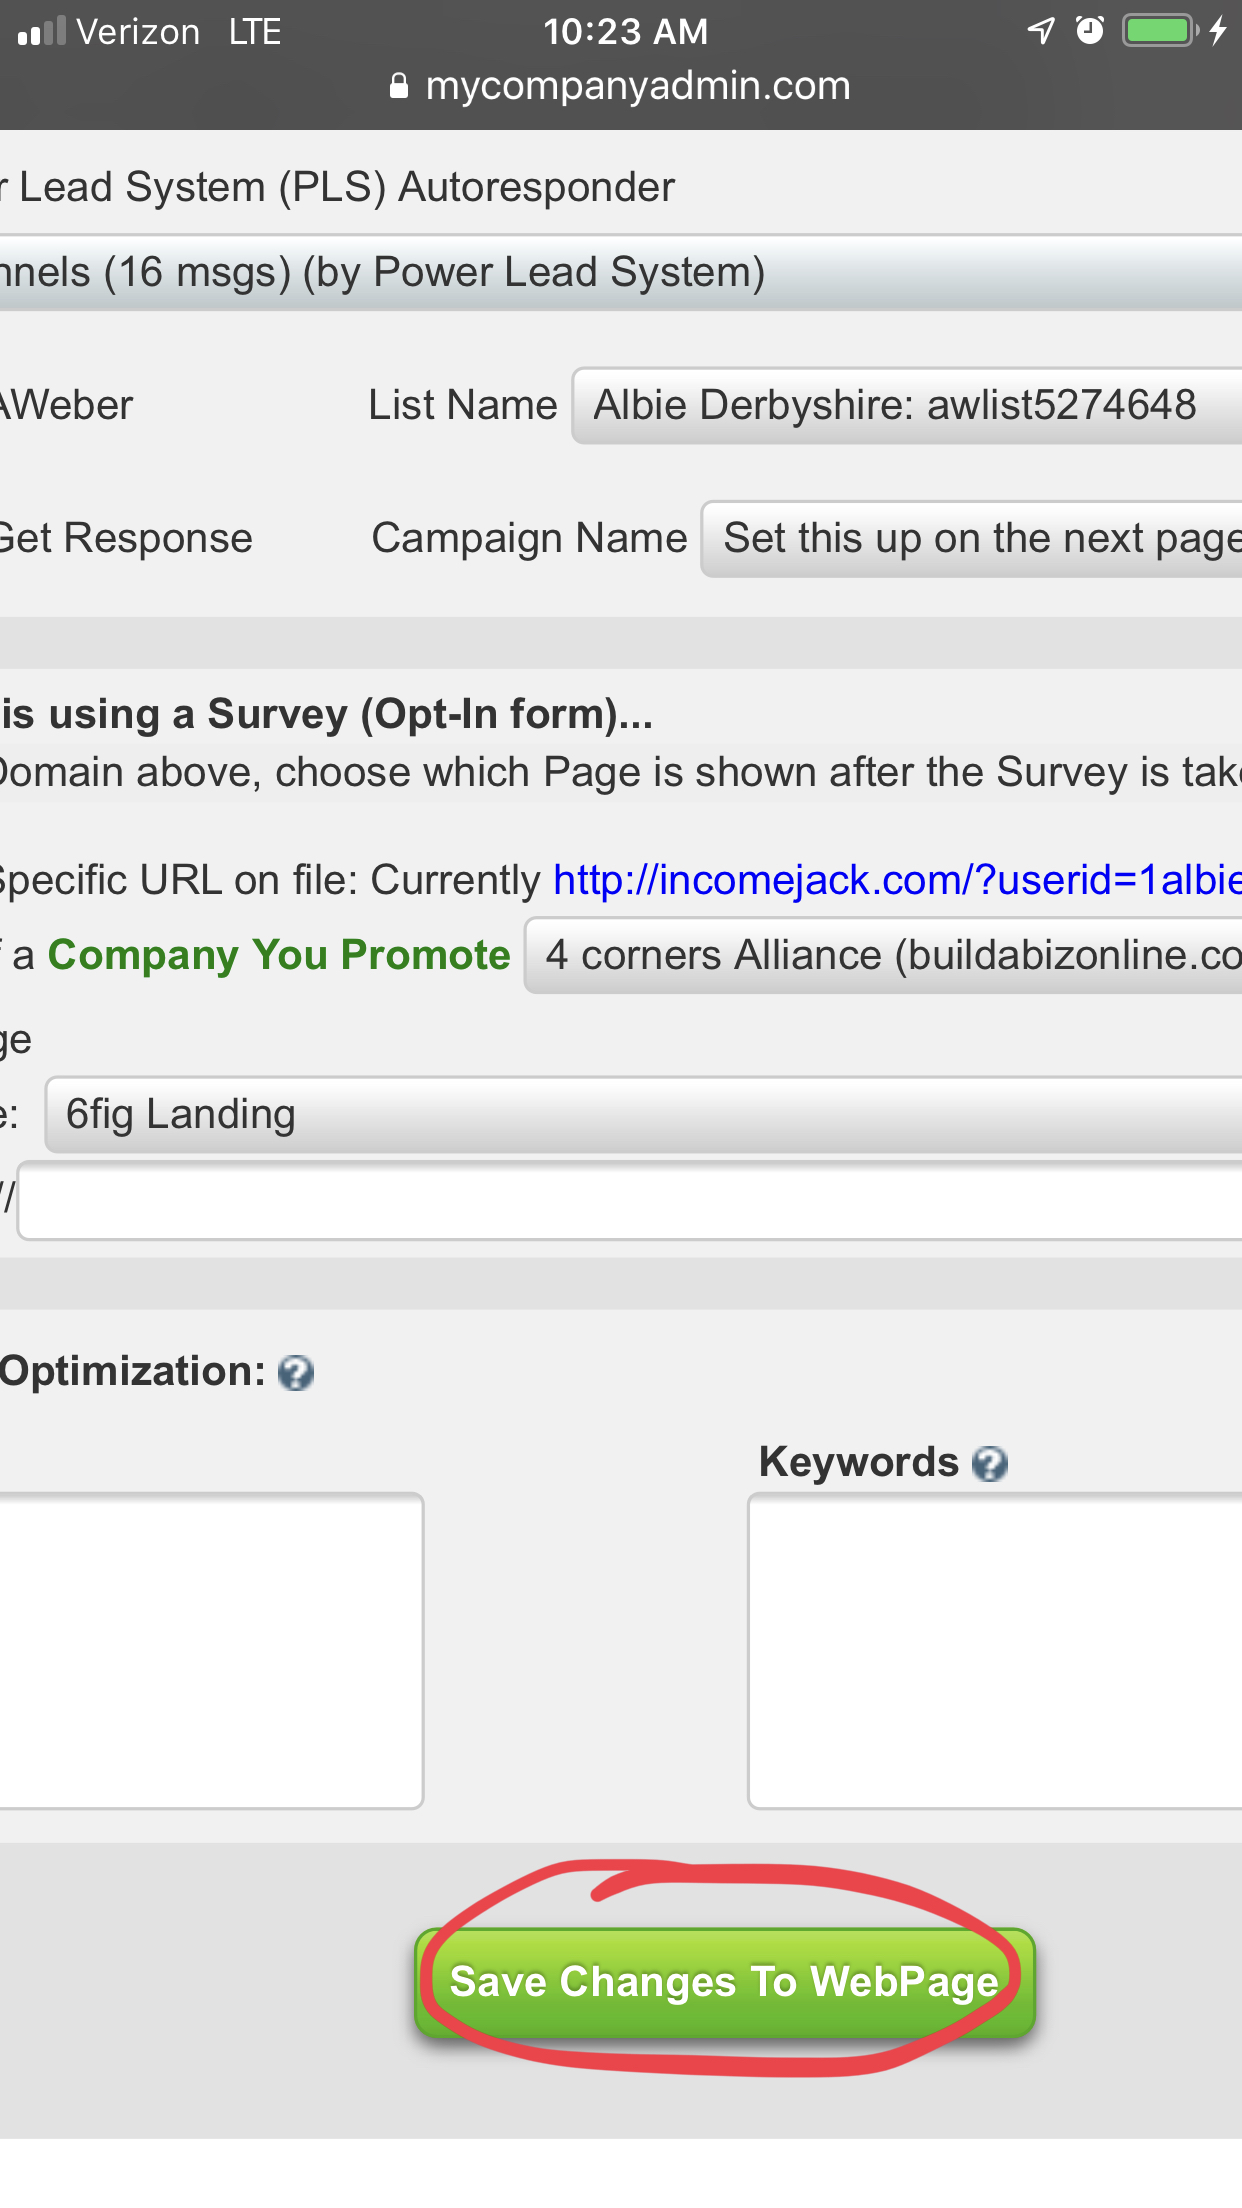
Press “Save”
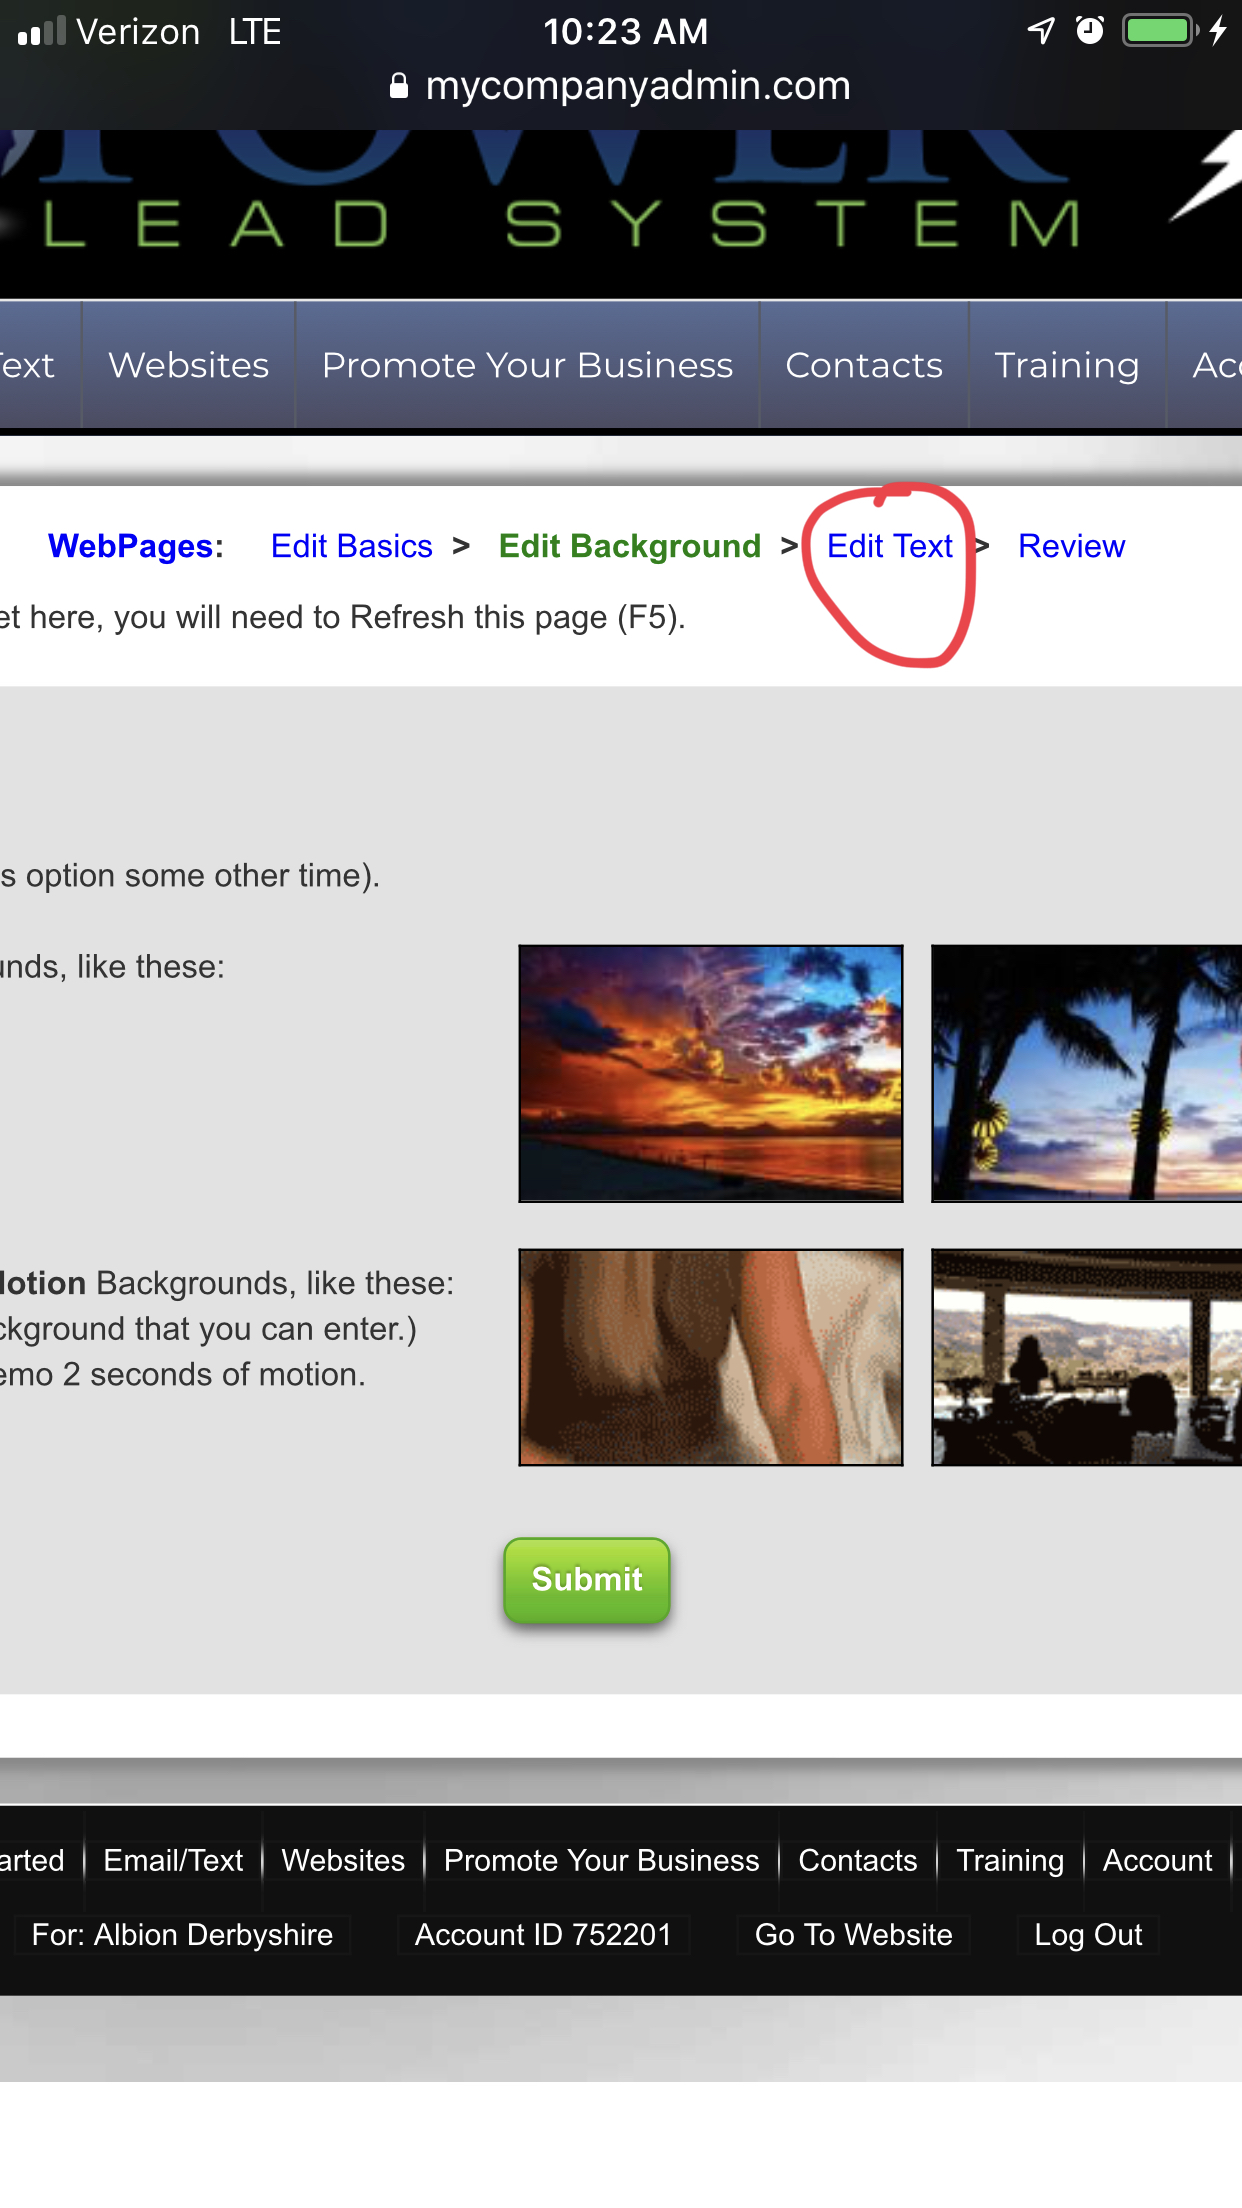
Skip this next screen and go to “edit”.
Get rid of the example writing on the page.
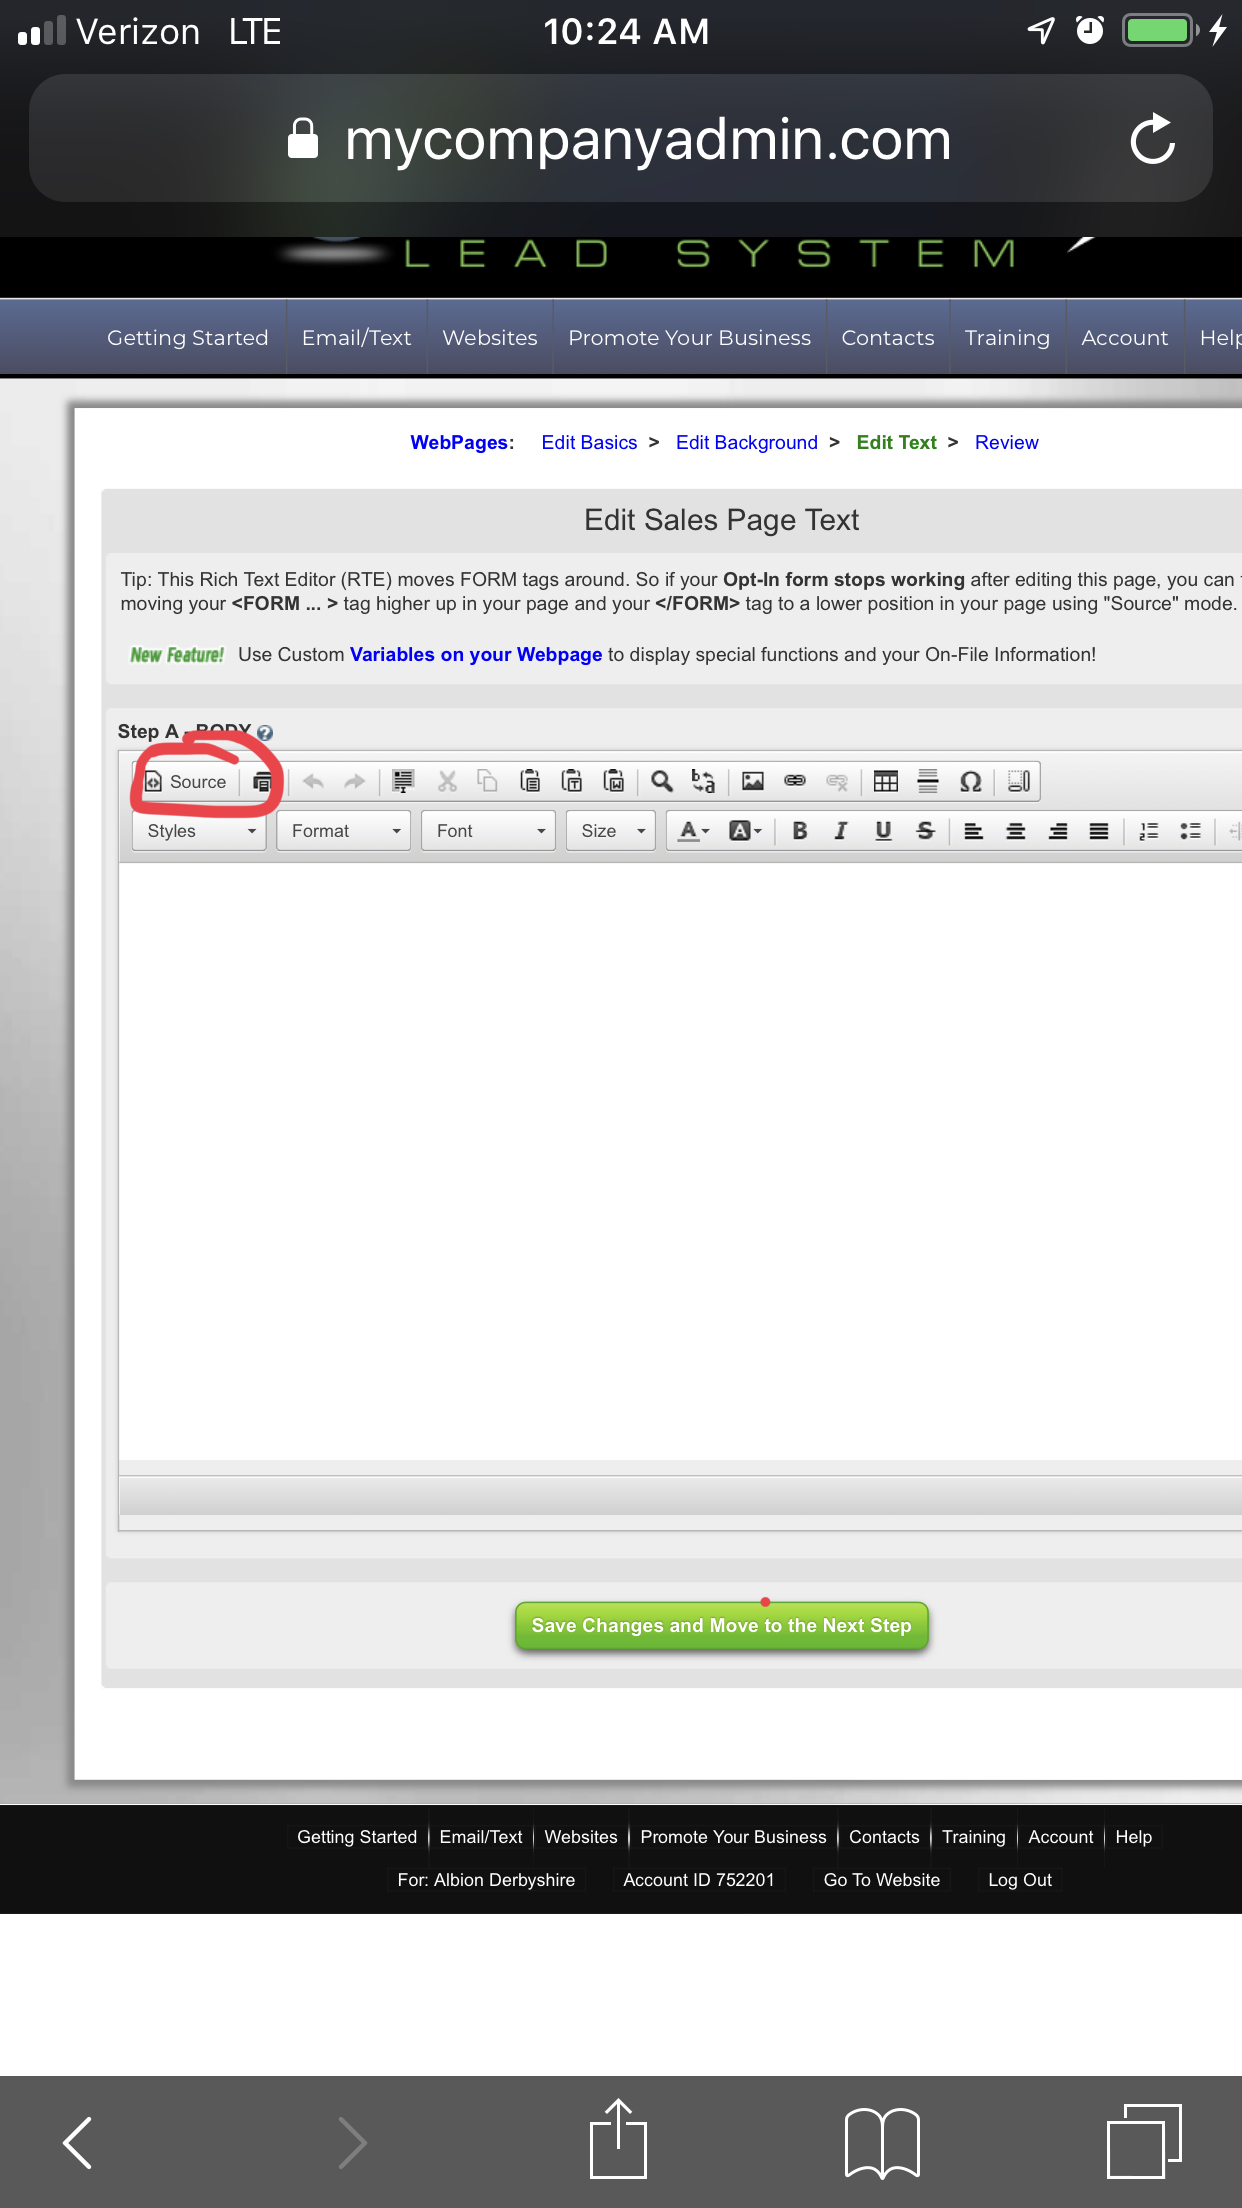
You will see the HTML (scource) button to go to html settings.
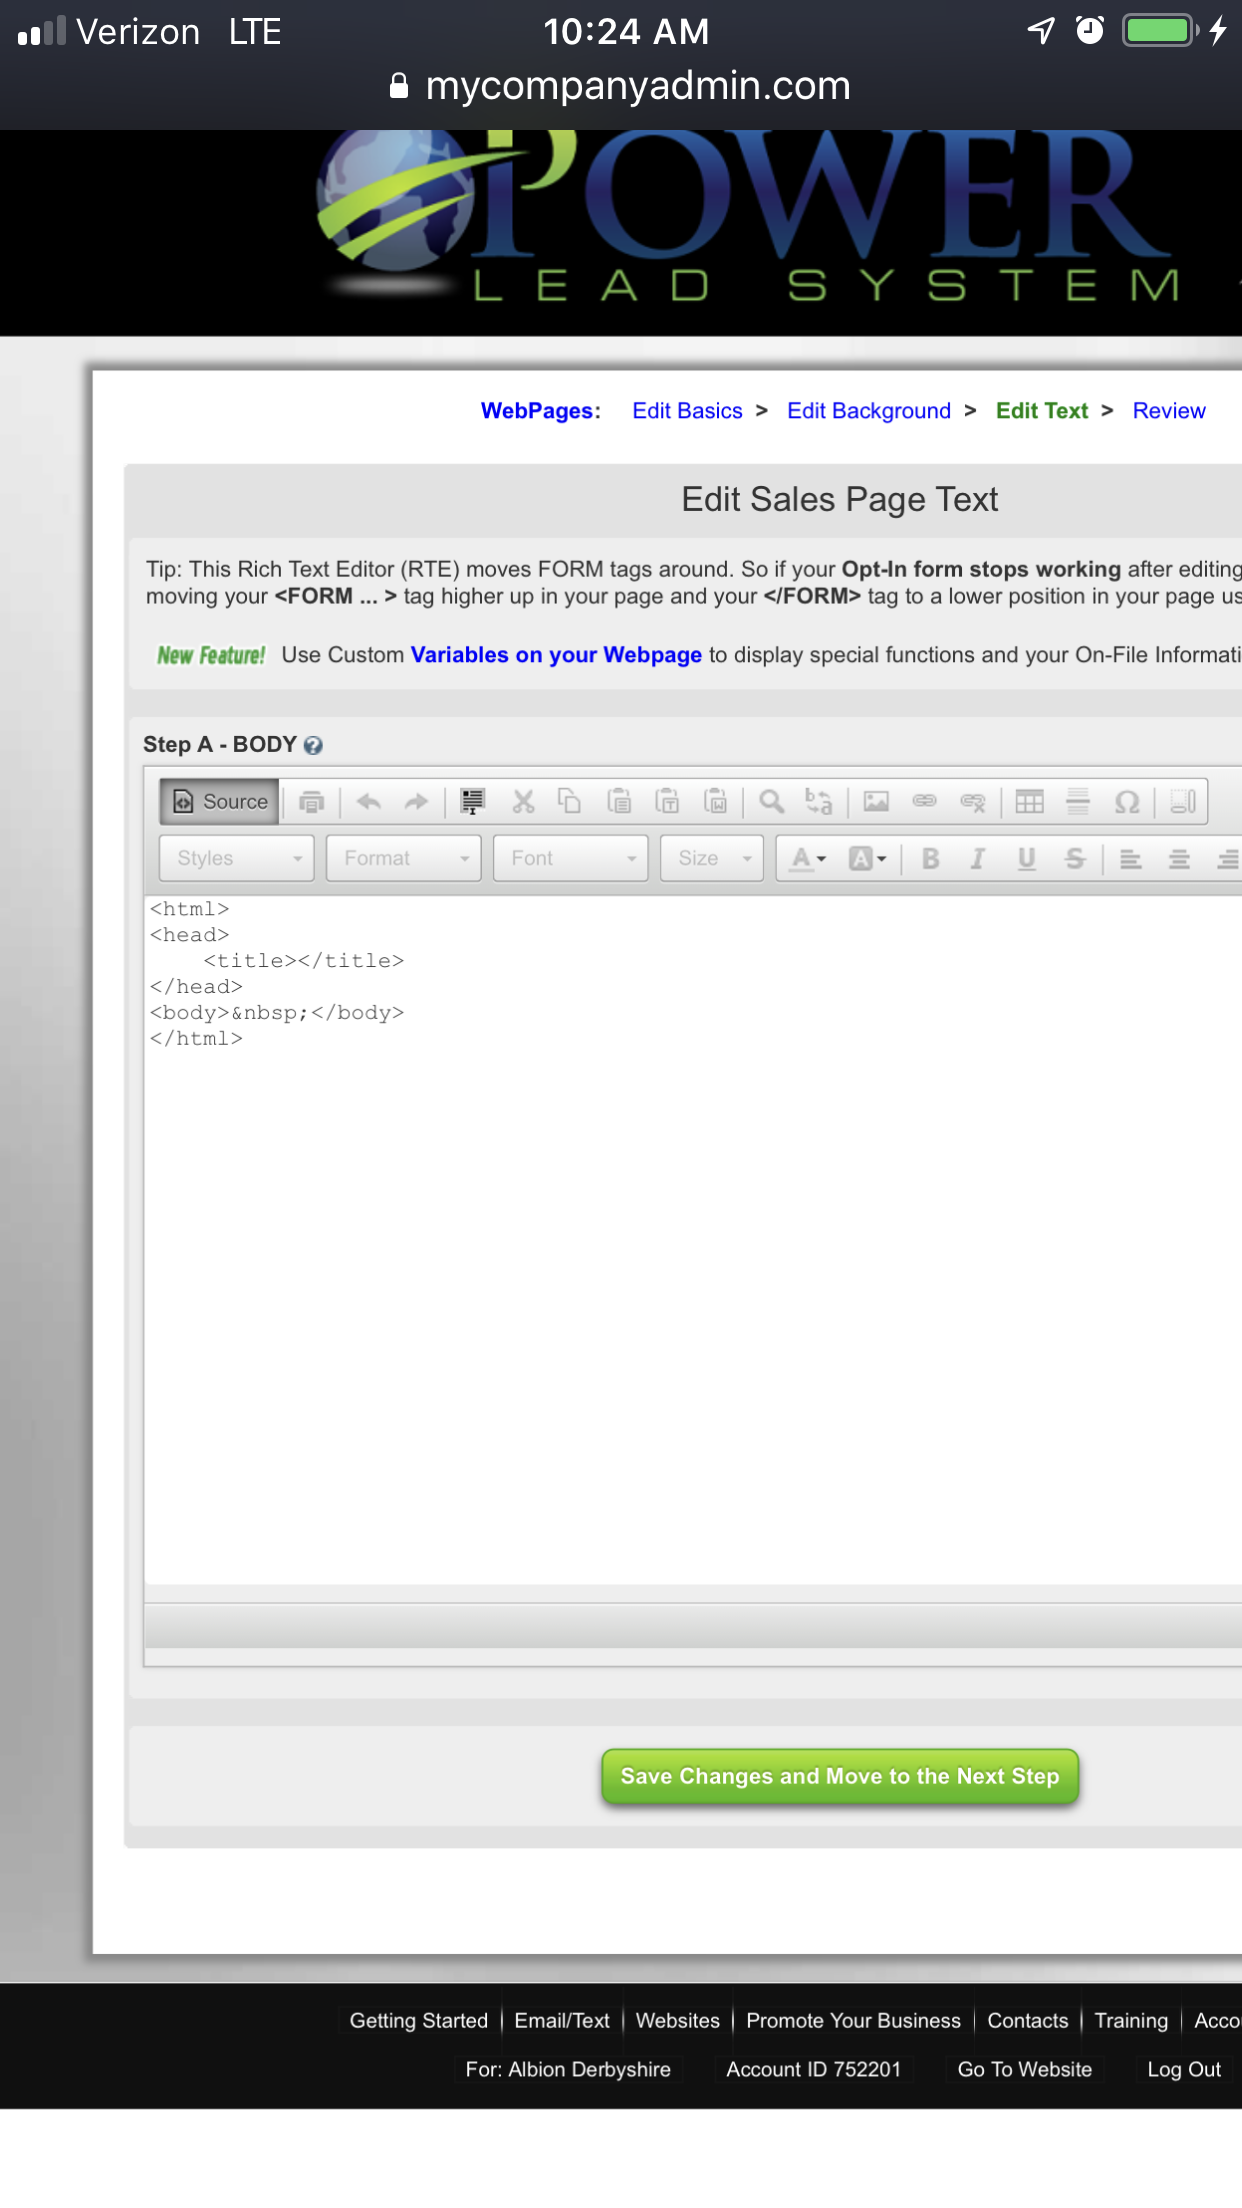
Get rid of any HTML code there on the page. Now go to CANVA:
Here are some pages I’ve made using Canva:
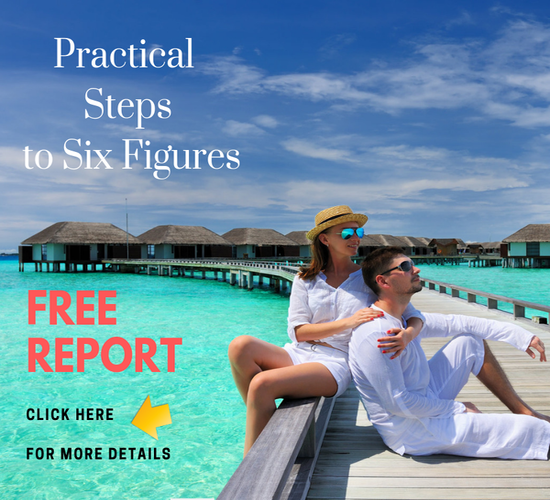
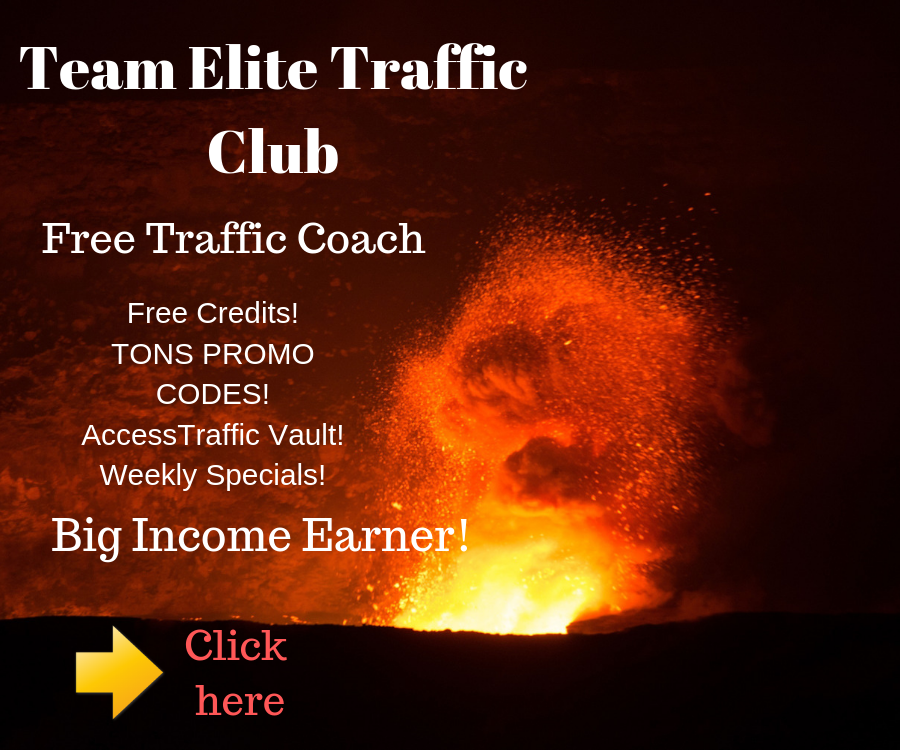


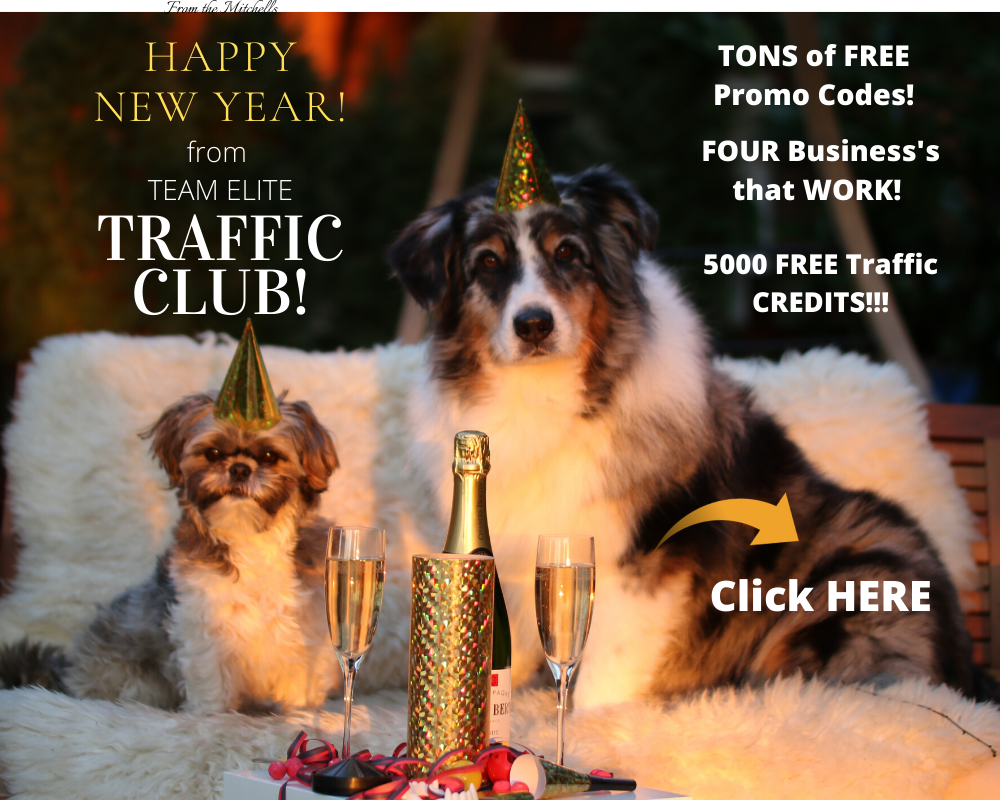
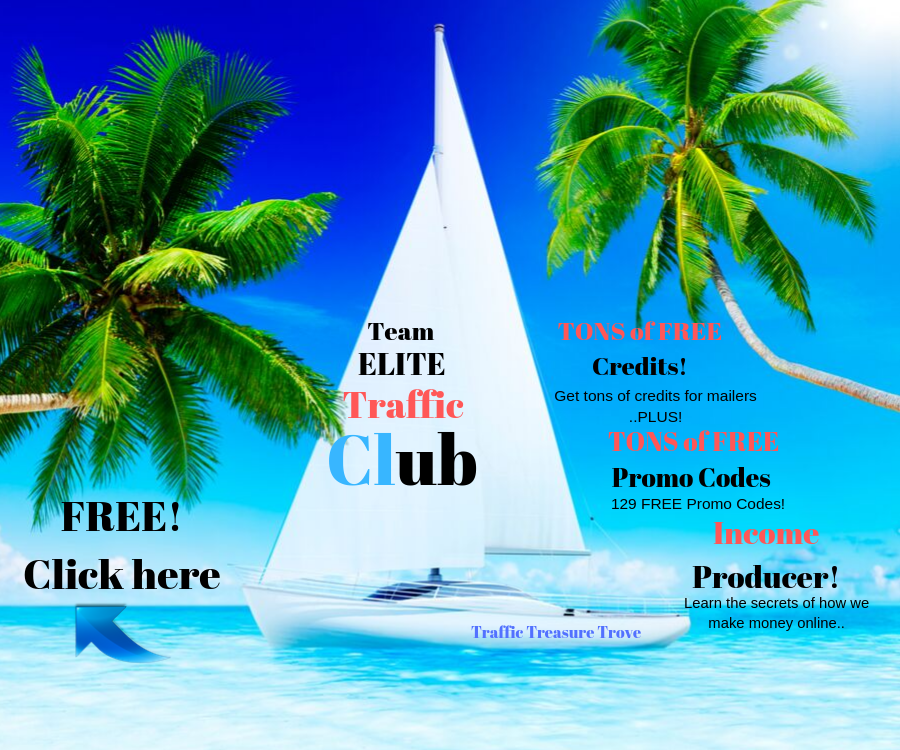
I hope these sample pages help you think a little bit of what you can create too! So now open Canva and let’s begin:
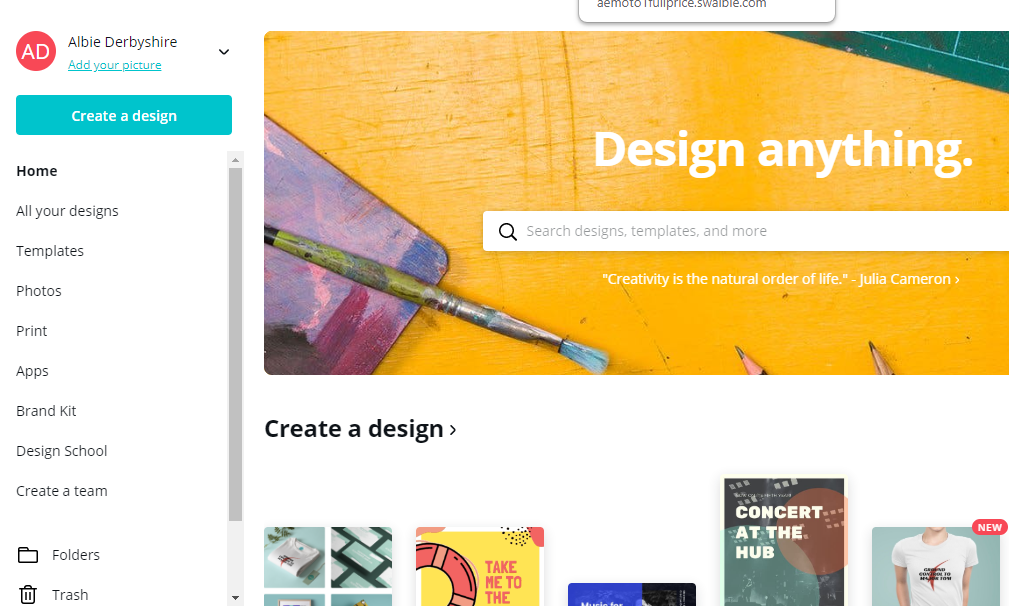
Go to “Create a Design”.
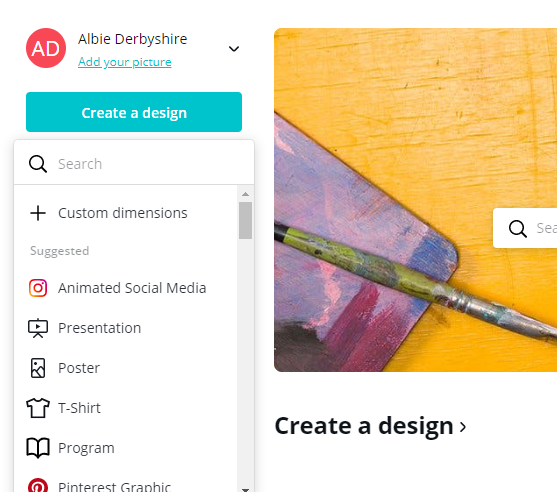
Go to “Custom dimensions”.
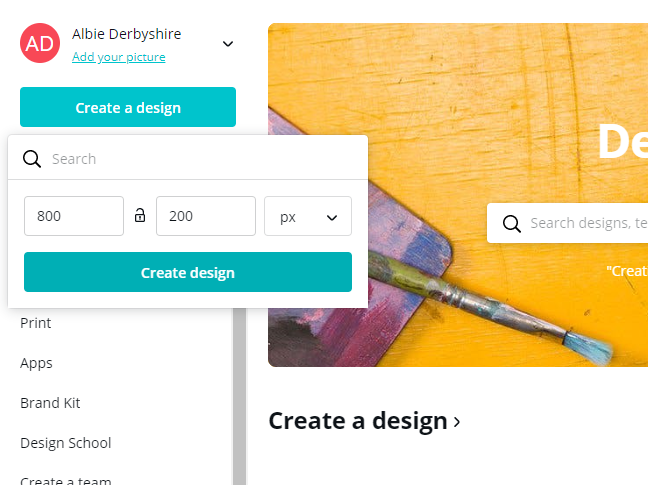
Add 800 x 200 if you want a banner. Add 1000 x 800 if you want a capture page.
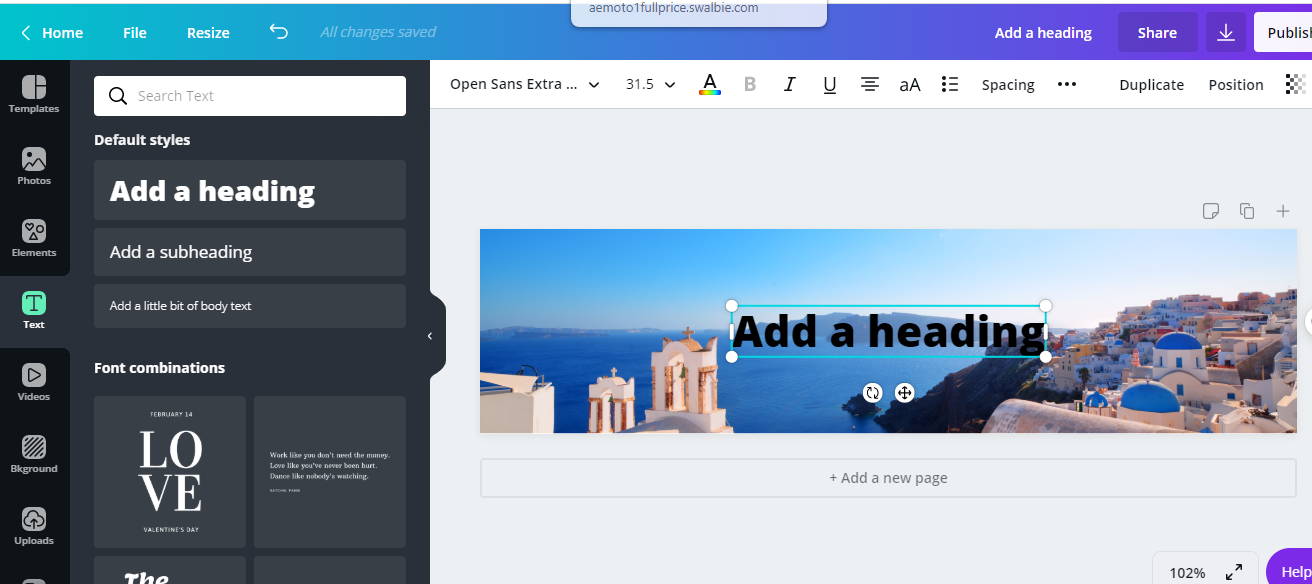
Now go down to “photo” and add a picture that you like. Here’s a sample pic that I liked and that I added. You can also add Text as you can see like I did in the picture.
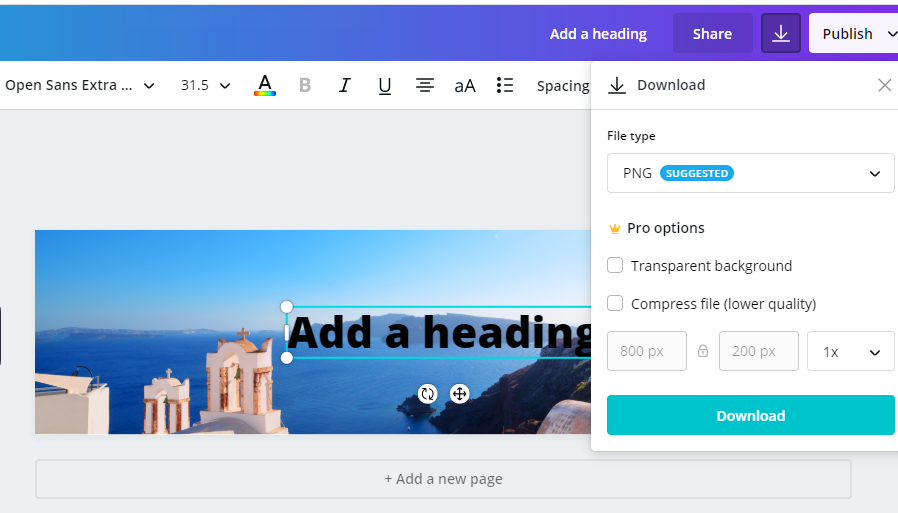
Now when you are done creating what you want, you can download your picture by pressing the arrow at the top right corner. Then make sure it is the right size and press “download”. It will then download to your computer and you can upload it from your computer.
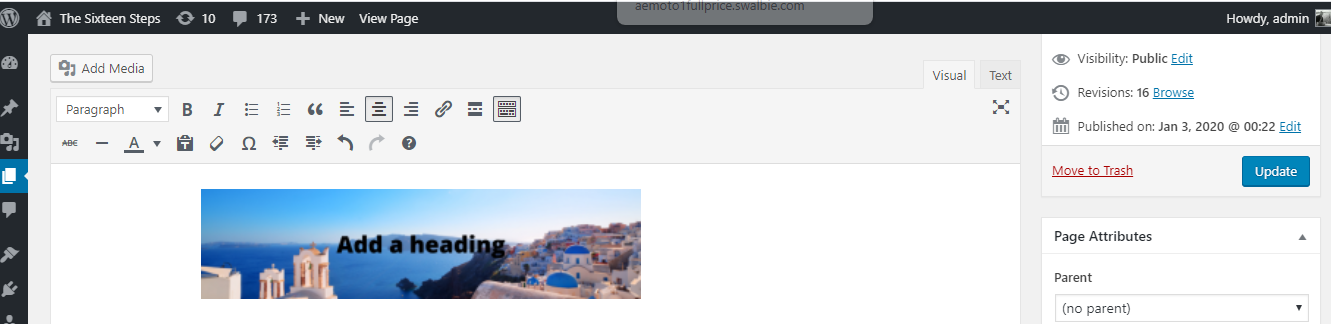
Now you can upload the picture to your GDI blog

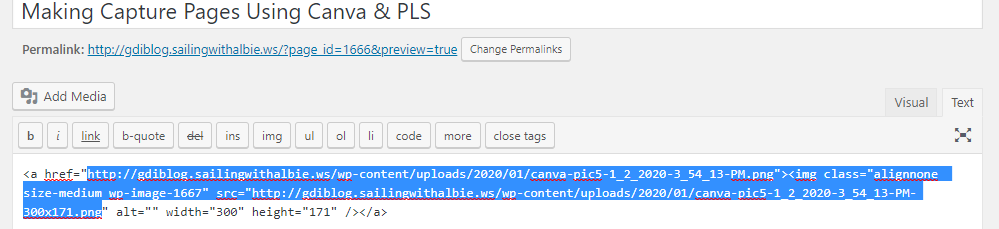
Now click the HTML editor (Press “Text” in mid right hand corner of screen. It will be right next to the word “Visual”). If you can’t find it email me and I will send you a seperate training on using HTML code and editors. Now highlight the http:// link all the way through the png. Here is an example of a link for you: http://gdiblog.sailingwithalbie.ws/wp-content/uploads/2020/01/Add-a-heading-9.png . You will notice that there are quotation marks before the URL and right afterwords. DO NOT COPY THE QUOTATION MARKS BEFORE THE LINK OR AFTER THE LINK!
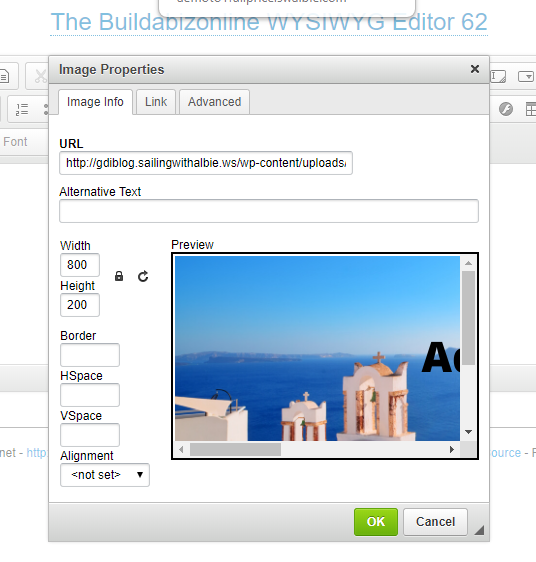
Now open a BuildabizOnline (BABO) HTML editor or the page you have open in PLS and use that editor in there to add the picture URL to the page. Open the picture icon and then add the URL inside the box marked URL.
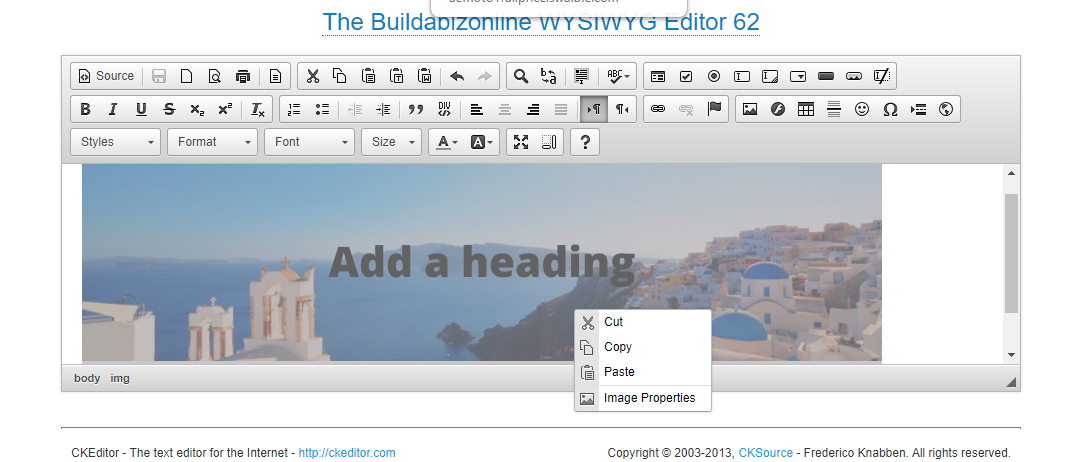
If you did this inside of BuildabizOnline (BABO) then highlight and copy the picture. If you did it in PLS you don’t have to do anything.
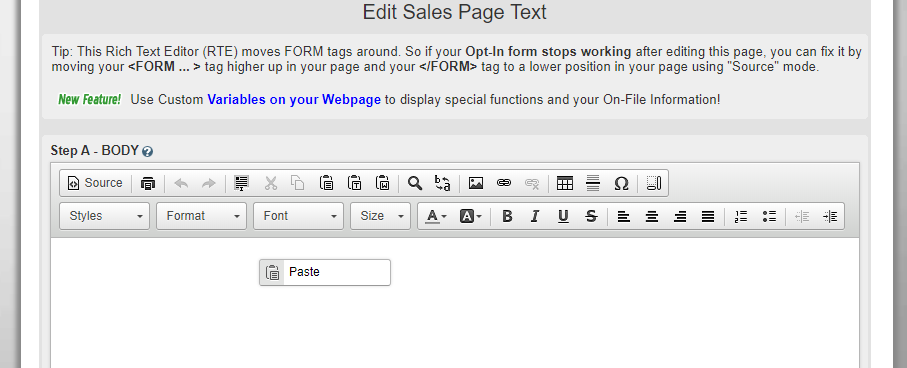
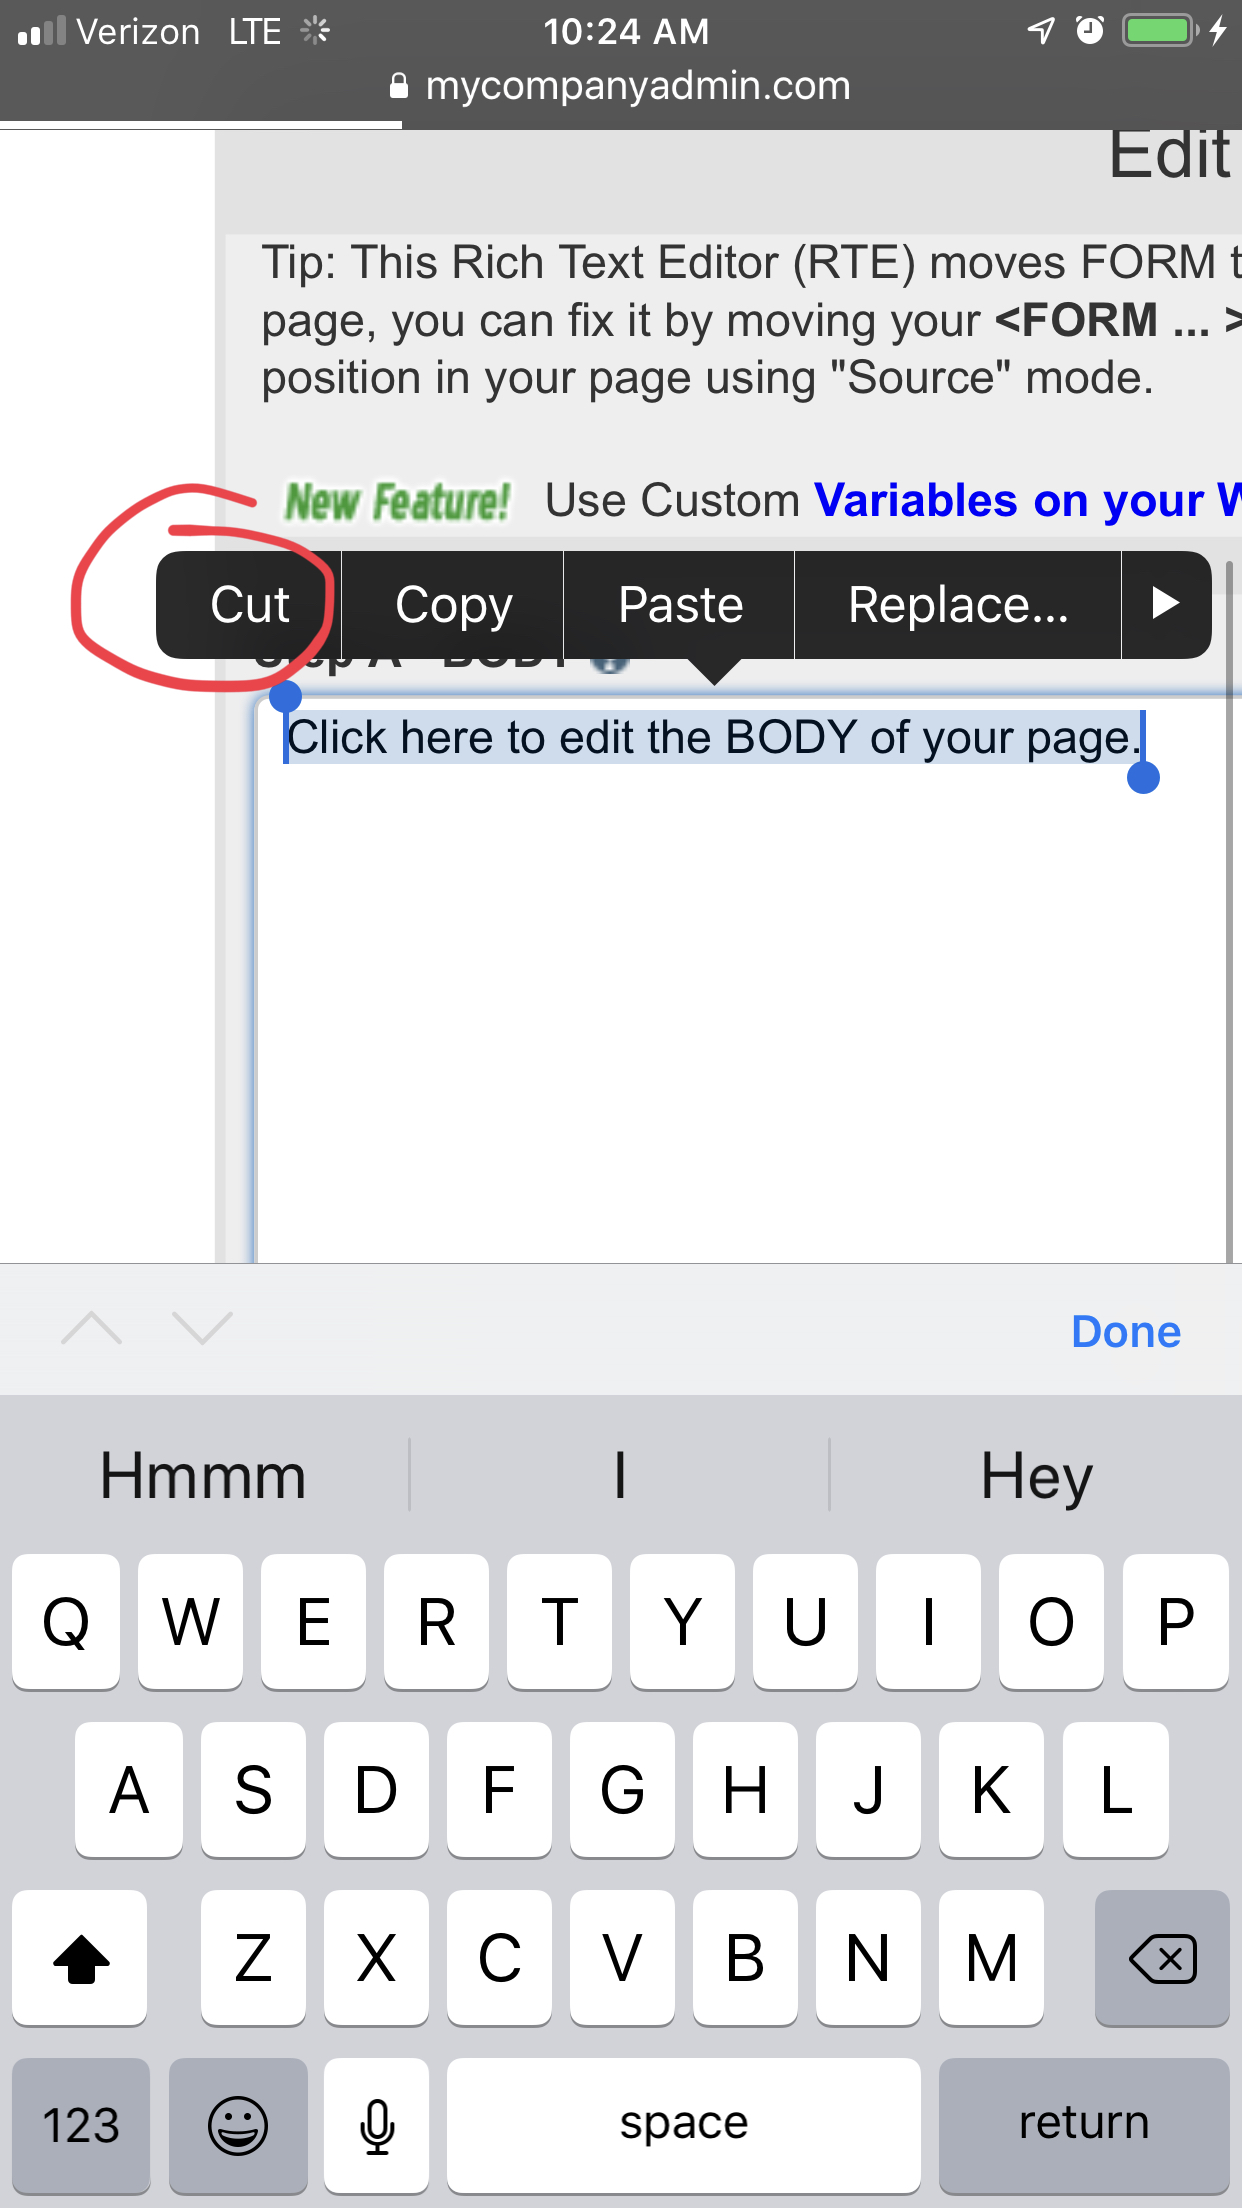
You should already have your picture in PLS. But if you used BABO go back to your open page in PLS. Paste the picture onto your page.
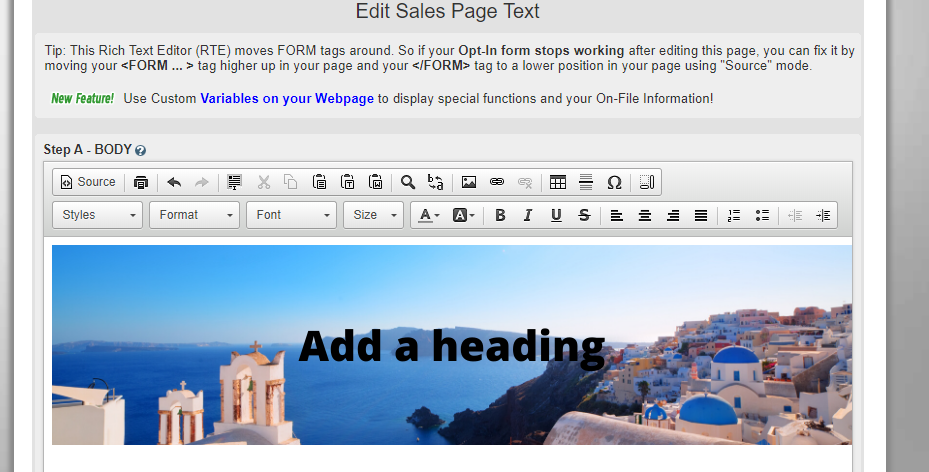
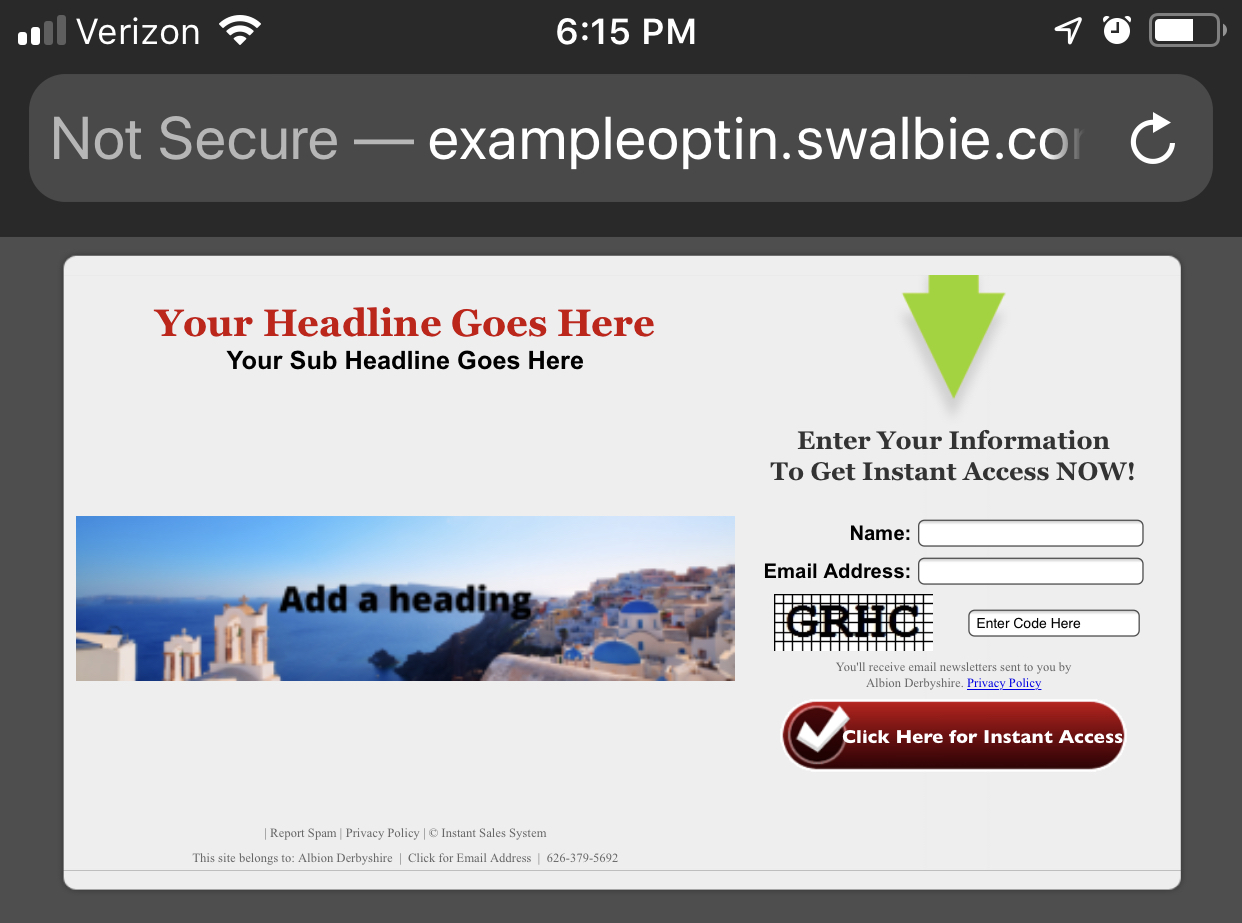
It will look like this for example. Now we will need to make another page (this will be your opt in page and we will connect this page to that one.) I will explain as we go. But first go the bottom of this page and click “SAVE”.
You will now see a place where you can click “VIEW” and see what your page looks like so far. If everything is good so far then continue.
Now go back to “Websites” and then go to “make Sub domain” again. Create another subdomain (you can make it like this for example: “capturepageoptin” so when you add it to your main domain it might look like this for example:
http://capturepageoptin.swalbie.com ).
Click to create your OWN capture page again.
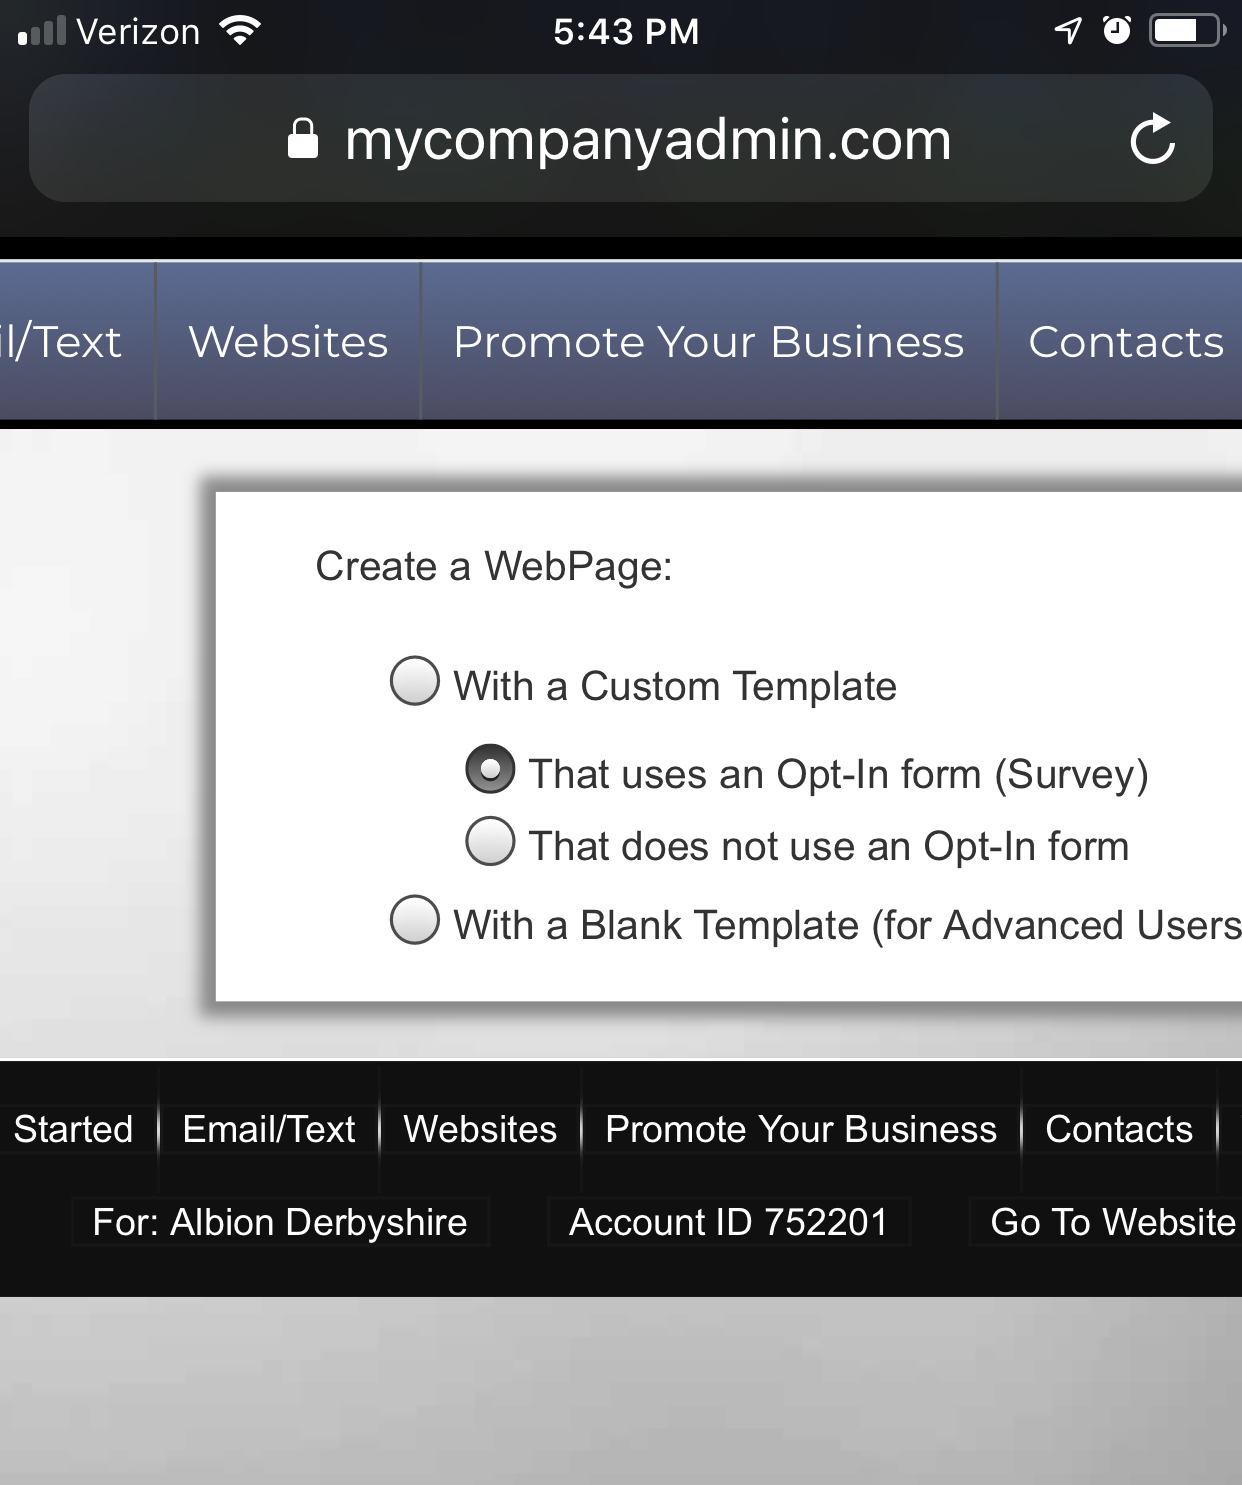
But this time click “with Custom Template” and then “that uses Opt in form”.
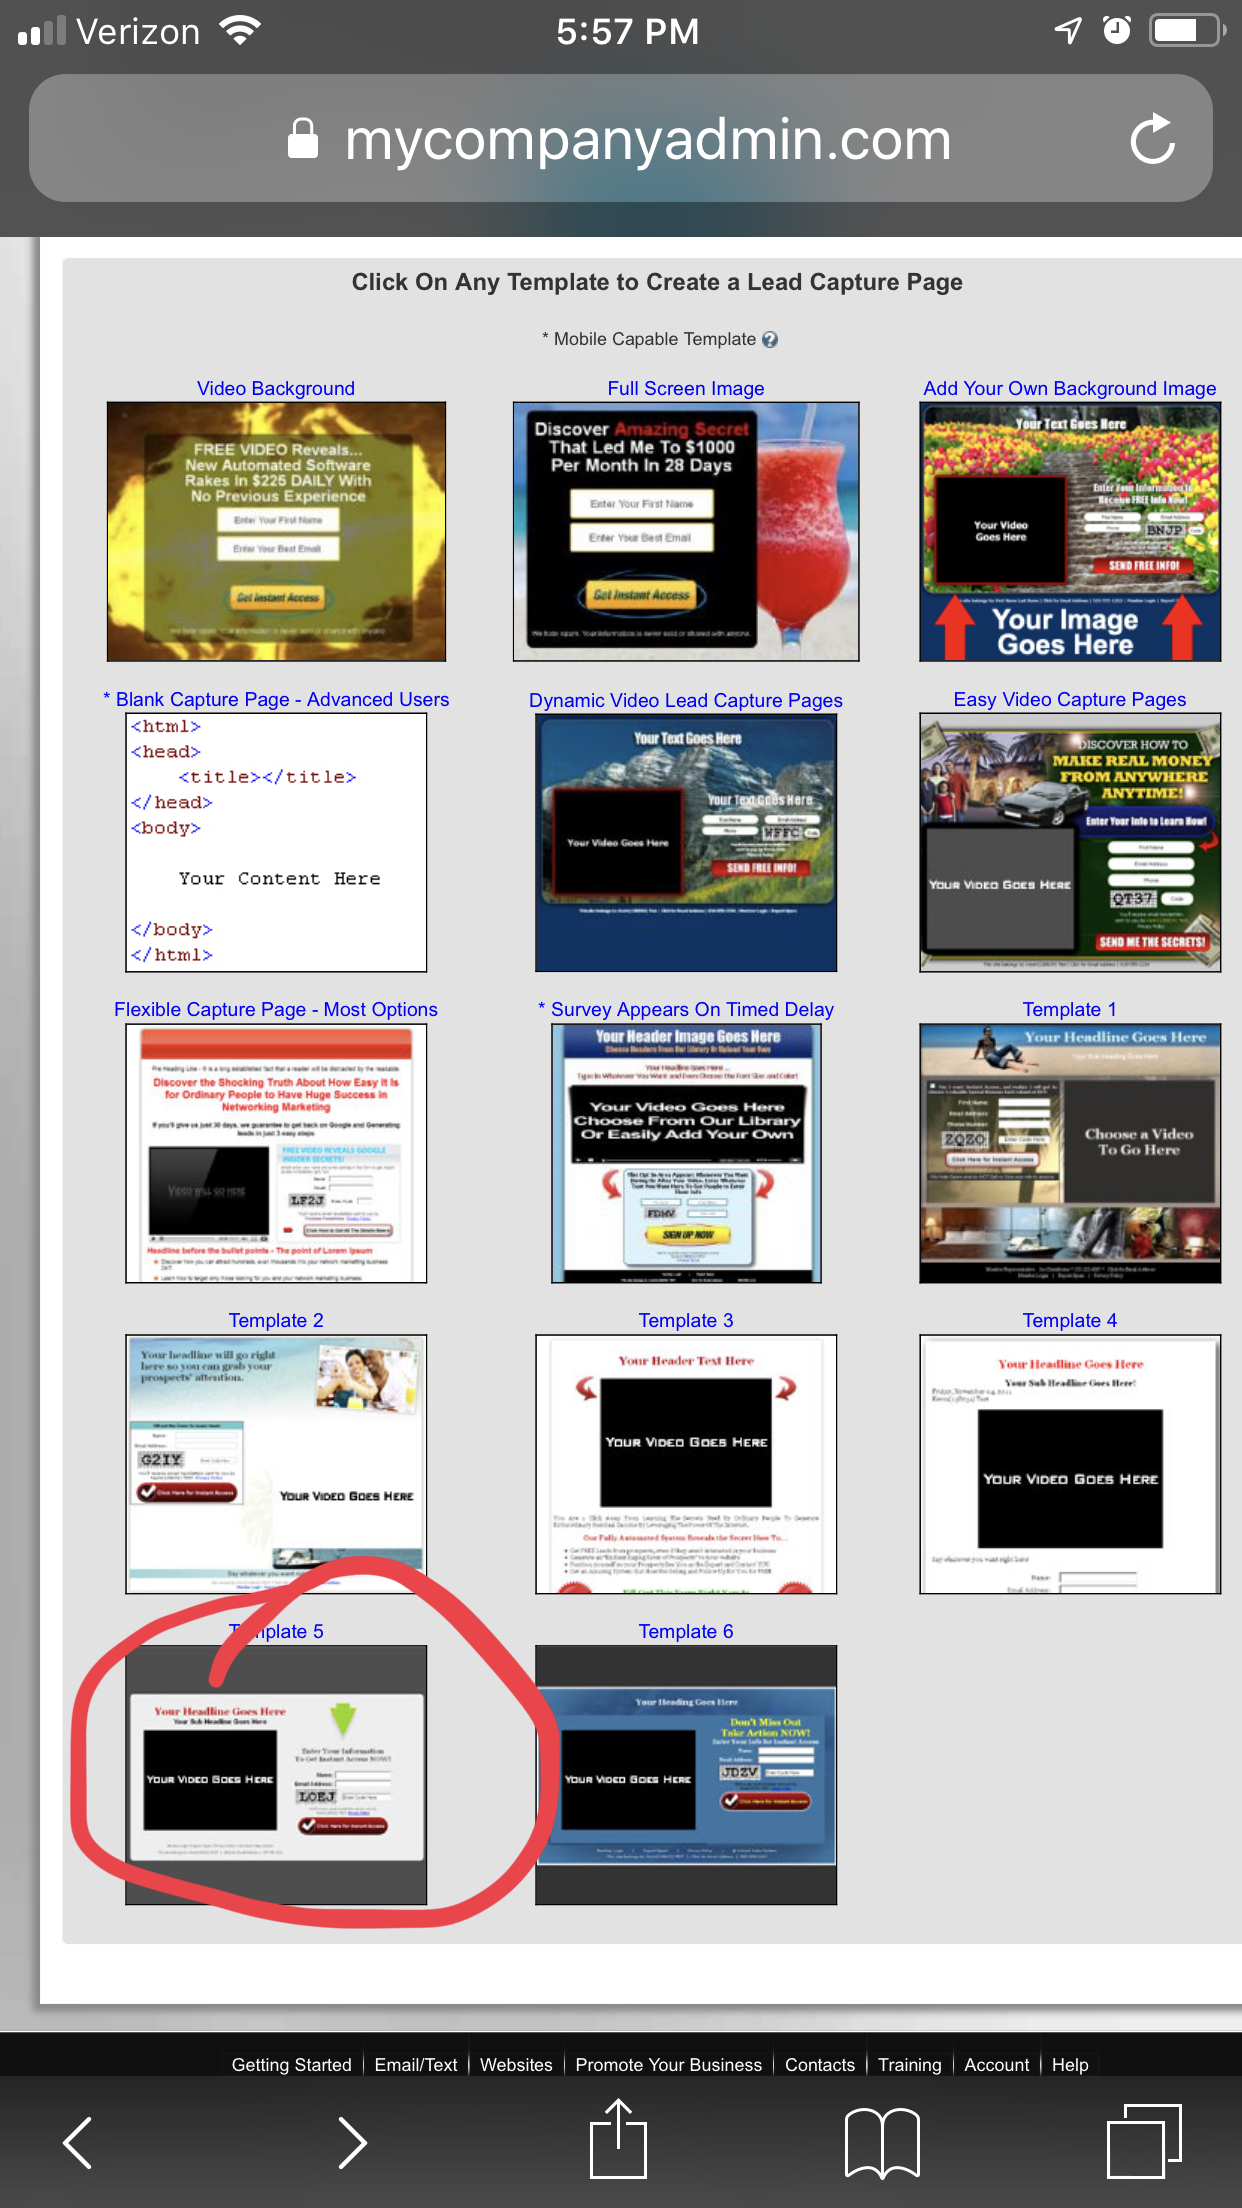
Then choose which page you want to use (I suggest this one).
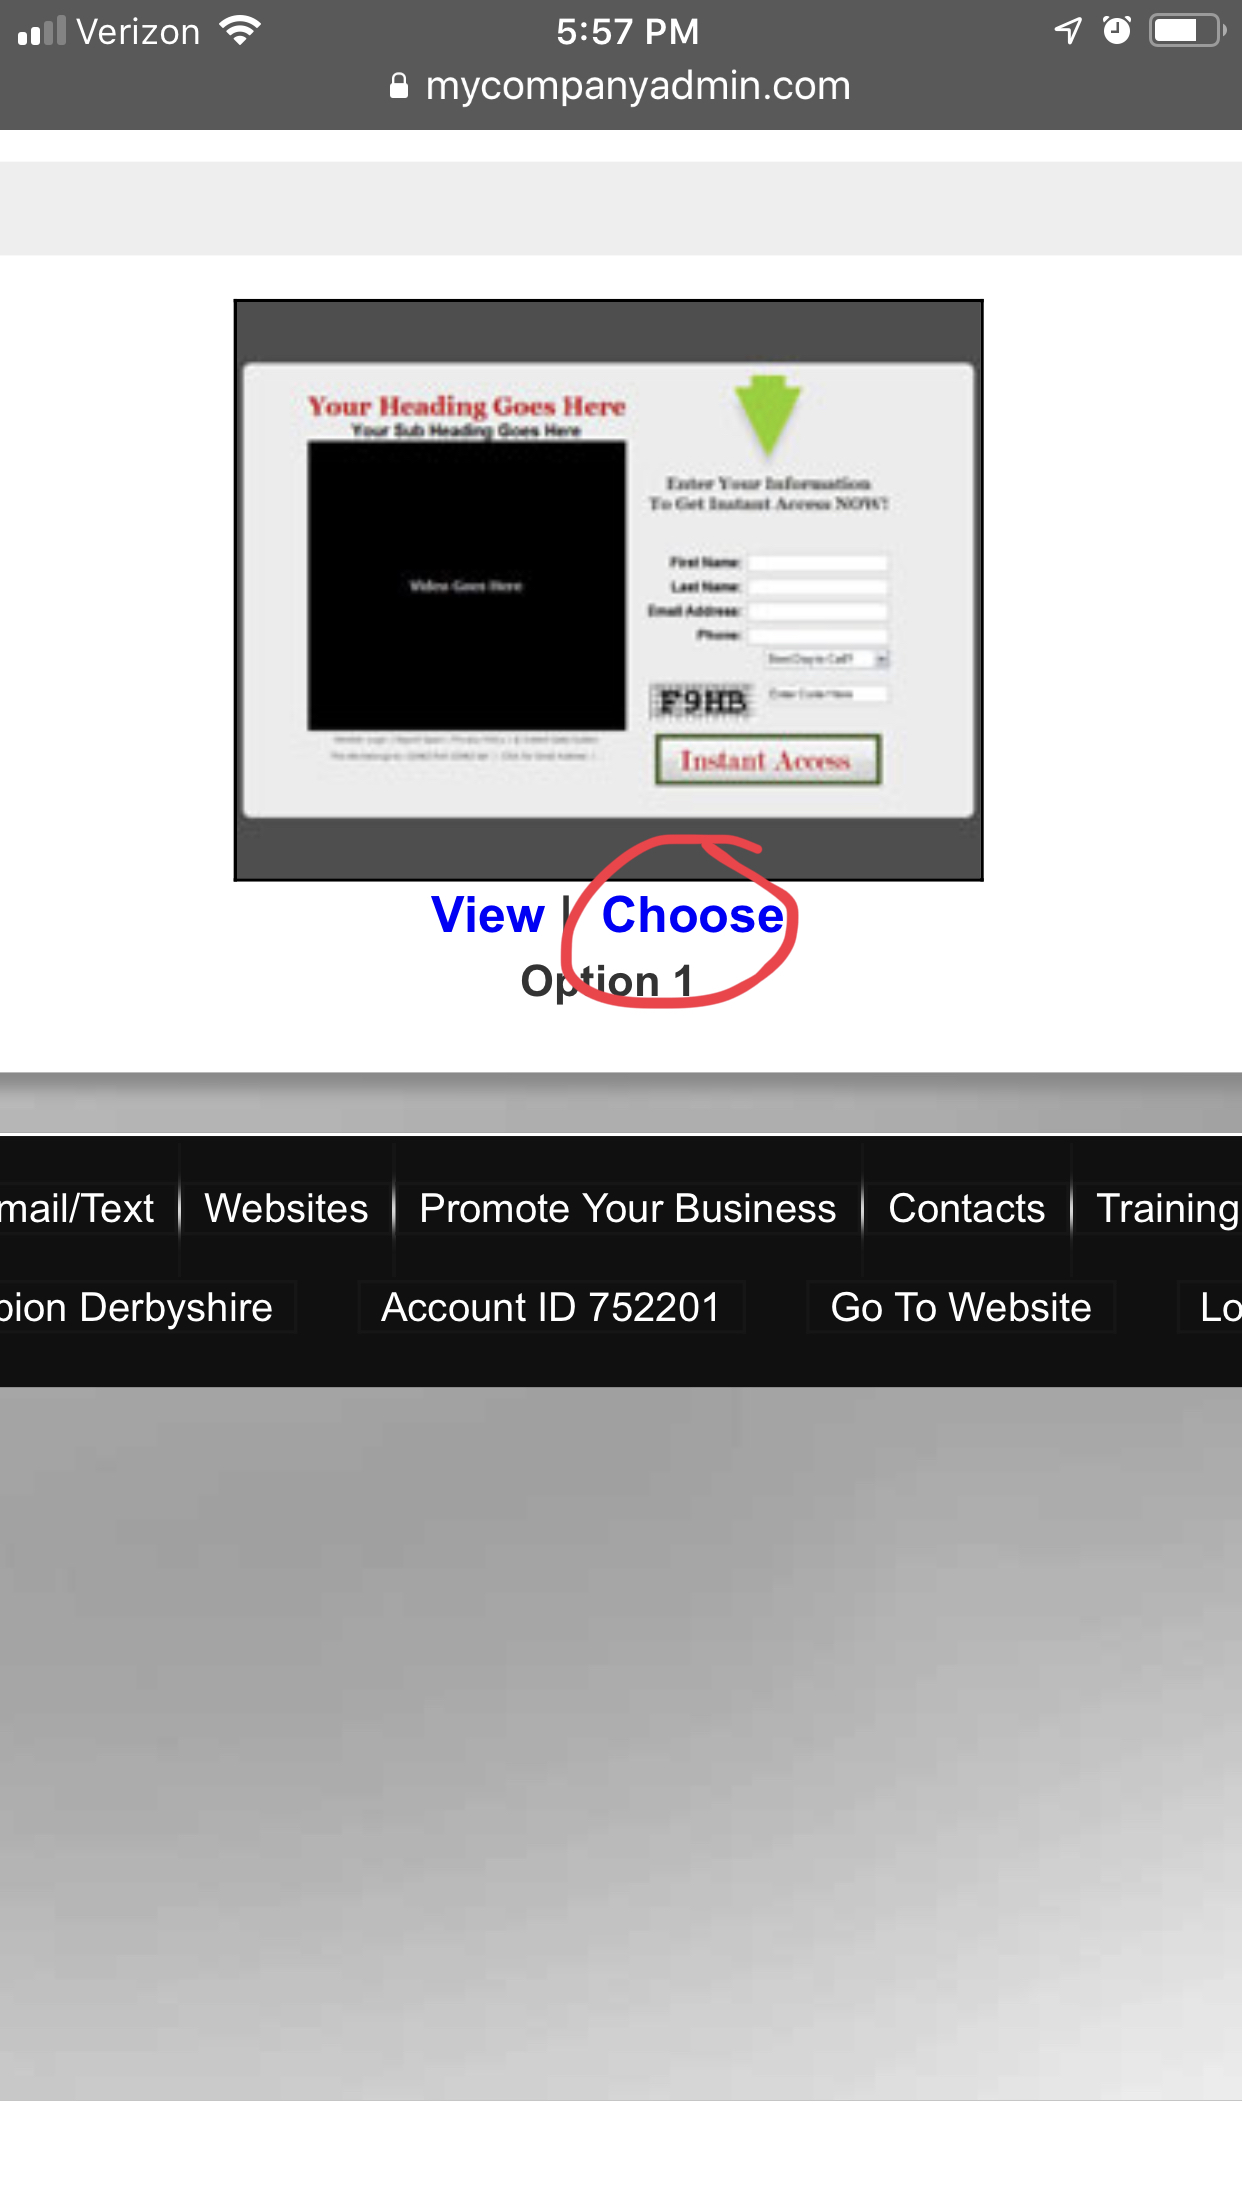
Then choose the page when it comes up.
You will then come back to the same pages I showed you before and do the same as you did before (except this time at the very bottom of the screen where is says Step 5, you can add an affiliate landing page URL such as your replicated GDI site or a page on your BLOG or any funnel you create with PLS. This is the page people will go to AFTER they subscribe to your opt in page you are now making.
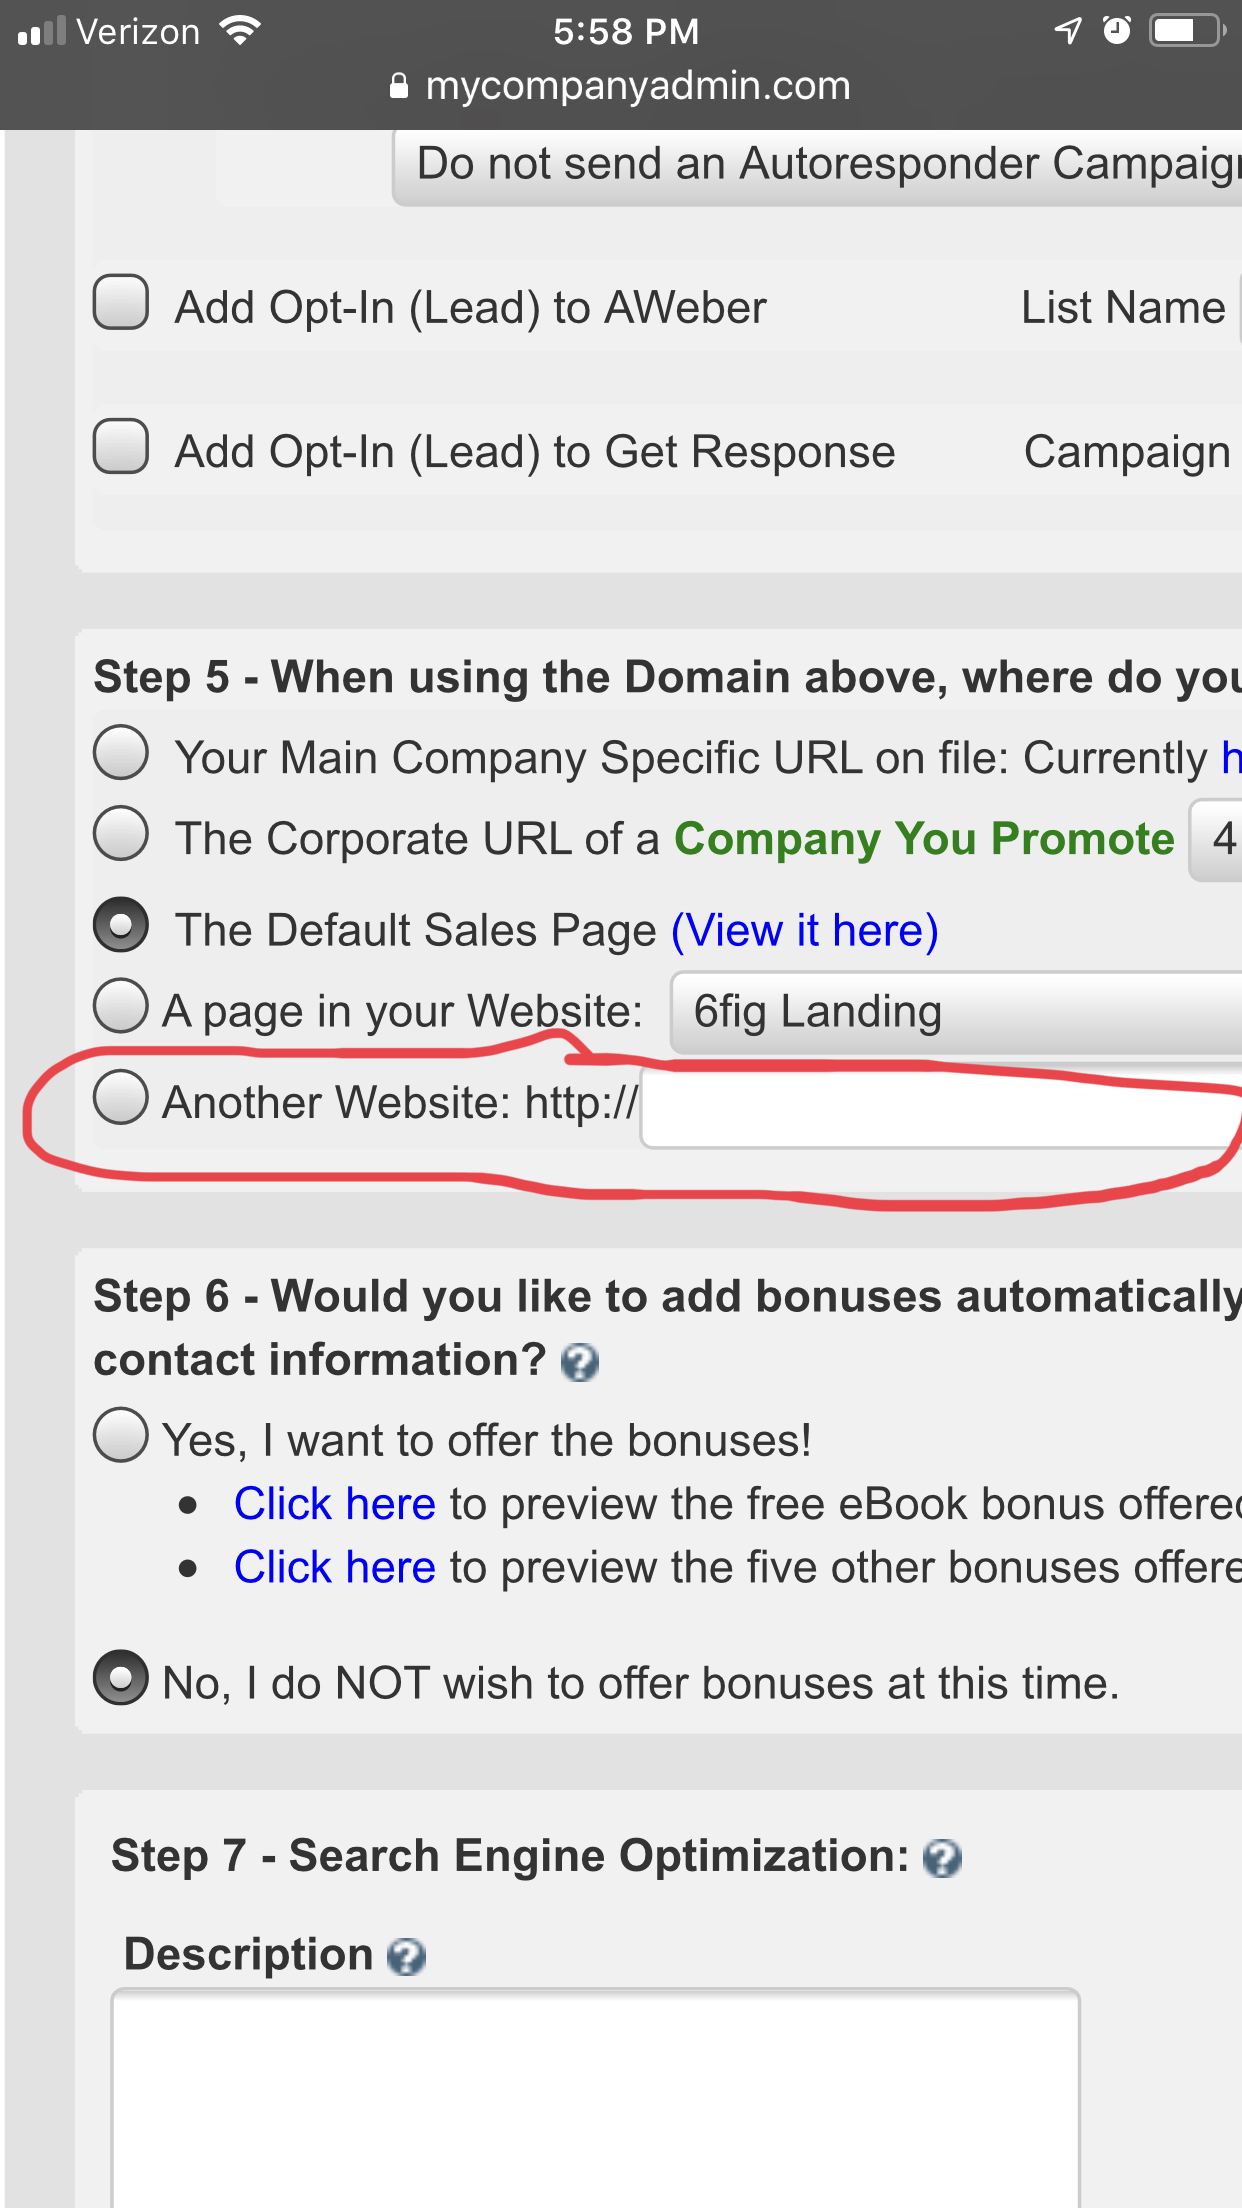
Add any landing page you want. This is where it will take the person after they subscribe to your page. Then save at the bottom of the page.
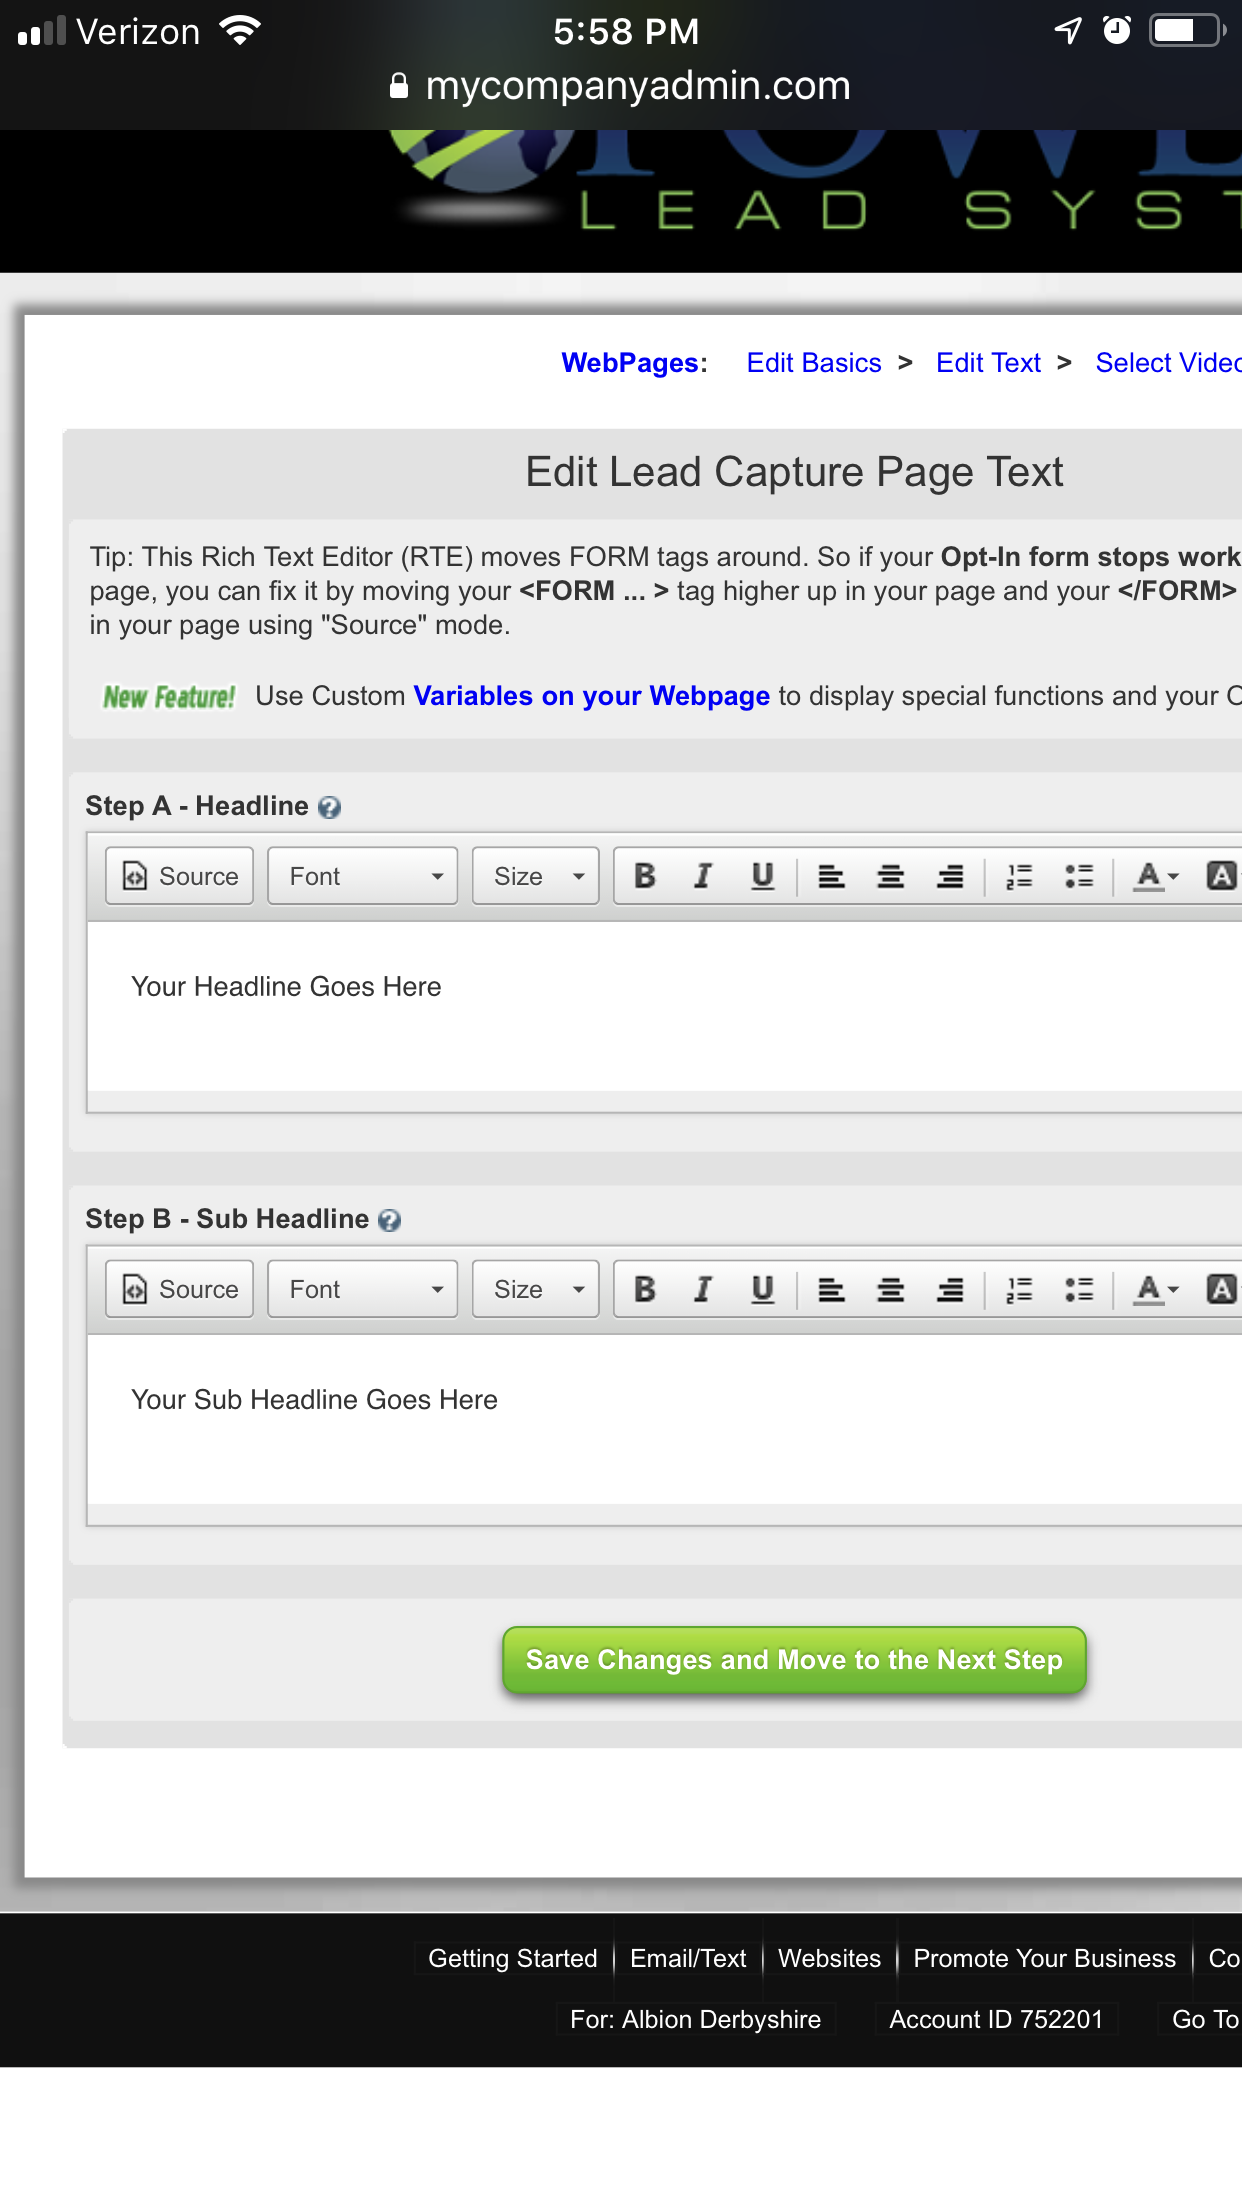
Then add what you want to the text of the page. You can say “Add your Email Now!” or Subscribe Now For More Details” etc…
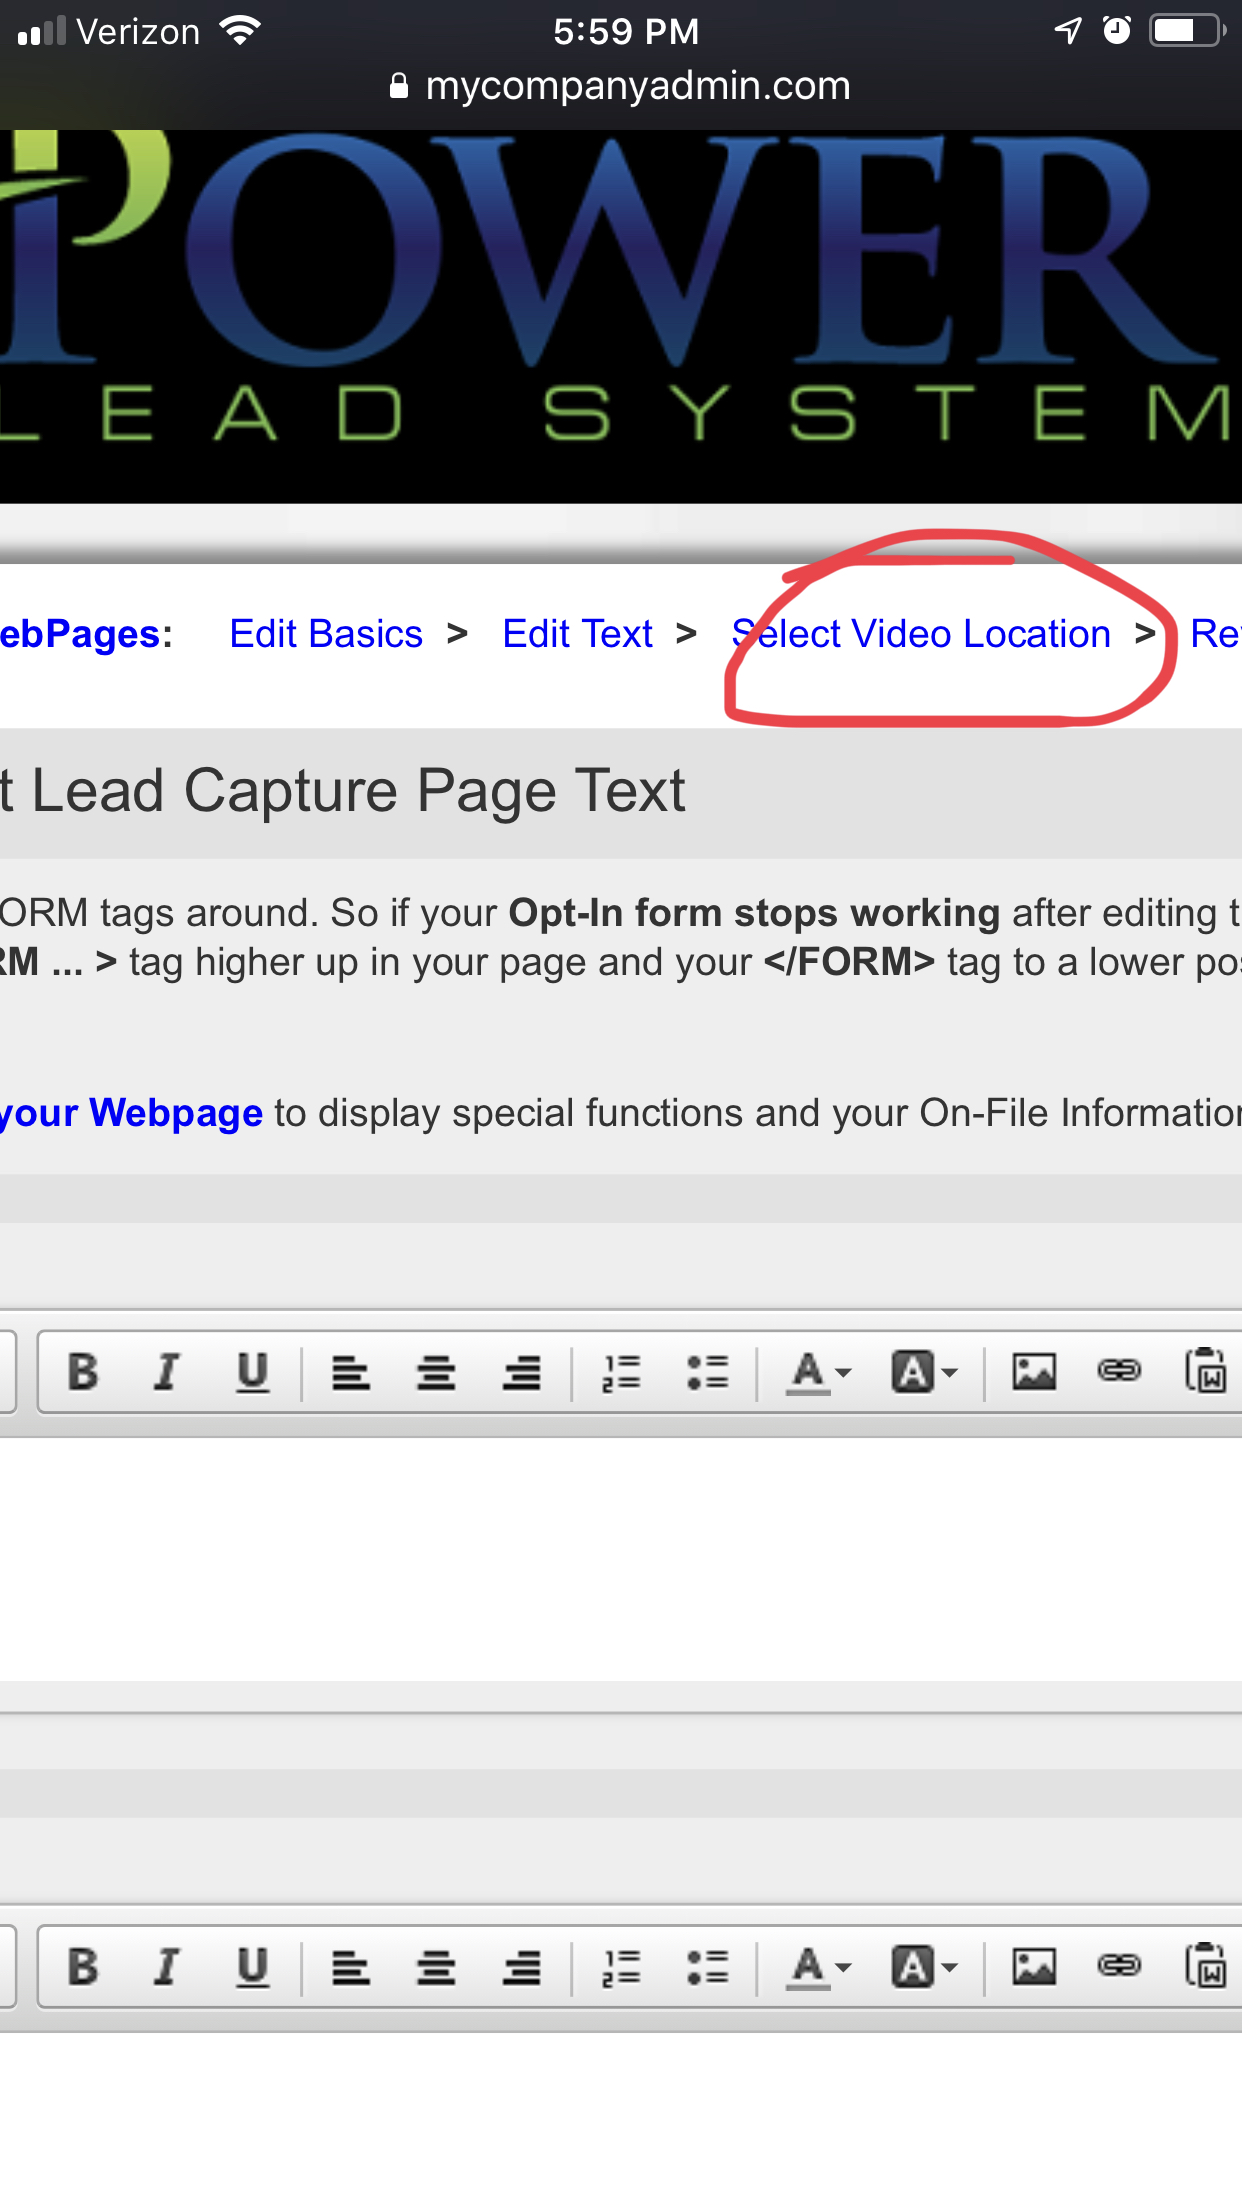
Then click on “select video location” (don’t worry – you won’t have to add a video).
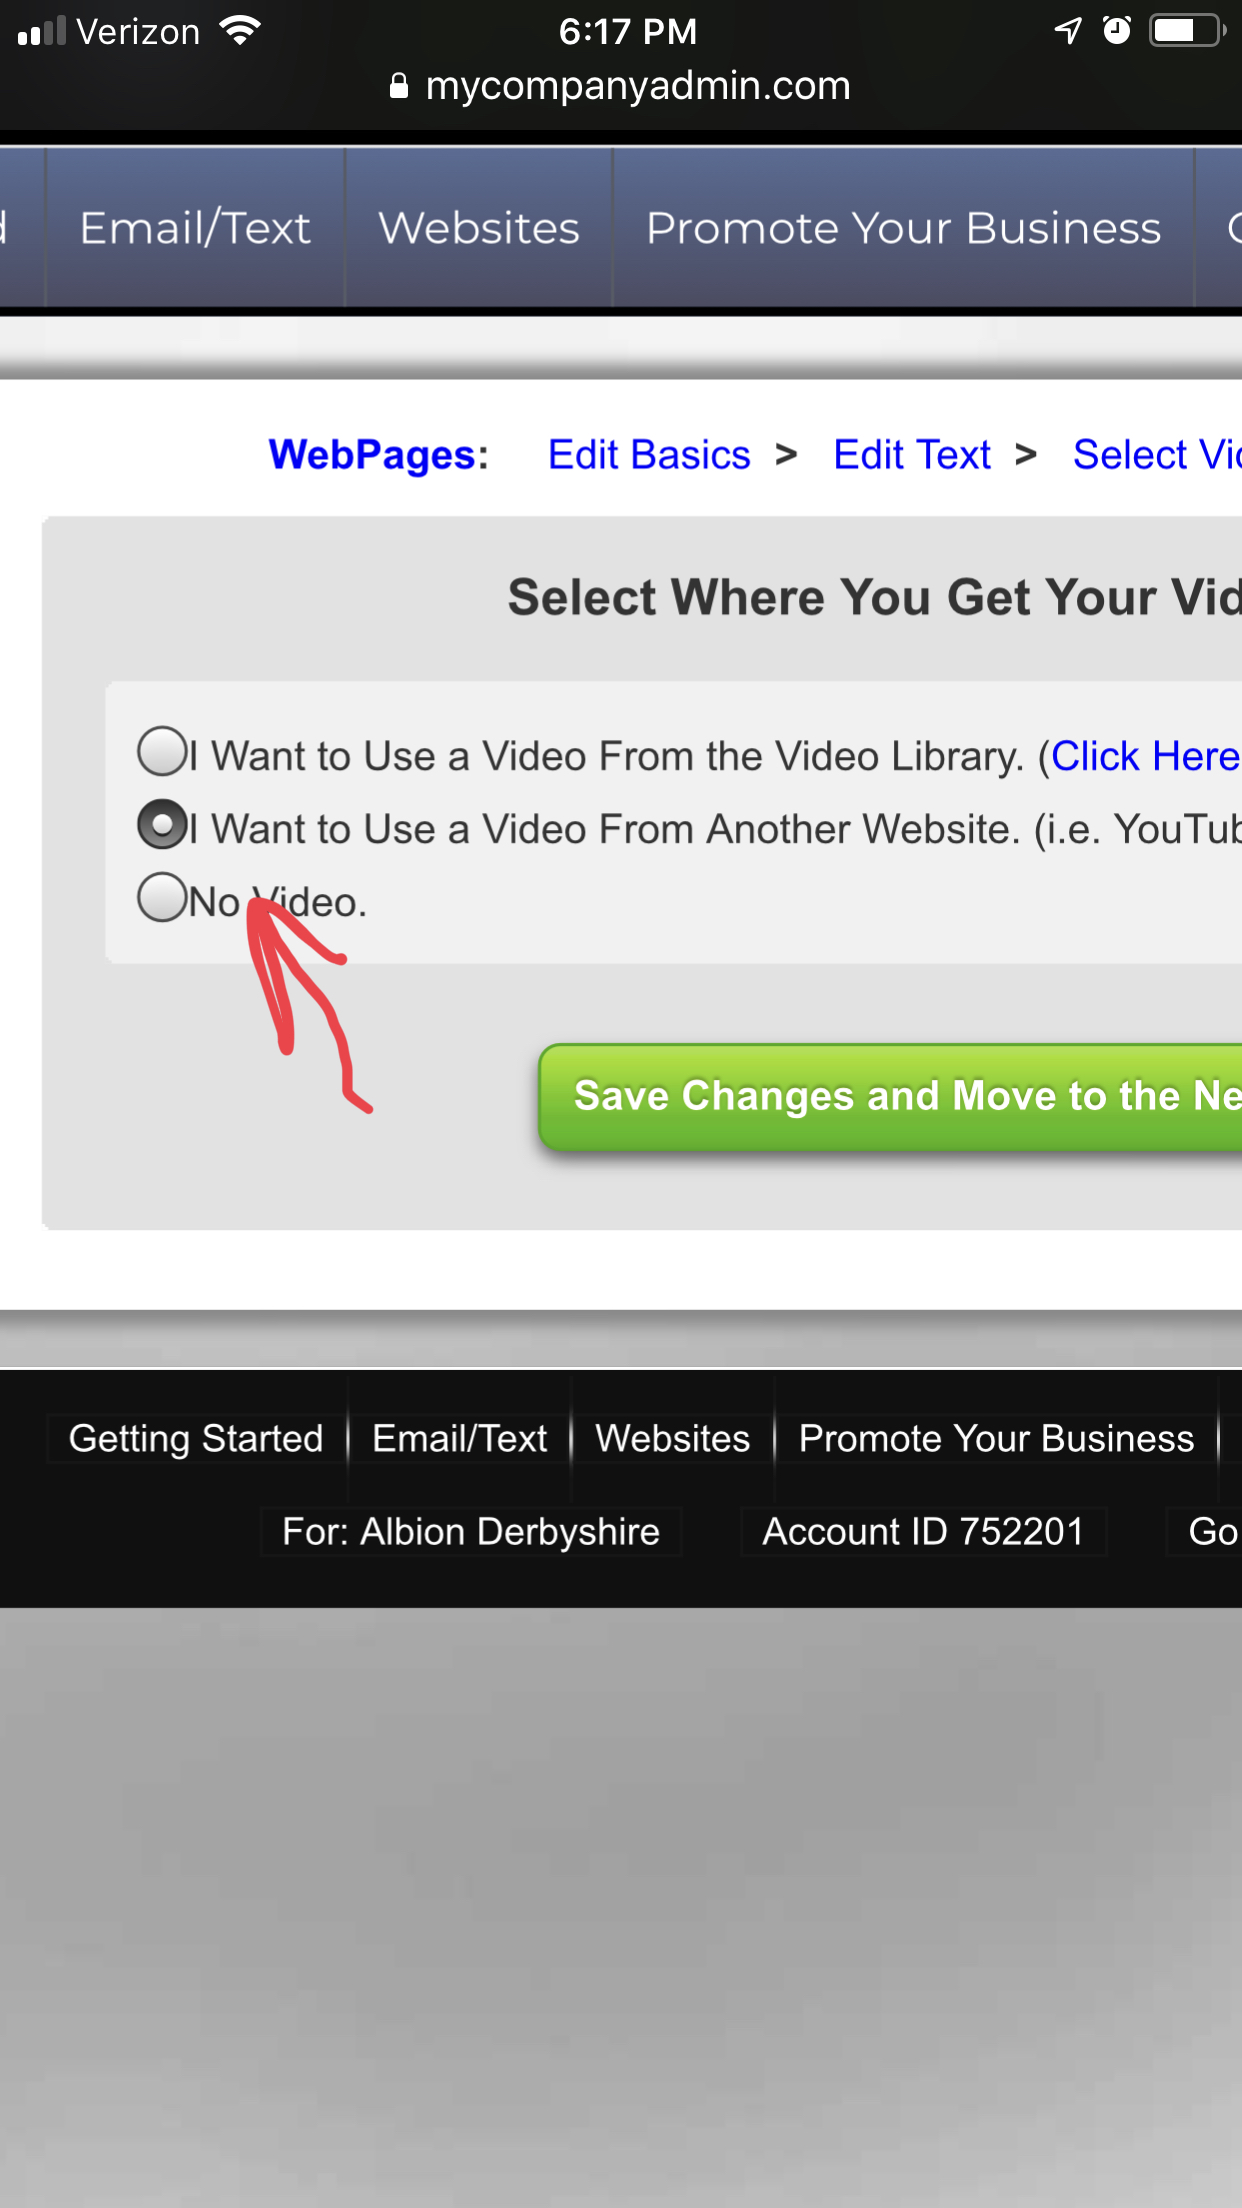
Click the button that says “Want to use a video from another website”
Now go back to your blog and your html should still be up. Then instead of highlighting only the URL, highlight the whole html code surrounding and encompassing the link. Then copy it and paste it into your PLS page (the area where you place the video)
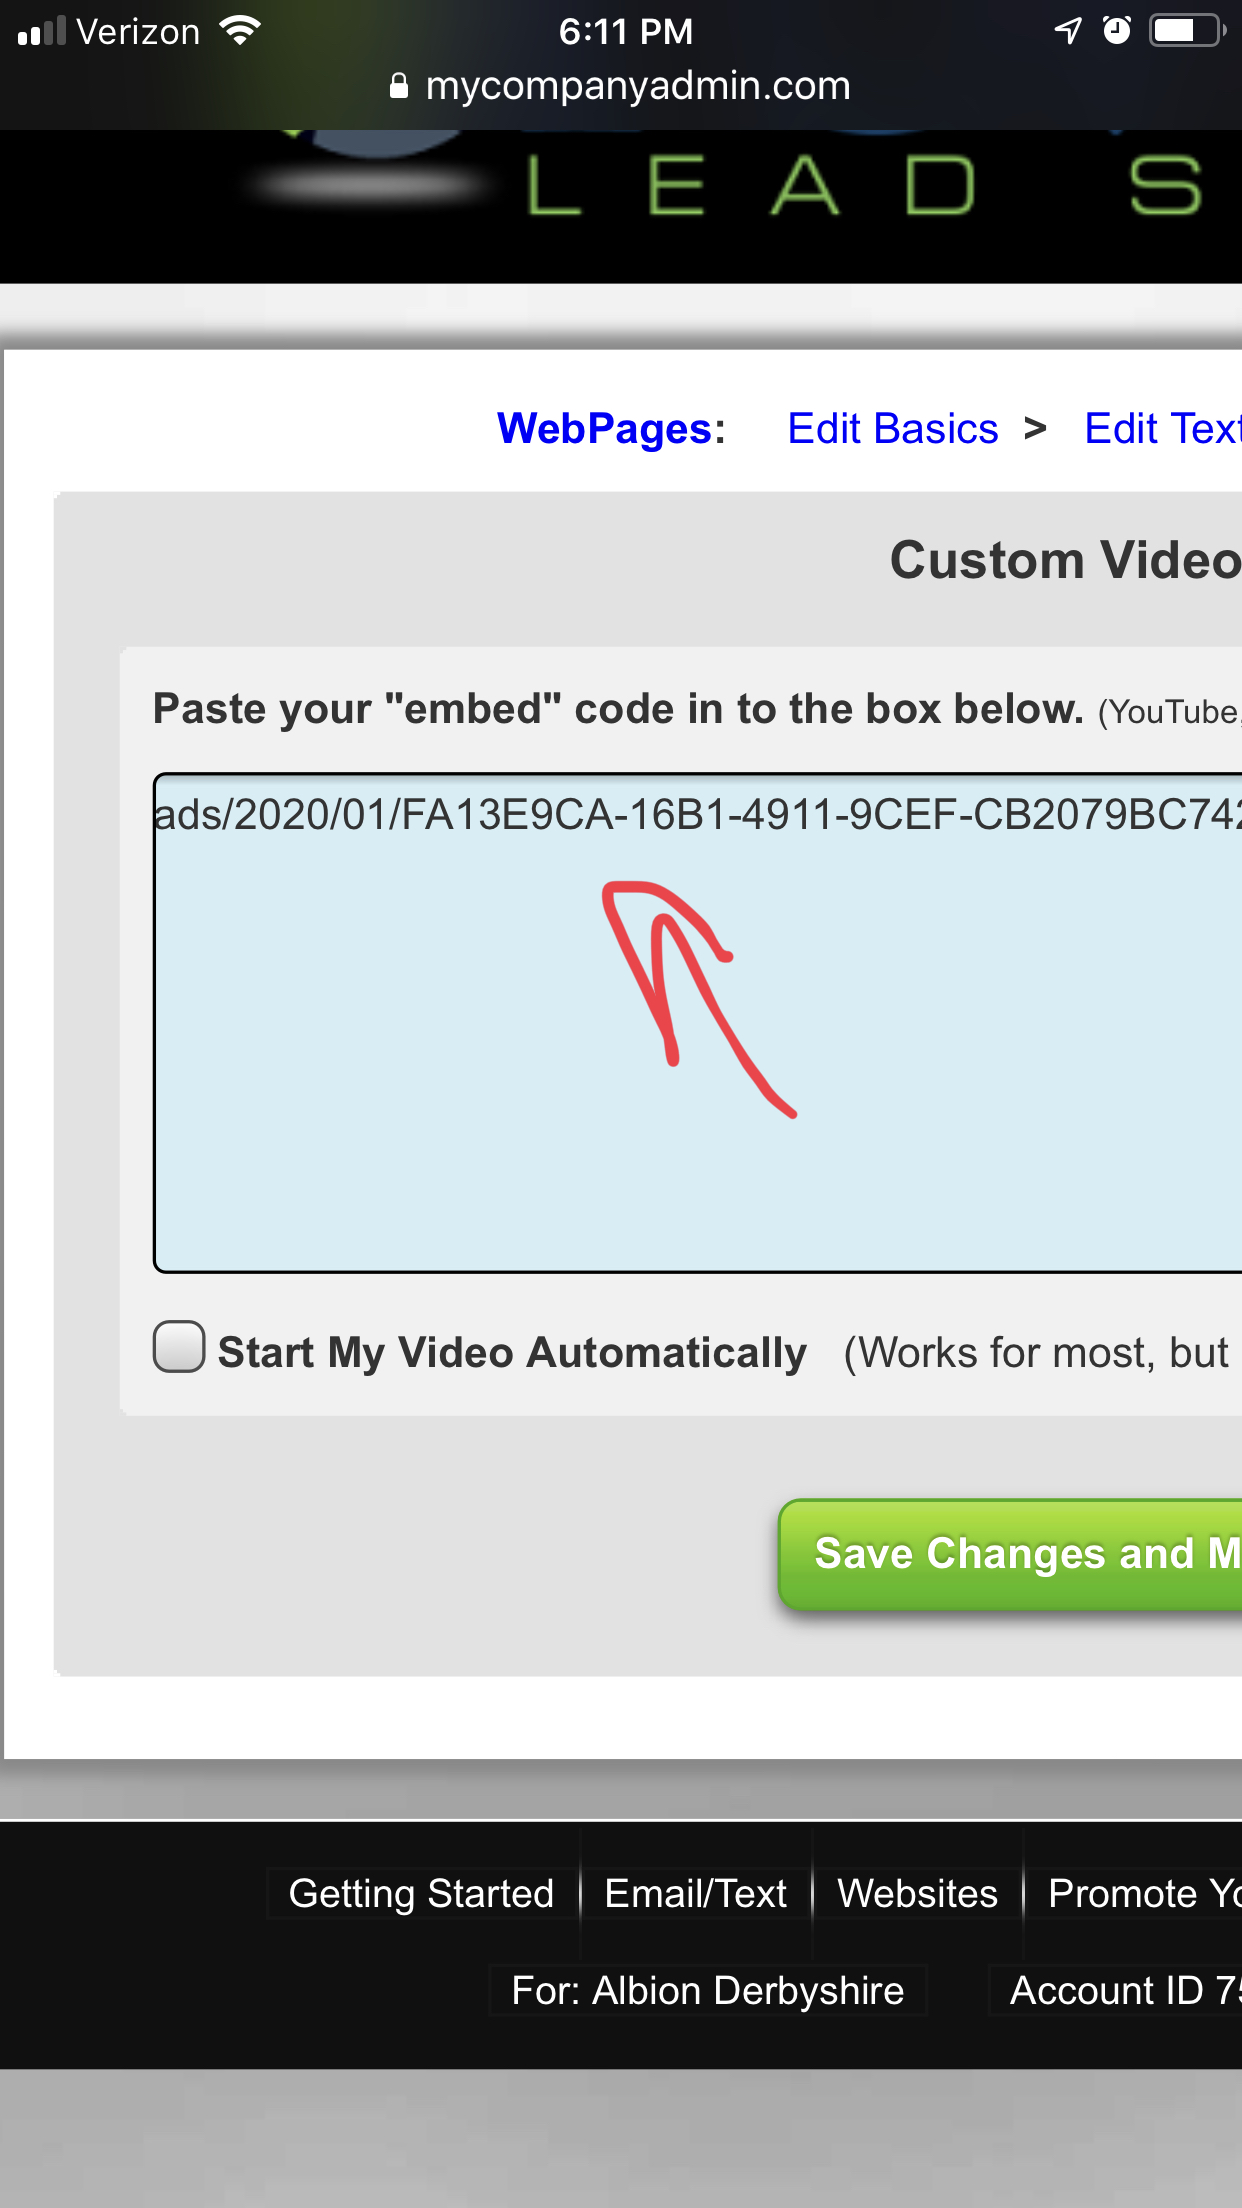
Add the html code to where the video code would normally go. Then press SAVE at the bottom and then VIEW your site. Hopefully it looks good.
Hopefully your page looks good. ✅
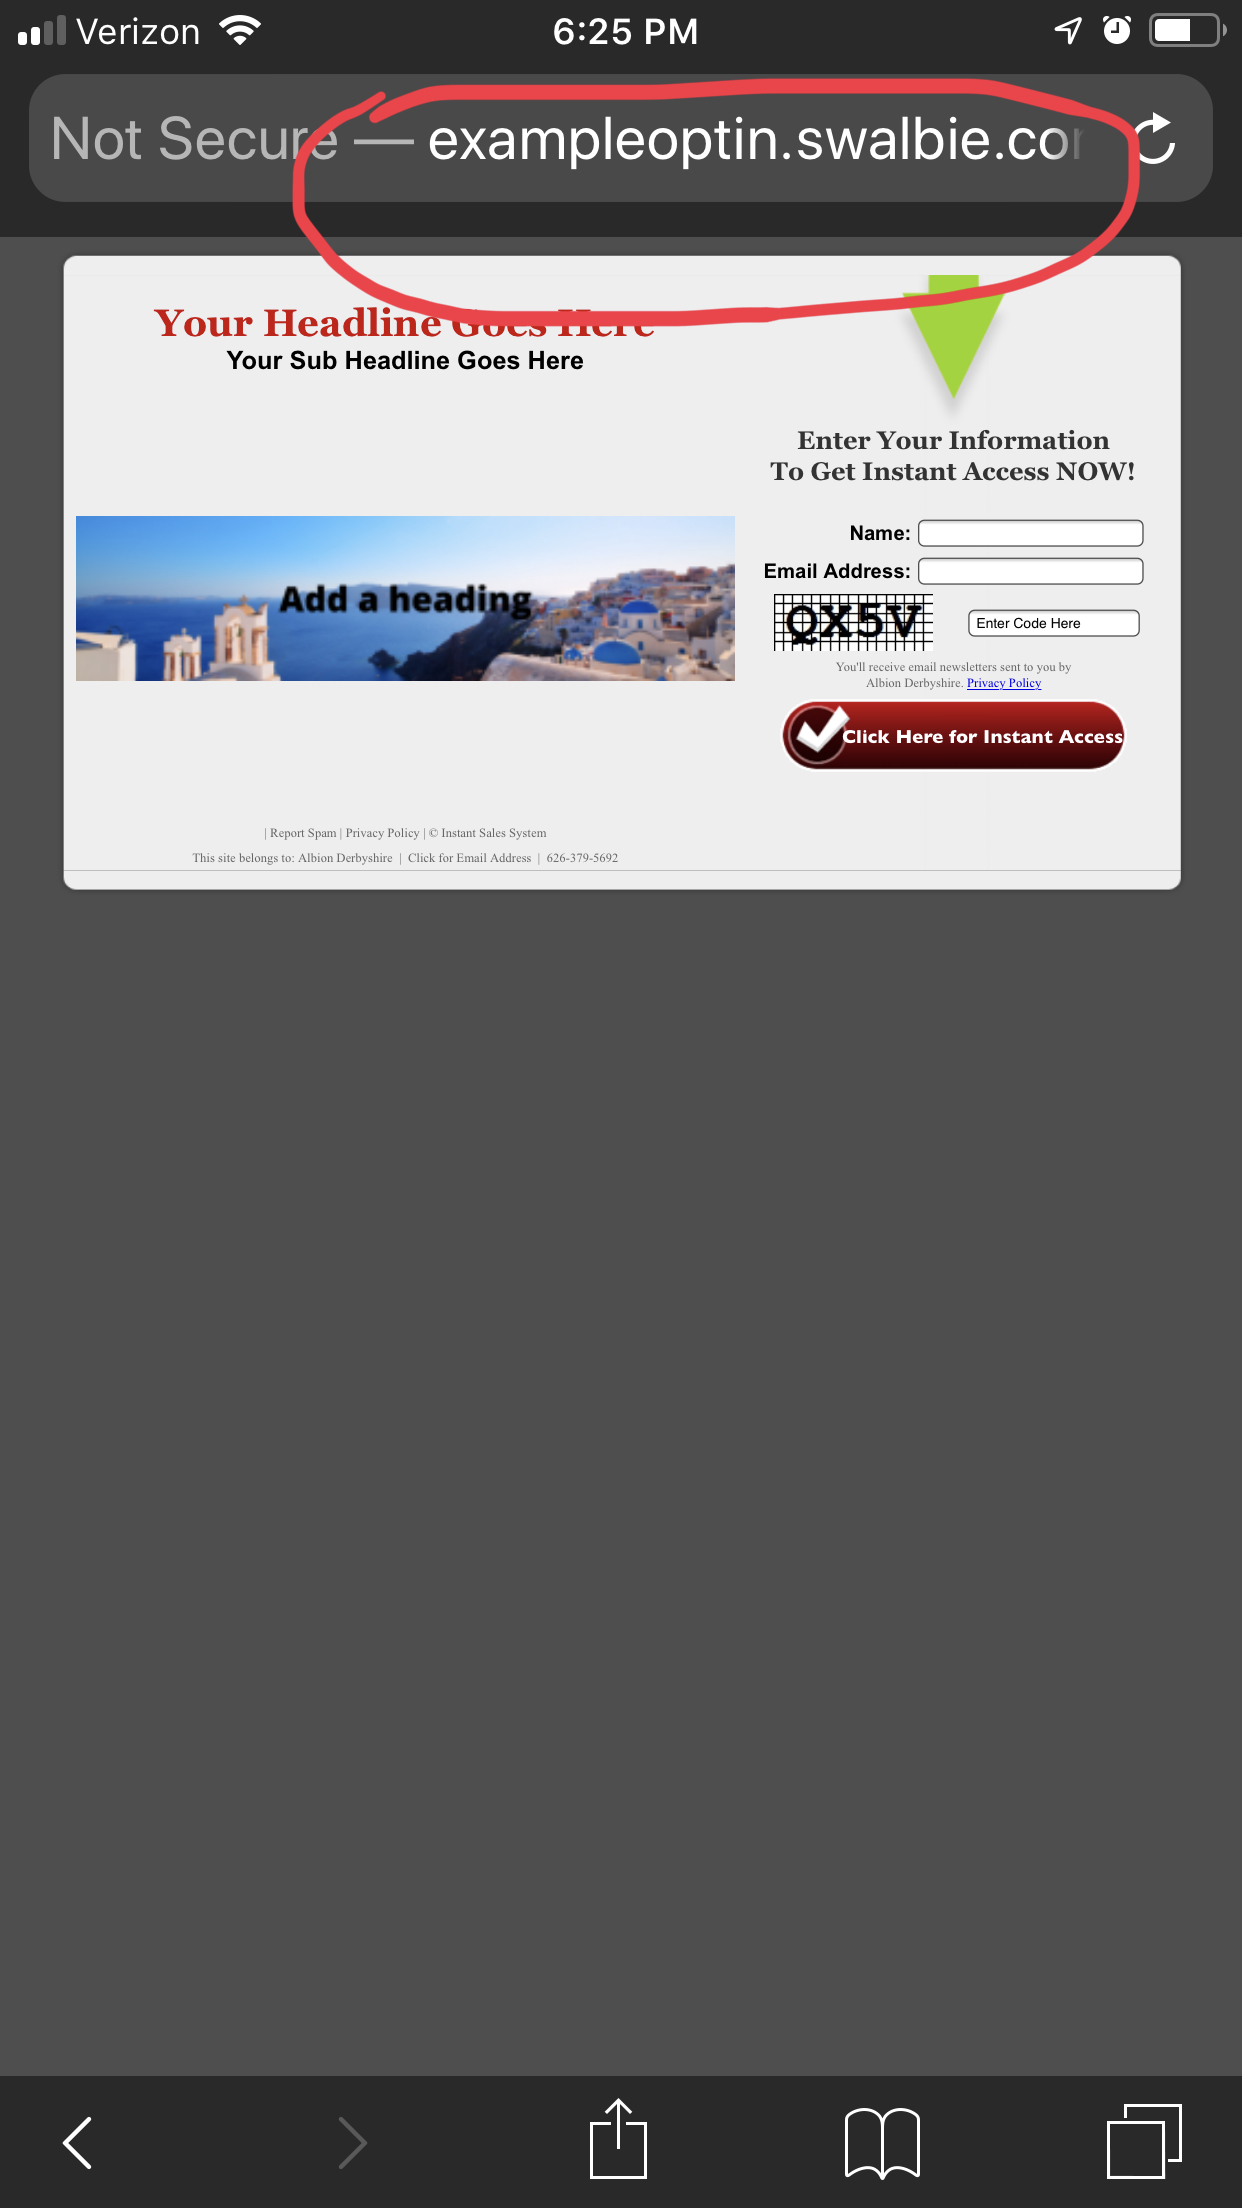
Then COPY your final opt in URL from the browser at the top of the page. You copied it right? Good. Don’t forget that you did this. You will understand in a few minutes when I tell you to paste. But don’t paste it anywhere yet.
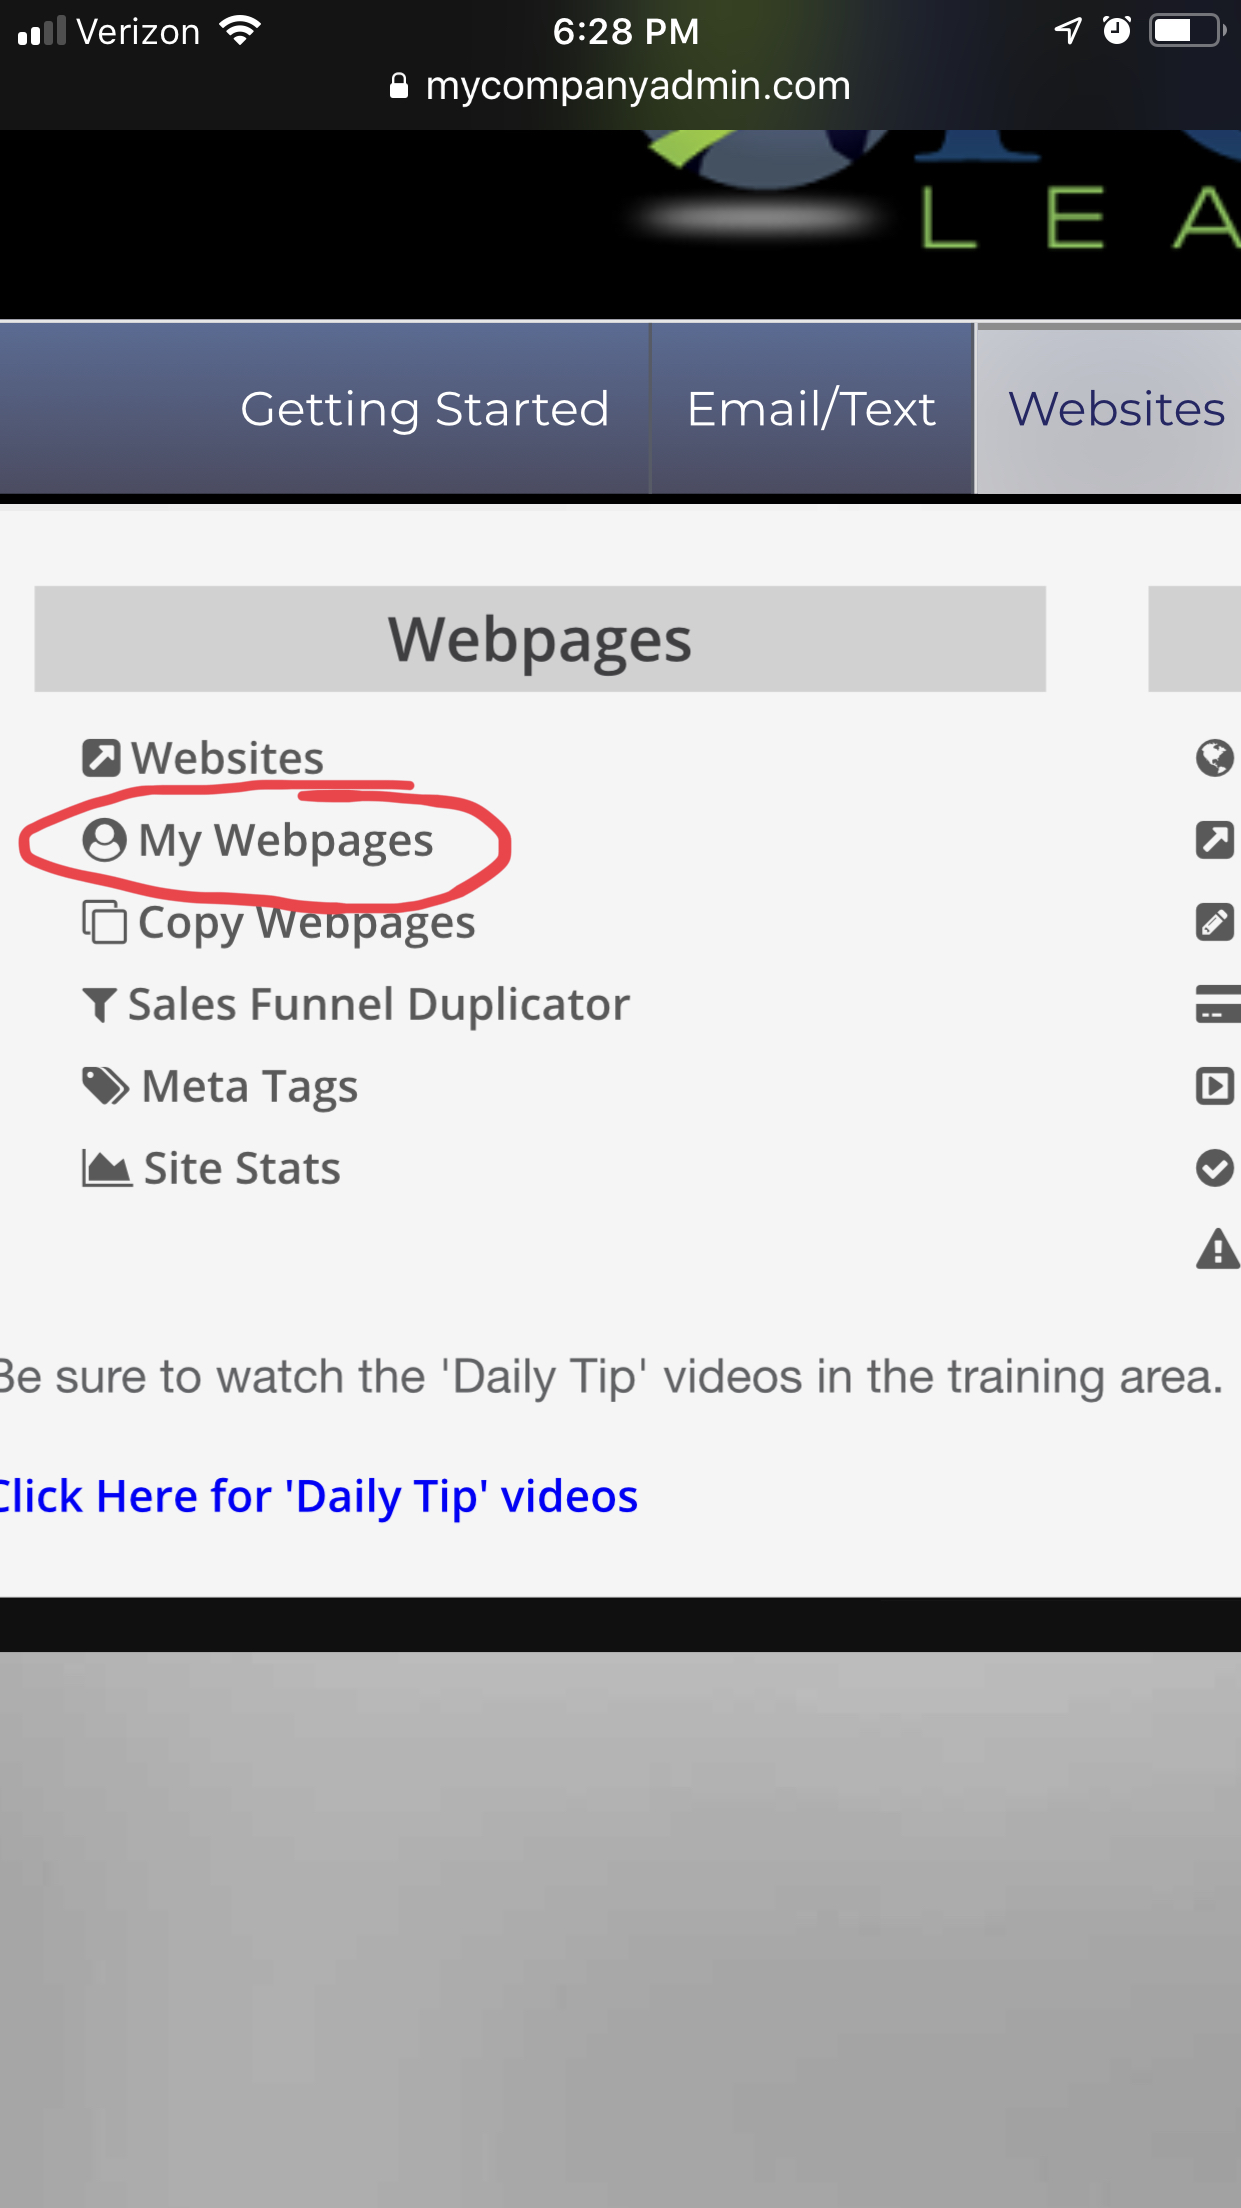
Then go back to “Websites” but this time go to “My webpages”.
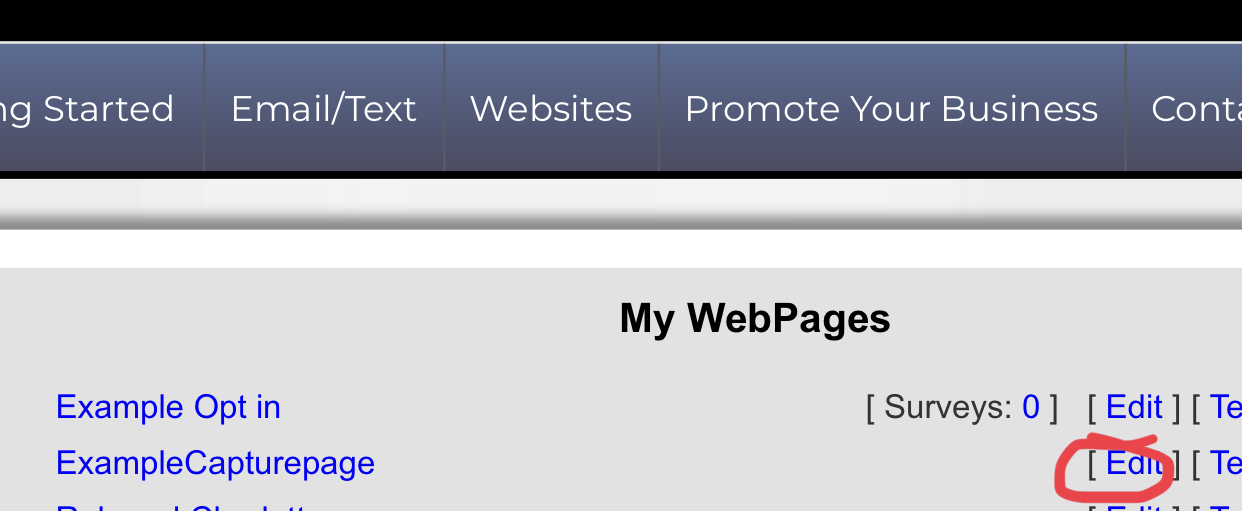
Find the first website you created without the opt in form (It will not say “Survey” near it). Then click the “edit” button.
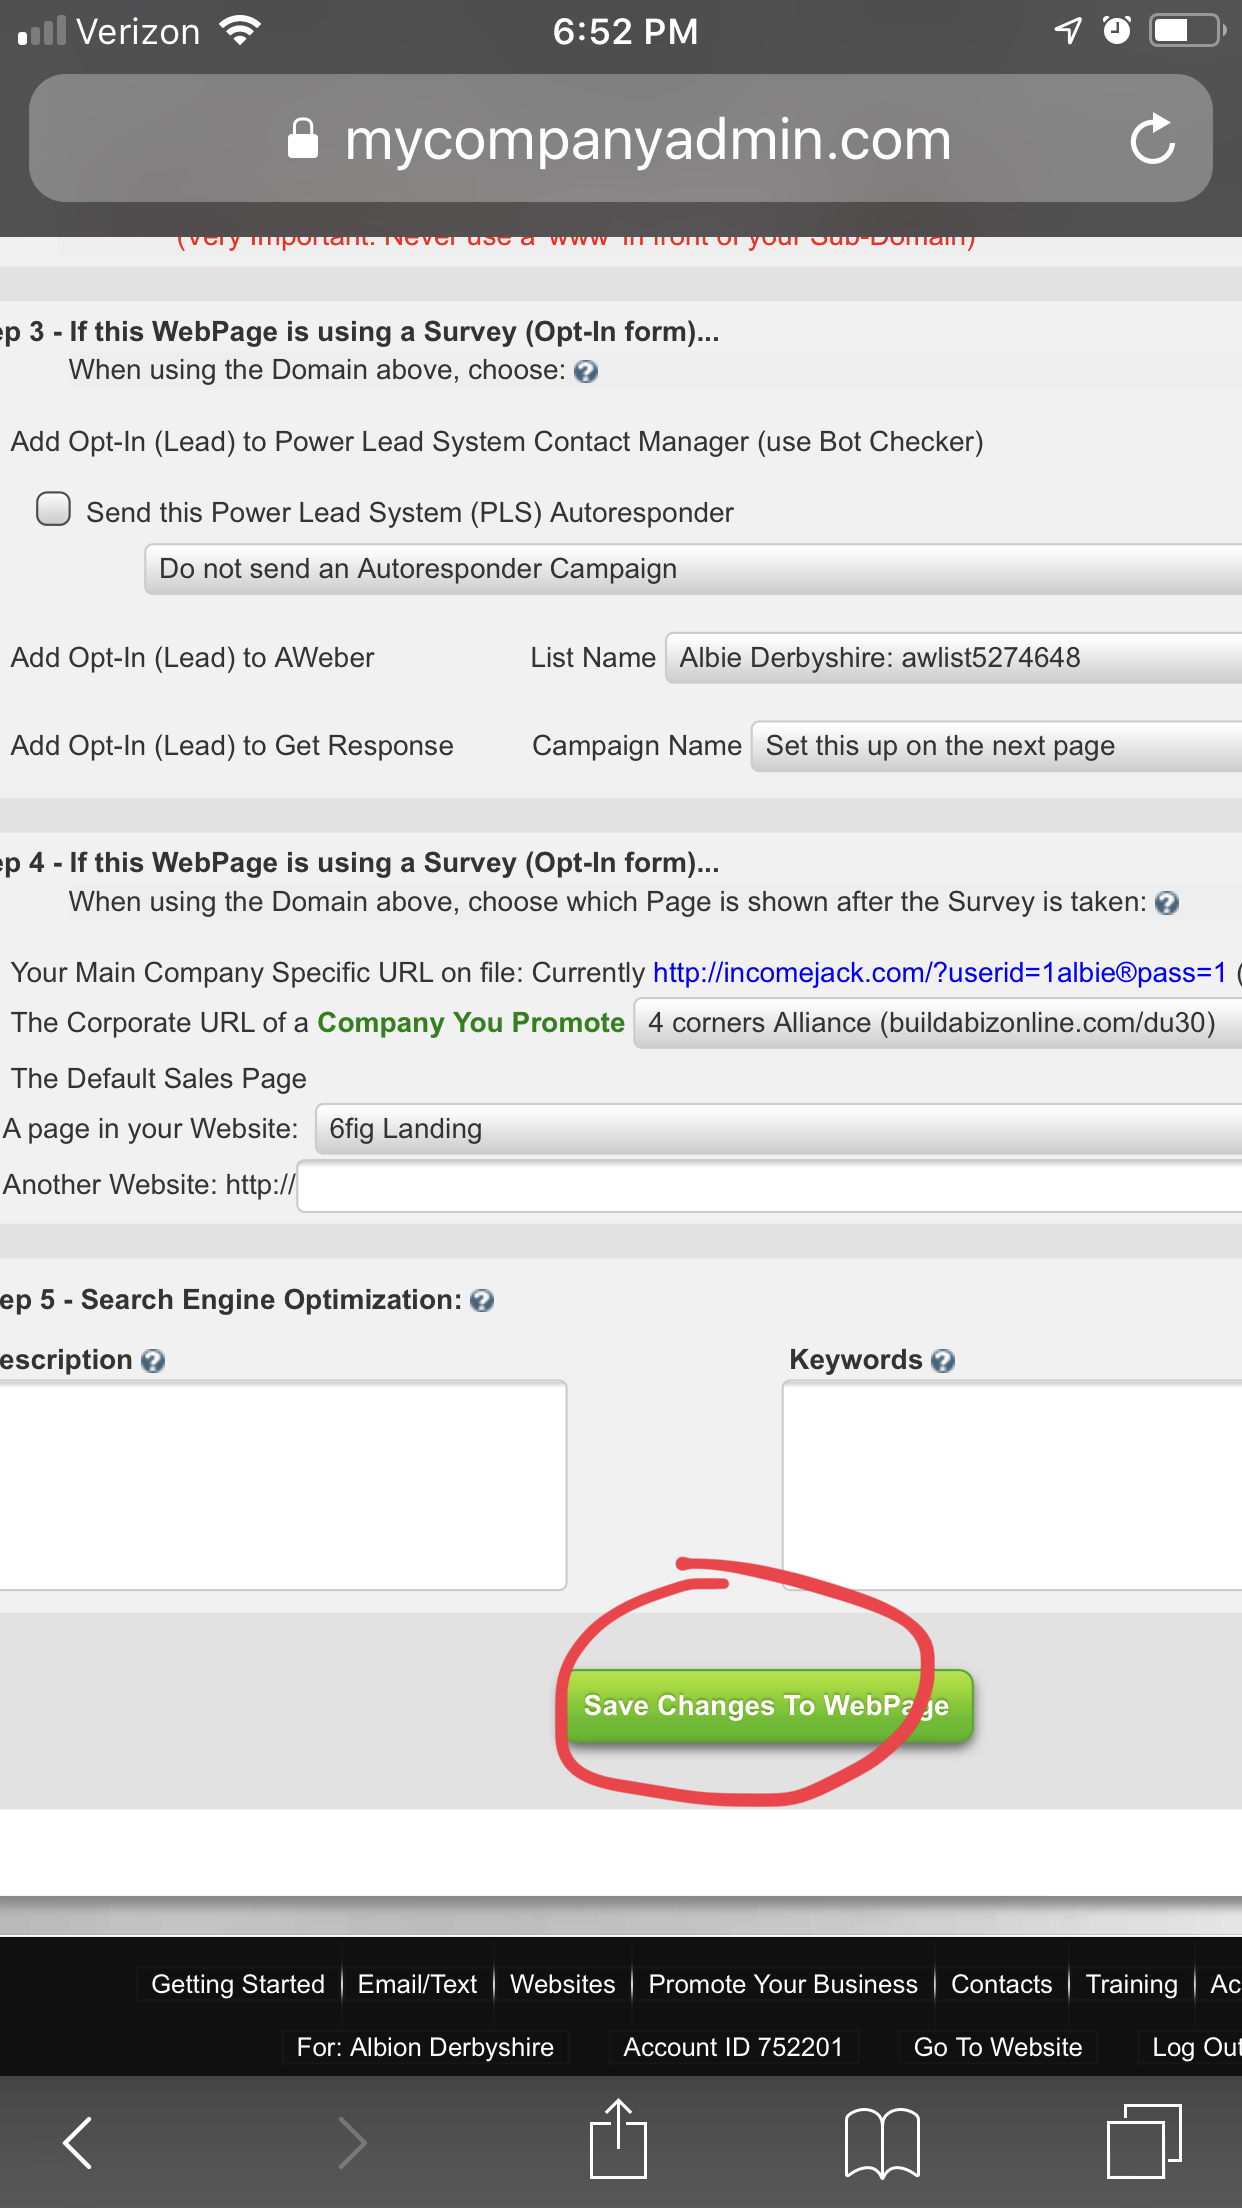
Now just go to the bottom of the page and press SAVE. Do this each time you come into this area because if you don’t, when you want to VIEW your website later, you won’t be able to.
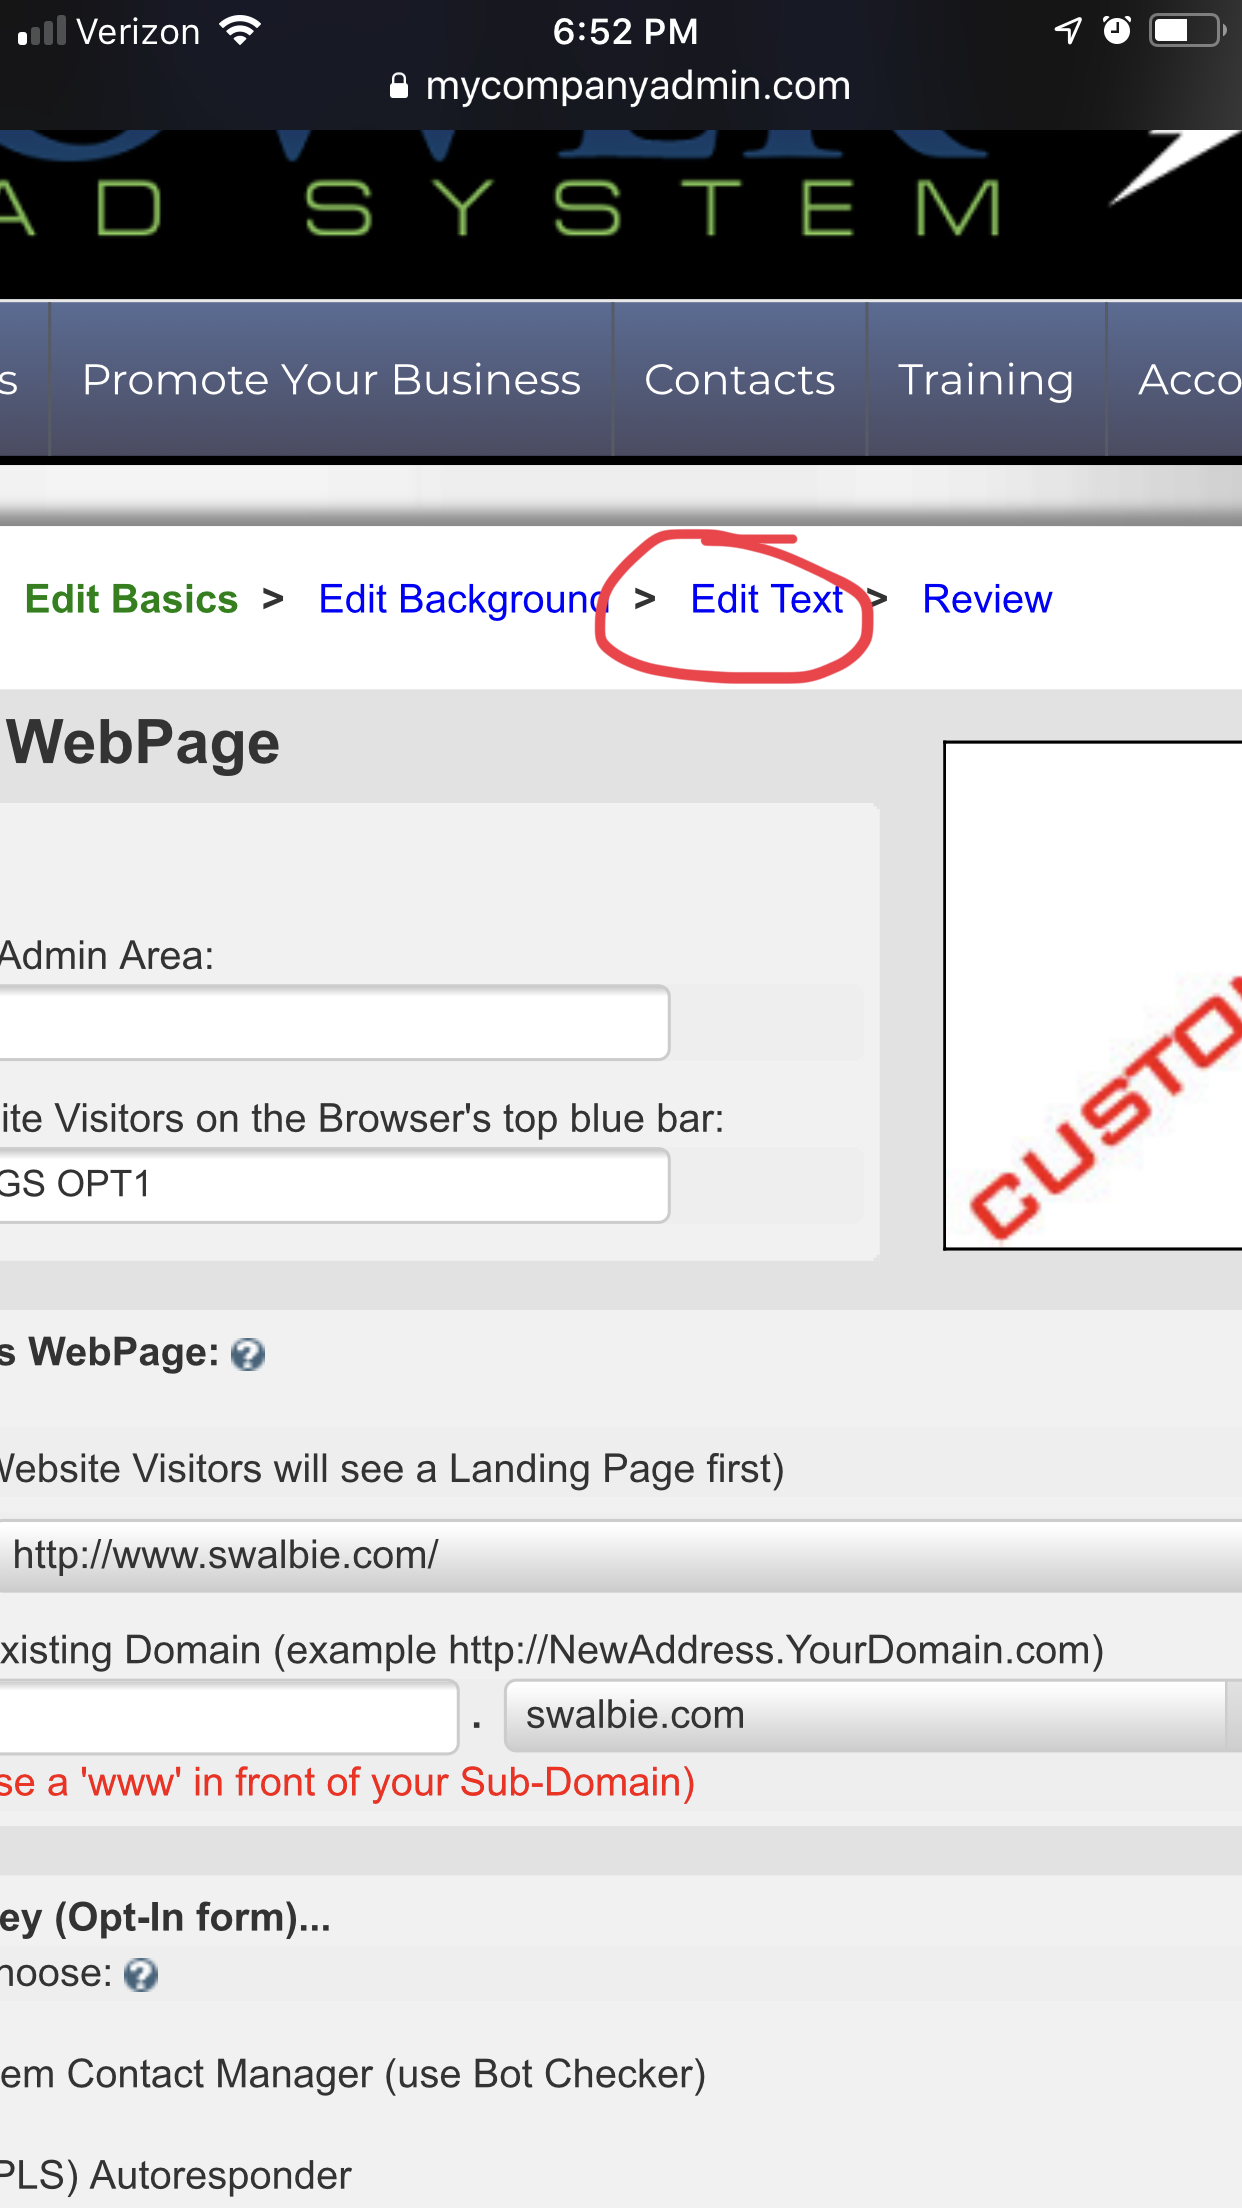
Now go to the “edit text” button.
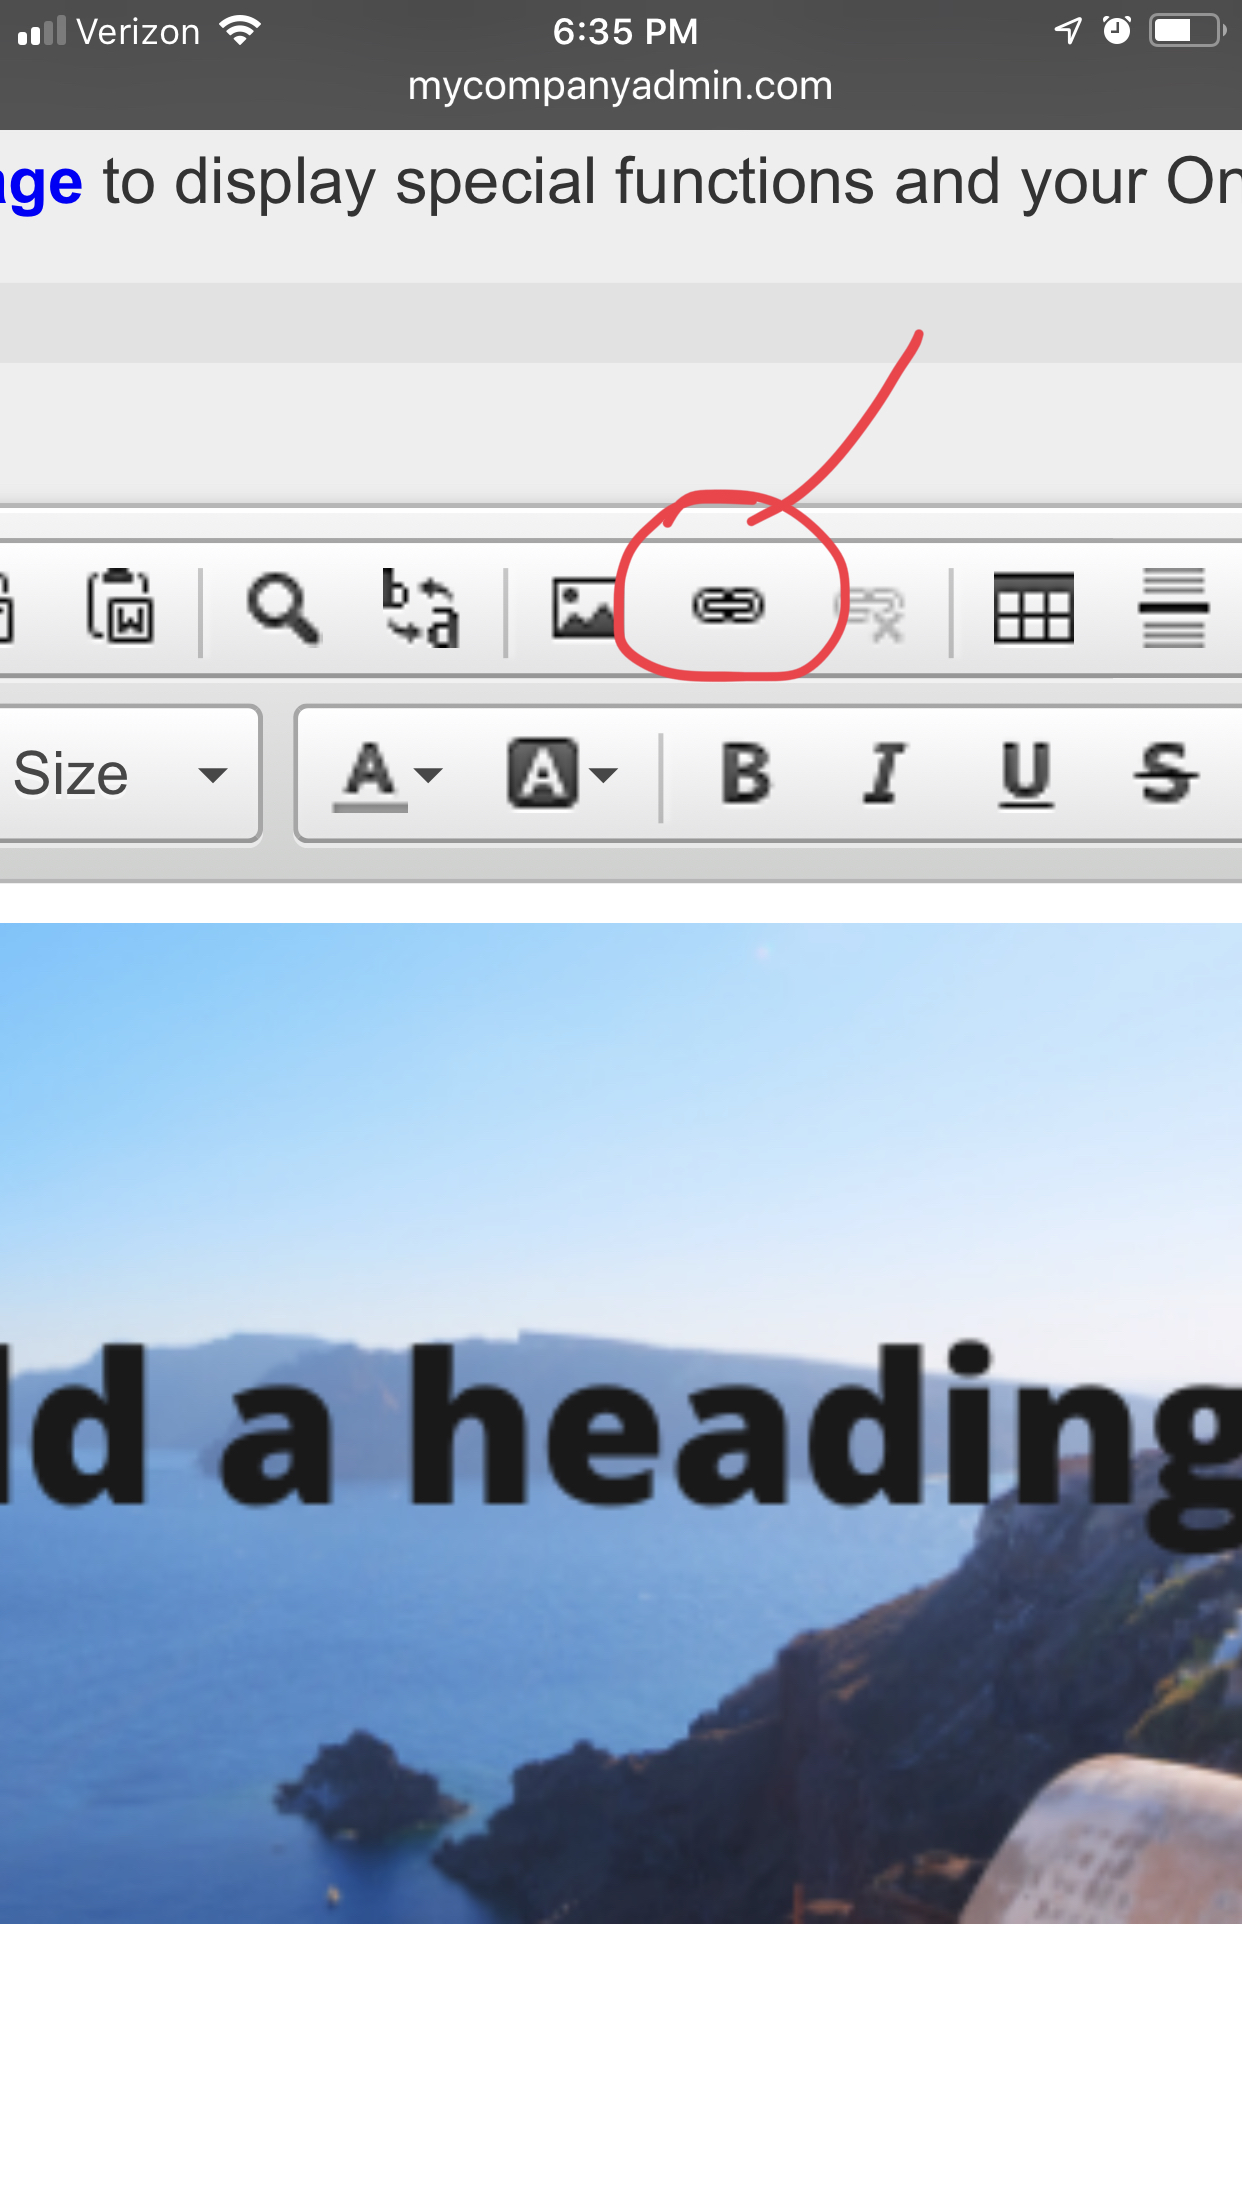
Now HIGHLIGHT the picture and press the “link” button (it’s an icon that kind of looks like a paperclip).

Add the link you copied (PRESS PASTE! It will paste the opt in page you made). Then press “go”.
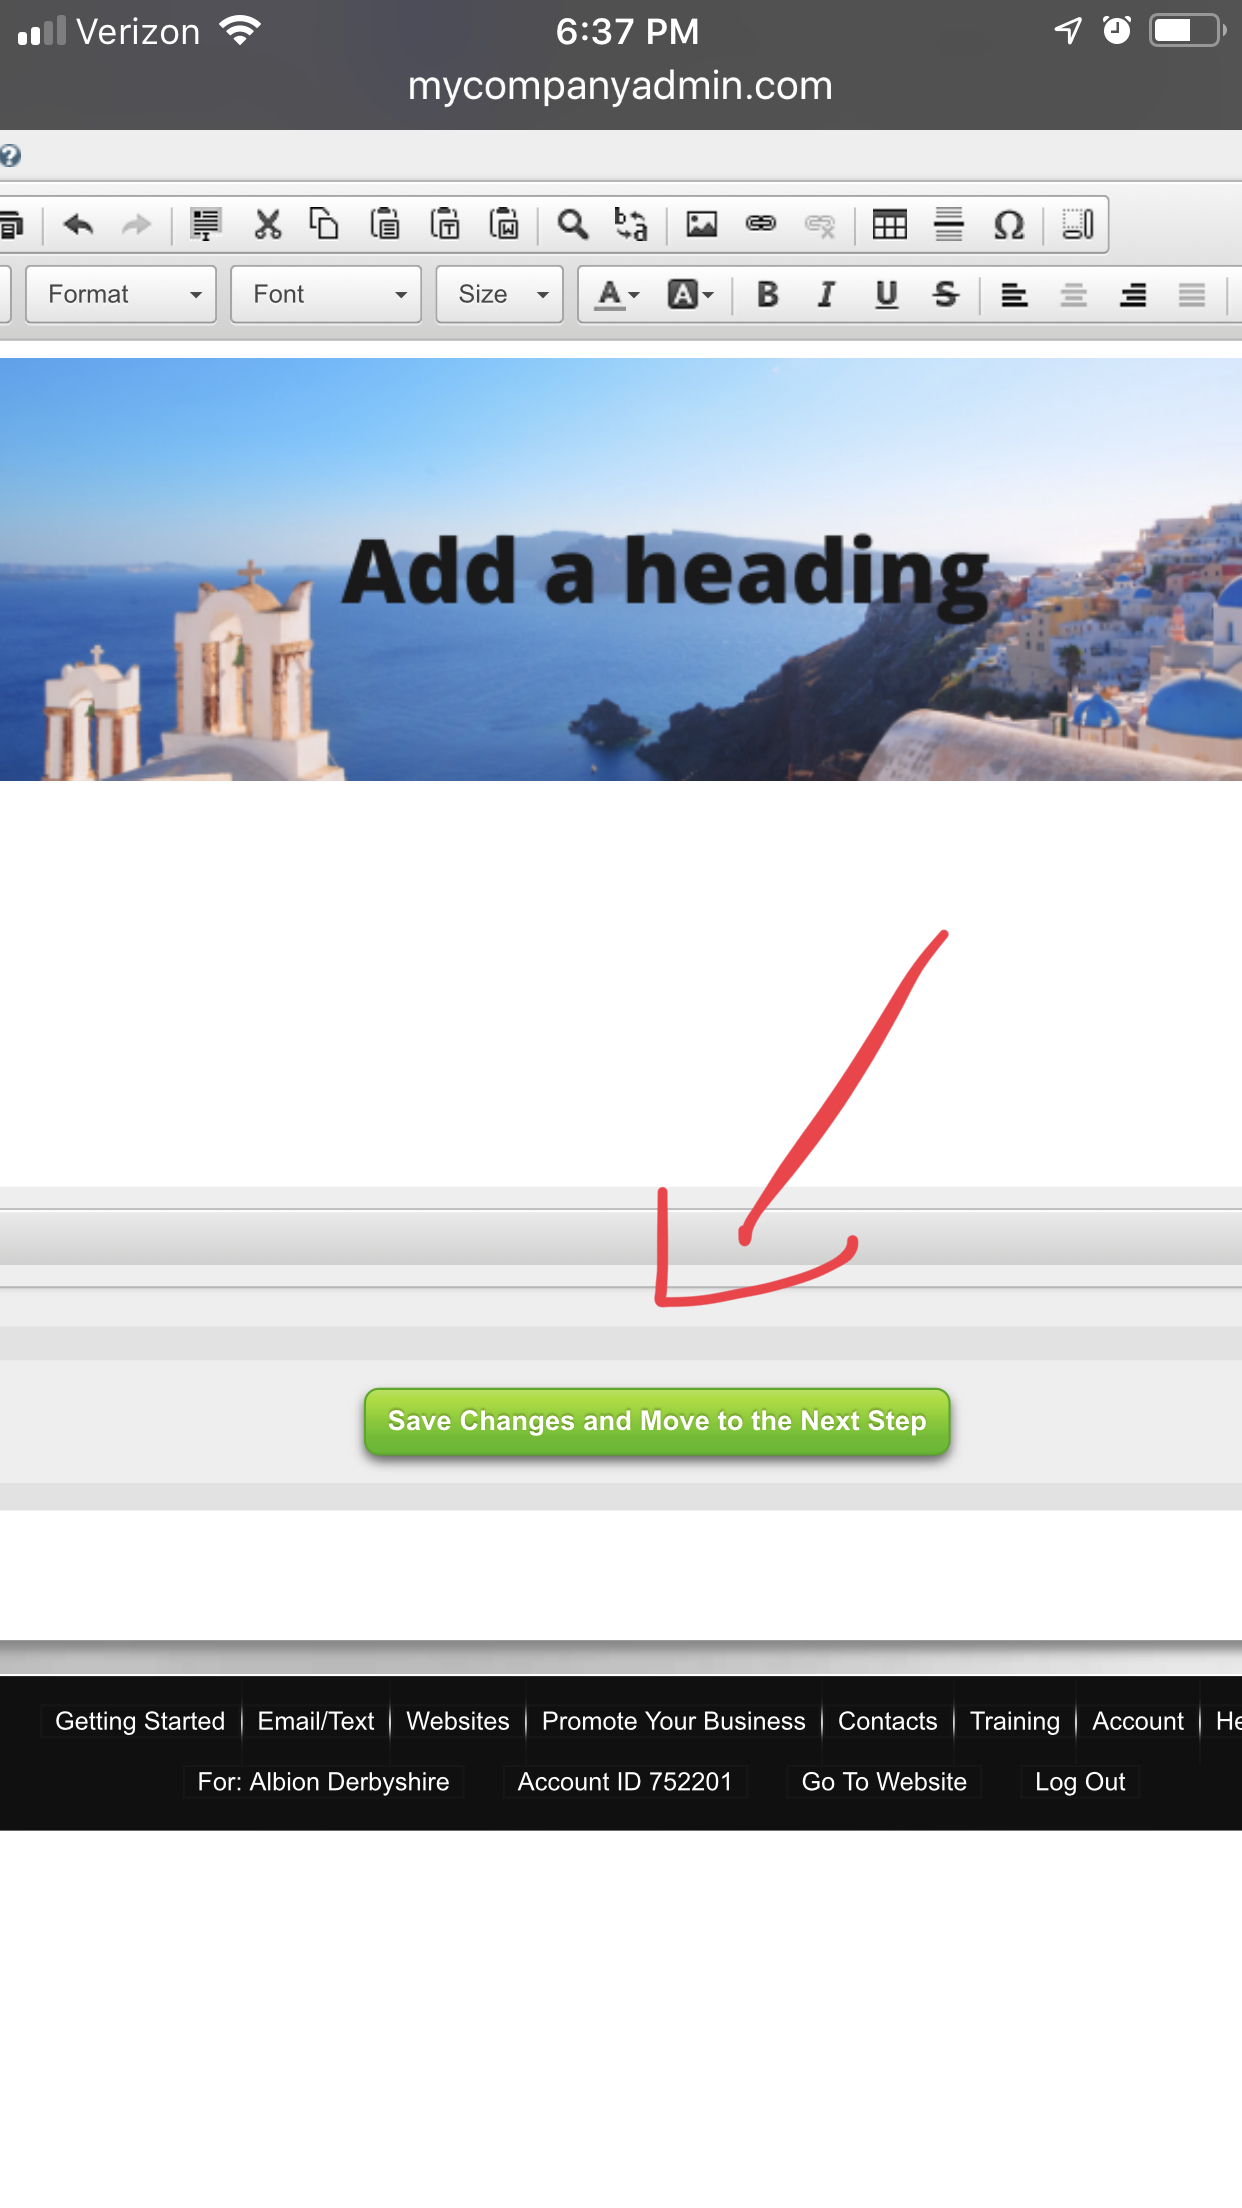
Now press SAVE at the bottom of the page. Now VIEW your page. Click on the page ANYWHERE and it will take you to the opt in page you created. Test out the opt in page and see where it takes you. Don’t worry about subscribing to your own autoresponder. Just subscribe. This will allow you to see how effective everything is.
I hope this has helped you to get some experience using PLS and Canva! Keep exploring PLS and Canva and you will see all the great things you can make. What I showed you are only a few advanced pages you can make but there is a whole world of easy capture pages and squeeze pages you can create with PLS without having to do all of this! Just create a page using the “opt in” option (instead of the “empty page for advanced users option I showed you at the beginning) and pick a template and you can click on little videos as you go and PLS will walk you through how to make it. It’s also common sense and you will figure it out in a little while.
If you have any questions just simply call, email, Facebook Messenger or Skype me (please do not call me if you are outside US unless you ask me).
~Albie